


FootfallCam Control Panel
The Footfallcam Control Panel is the hub for all reporting for every FootfallCam device. The data generated from every counter is uploaded to the Control Panel once every hour. From the control panel, users will have access to all reporting features, all aggregation of the data, and visibility on how the generated data are used to create the report. The Control Panel also displays the health and maintenance status of each individual FootfallCam counters, as well as features to automate reporting features and choice to automatically push the data generated to users’ own ePoS or equivalent devices. The Control Panel is accessible by anyone with or without any purchases to FootfallCam, though users that have not purchased any FootfallCam device will not have access to any data or reporting functions.
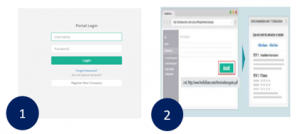
One Click Registration
The registration for a new account is as simple as one click. Anyone can sign up for an account for our cloud portal. Users that wish to sign up for an account may do so at footfallcounter.com and click on the bottom option to register a new company. Afterwards, there will be only three blank spaces for users to fill in, as well as their preference for date formats and the sign-up process will be completed. The verification link for the account will be instantaneously sent to the inputted e-mail address of the user to reduce wait time. Once the verification link is clicked on, users will be able to log in to their Control Panel hub without any further steps.
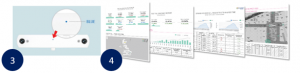
Guided Set Up
Upon signing up a new account in FootfallCam Control Panel, the user will be guided through a single step in order to properly create a branch to allocate their desired FootfallCam counter. While these steps are optional, to allow prospective users the option to freely explore our dashboards and our reports available, these steps are recommended for anyone that have installed FootfallCam in their retail shop. The moment the user enters their newly verified account, they will immediately land on counter management page along with a blinking notification signaling users to add a branch level and a counter to the account to start generating data. Afterwards, the user will be asked to input all required detail in the open area. The user may choose to configure advance settings by turning on advance configurations, though it is not necessary nor recommended for users with no experience.