


8.1 Electronic Shelf Label
8.1.1 Brand and Category of the product
Products can be categorised according to brand and category. Brand can be used as a filter for the products tagged to it. The brand and the category need to be created before the product can tag to them. This section focuses on the creation and management of brand and category of product.
8.1.1.1 Create New Brand
STEP 1 - Access to FootfallCam Analytic Manager V9™: http://v9.footfallcam.com via Google Chrome.
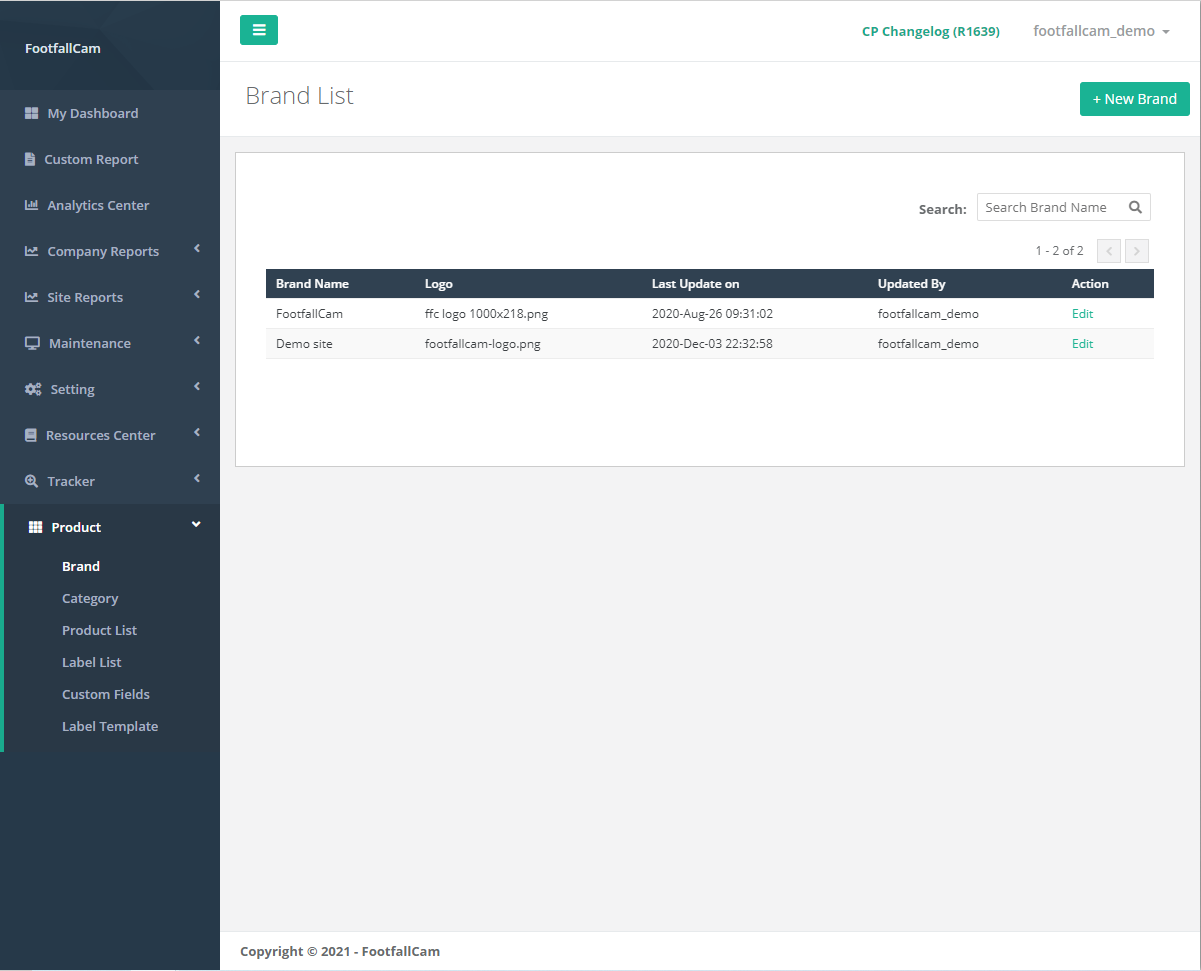
STEP 2 - Click on Product > Brand to access the Brand List page.
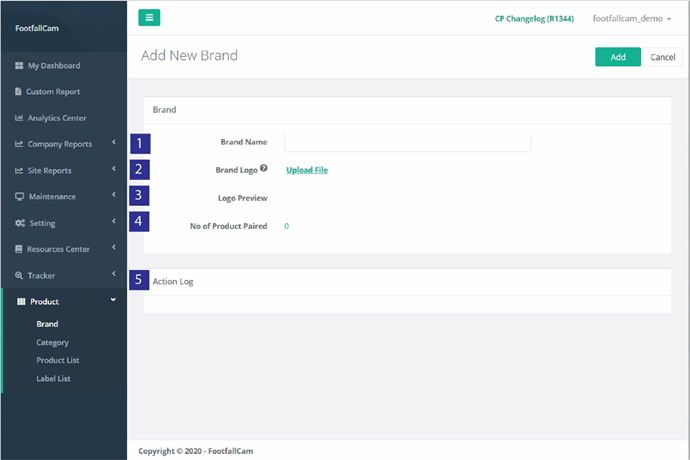
STEP 3 - Click on + New Brand button to access the Create New Brand page.
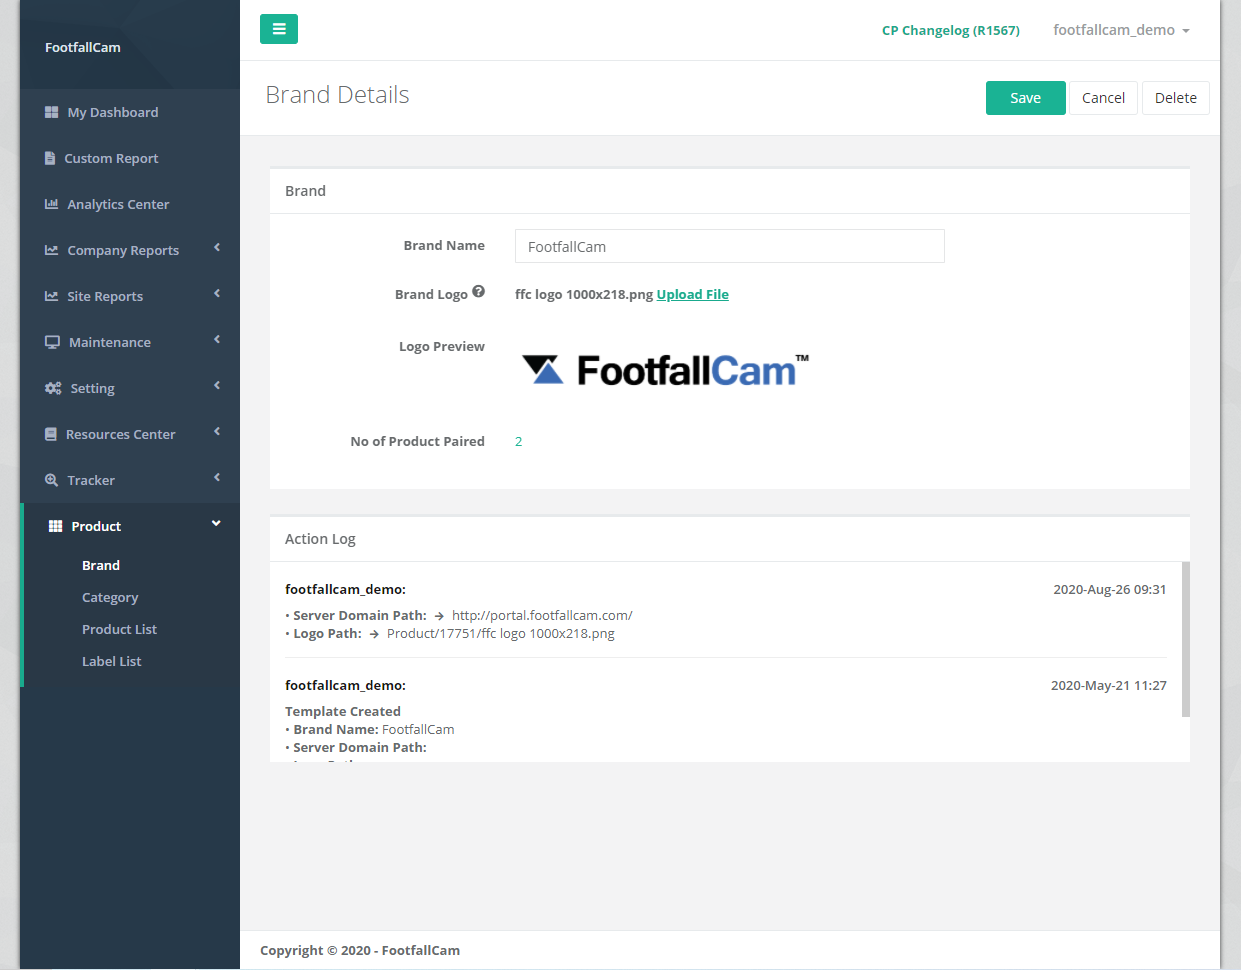
STEP 4 - Complete the process by entering all the required fields and click on Add button.
|
Item |
Description |
|
1. Brand Name |
Enter a preferred brand name. |
|
2. Brand Logo |
Upload brand logo in .png, .jpeg, or .jpg format. (Info: Logo inserted will be display on ESL.) |
|
3. Logo Preview |
Brand Logo preview of uploaded brand logo |
|
4. No of Product Paired |
Total number of product(s) paired with the brand and click the number link to direct to filtered out product(s) paired with the brand list |
|
5. Action Log |
Log all changes made by user(s) with time stamp |
8.1.1.2 Manage Brand
STEP 1 - Click on Product > Brand to access the Brand List page.
STEP 2 - Select the brand to manage and click on Edit button.
STEP 3 - Update the fields and click Save button to save the update.
8.1.1.3 Delete Brand
STEP 1 - Click on Product > Brand to access the Brand List page.
STEP 2 - Select the brand to manage and click on Edit button.
STEP 3 - Complete the process by click on the Delete button at the top-right of the page.
8.1.1.4 Create New Category
STEP 1 - Access to FootfallCam Analytic Manager V9™: http://v9.footfallcam.com via Google Chrome.
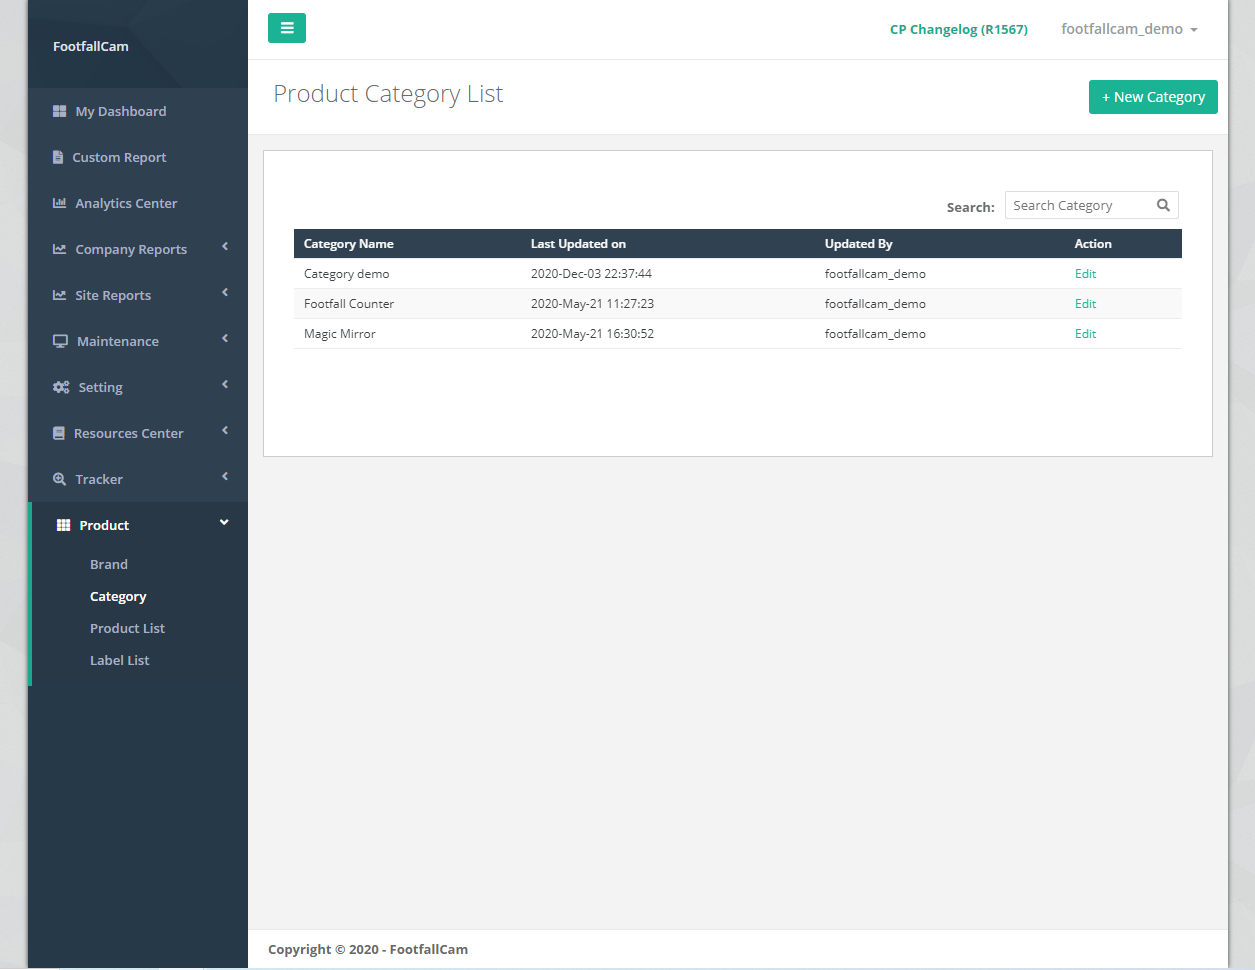
STEP 2 - Click on Product > Category to access the Category List page.
STEP 3 - Click on + New Category button to access the Create New Category page.
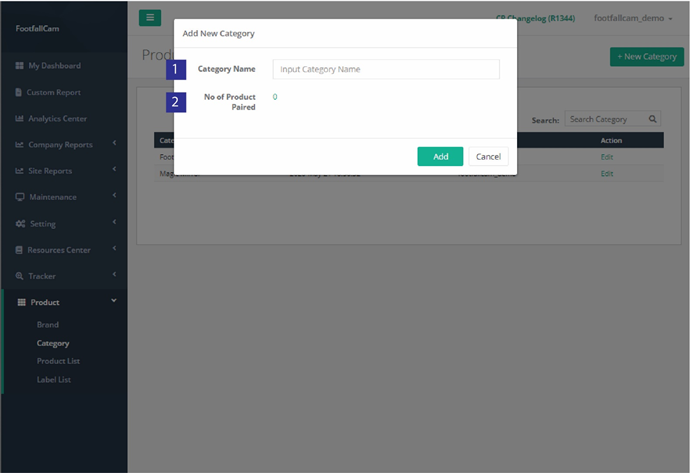
STEP 4 - Complete the process by entering all the required fields and click on Add button.
|
Item |
Description |
|
1. Category Name |
Enter a preferred category name. |
|
2. No of Product Paired |
Total number of product(s) paired with the category and click the number link to direct to filtered out product(s) paired with the category list |
8.1.1.5 Manage Category
STEP 1 - Click on Product > Category to access the Category List page.
STEP 2 - Select the category to manage and click on Edit button.
STEP 3 - Update the Category Name and click Save button to save the update.
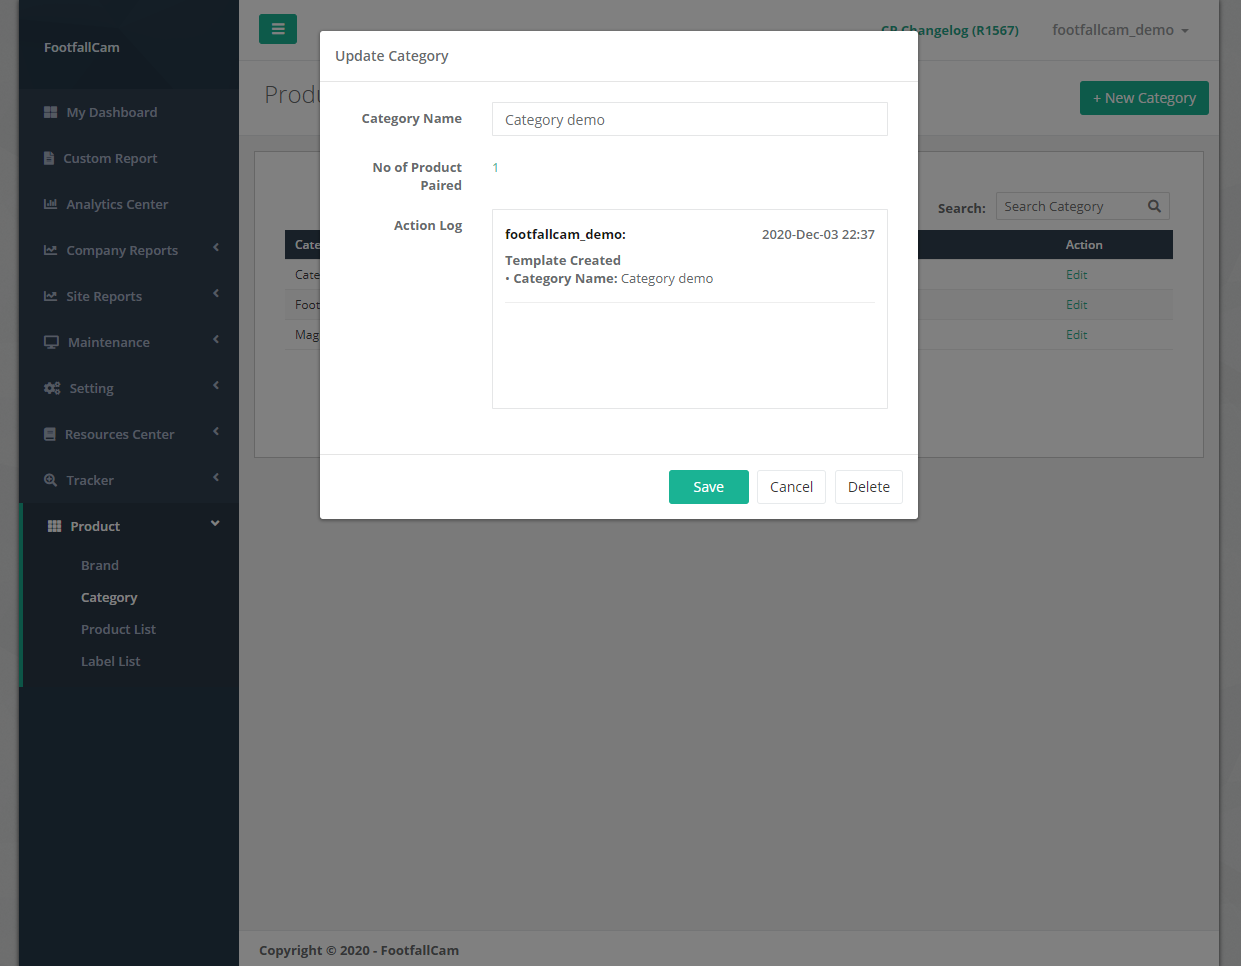
8.1.1.6 Delete Category
STEP 1 - Click on Product > Category to access the Category List page.
STEP 2 - Select the category to manage and click on Edit button.
STEP 3 - Complete the process by click on the Delete button at the bottom of the pop-out page.
8.1.2 Create Custom Field List
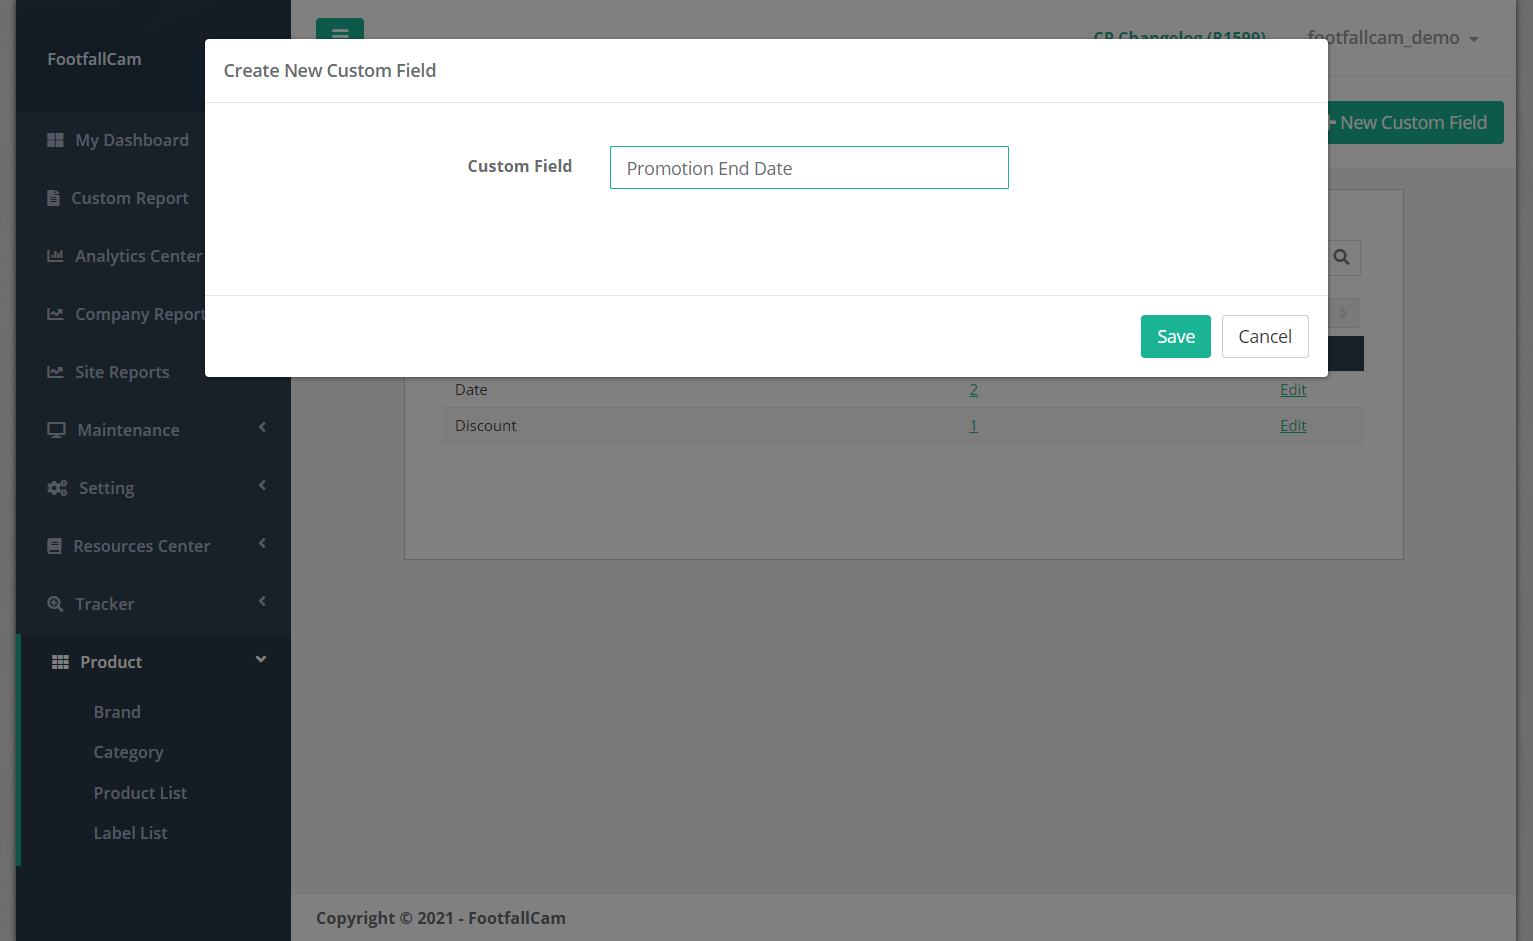
Sometimes there are info to show on the ESL tag but vary by product, for example promotion end date. It would be troublesome to create different label template due to the promotion end date are fixed text in label template. Custom field feature is a solution to this as it enables to create custom field that accept different value per product. The ESL tag can update accordingly using the same template.
8.1.2.1 Create New Custom Field
STEP 1 - Access to FootfallCam Analytic Manager V9™: http://v9.footfallcam.com via Google Chrome.
STEP 2 - Click on Product > Custom Fields to access the Custom Field List page.
STEP 3 - Click on + New Custom Field button at top right corner to trigger the Create New Custom Field pop up.
STEP 4 - Complete the process by entering preference custom field name and click on Save button.
8.1.2.2 Manage Custom Field
STEP 1 - Click on Product > Custom Fields to access the Custom Field List page.
STEP 2 - Select the custom field to manage and click on Edit button.
STEP 3 - Update the Custom Field Name and click Save button to save the update.

8.1.2.3 Delete Custom Field
STEP 1 - Click on Product > Custom Fields to access the Custom Field List page.
STEP 2 - Select the custom field to manage and click on Edit button.
STEP 3 - Complete the process by click on the Remove button at the bottom of the pop-out page.
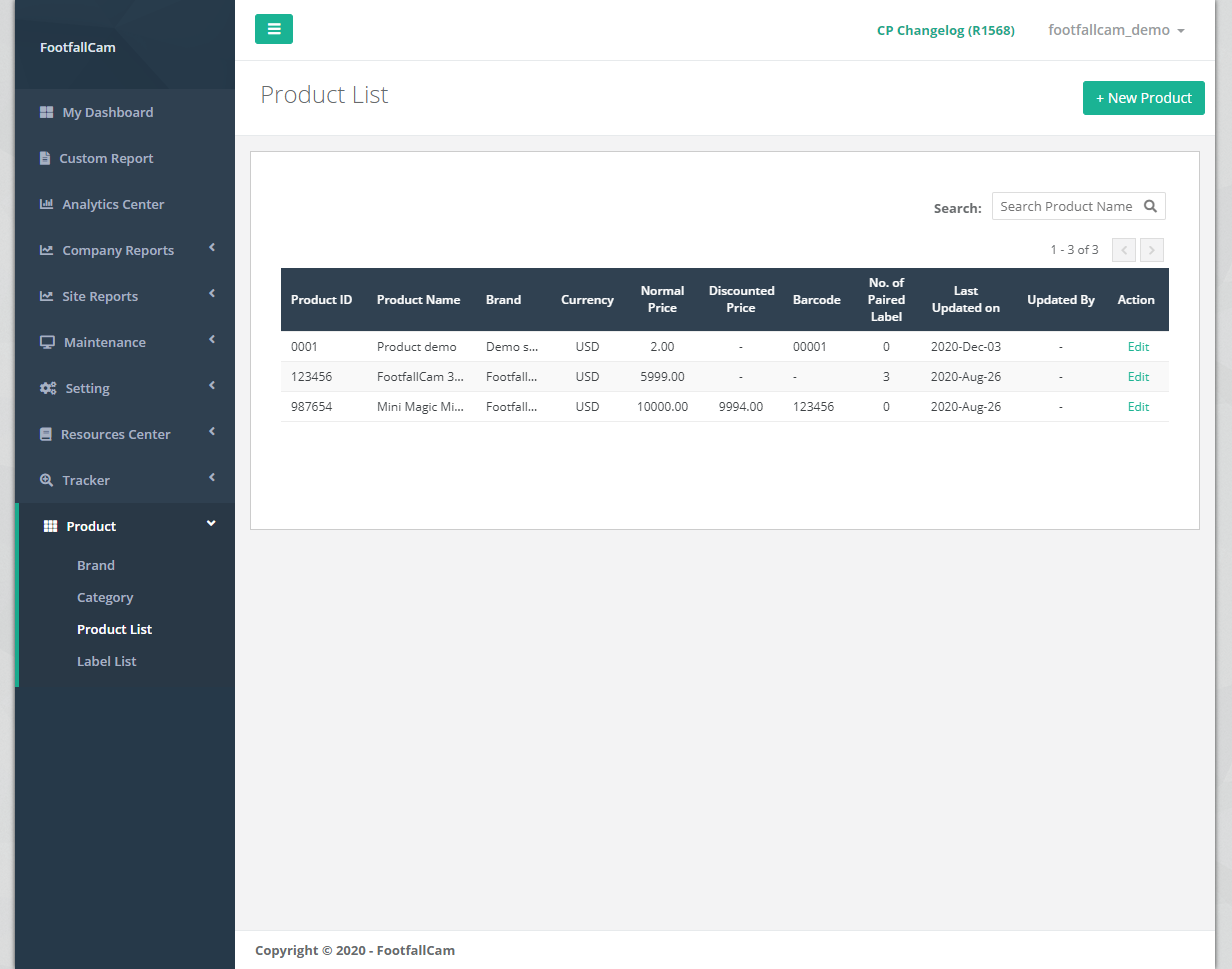
8.1.3 Create Product List
This section focuses on the creation and management of products. Information related to the product including the description, pricing, discounted price, and number of units are stored in the system to be used on ESL display.
8.1.3.1 Create New Product
STEP 1 - Access to FootfallCam Analytic Manager V9™: http://v9.footfallcam.com via Google Chrome.
STEP 2 - Click on Product > Product List to access the Product List page.
STEP 3 - Click on + New Product button to access the Create New Product page.
STEP 4 - Complete the process by entering all the required fields and click on Add button.
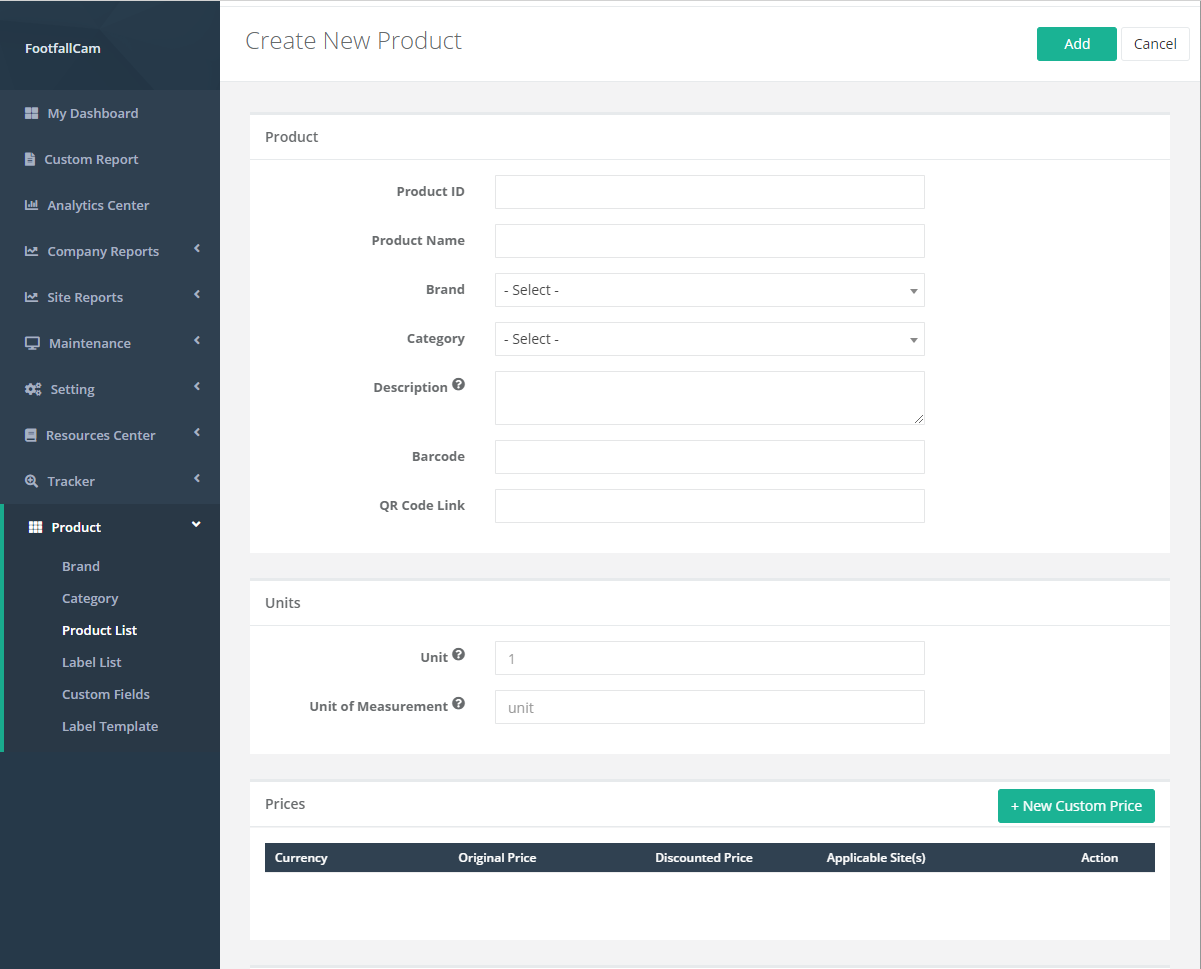
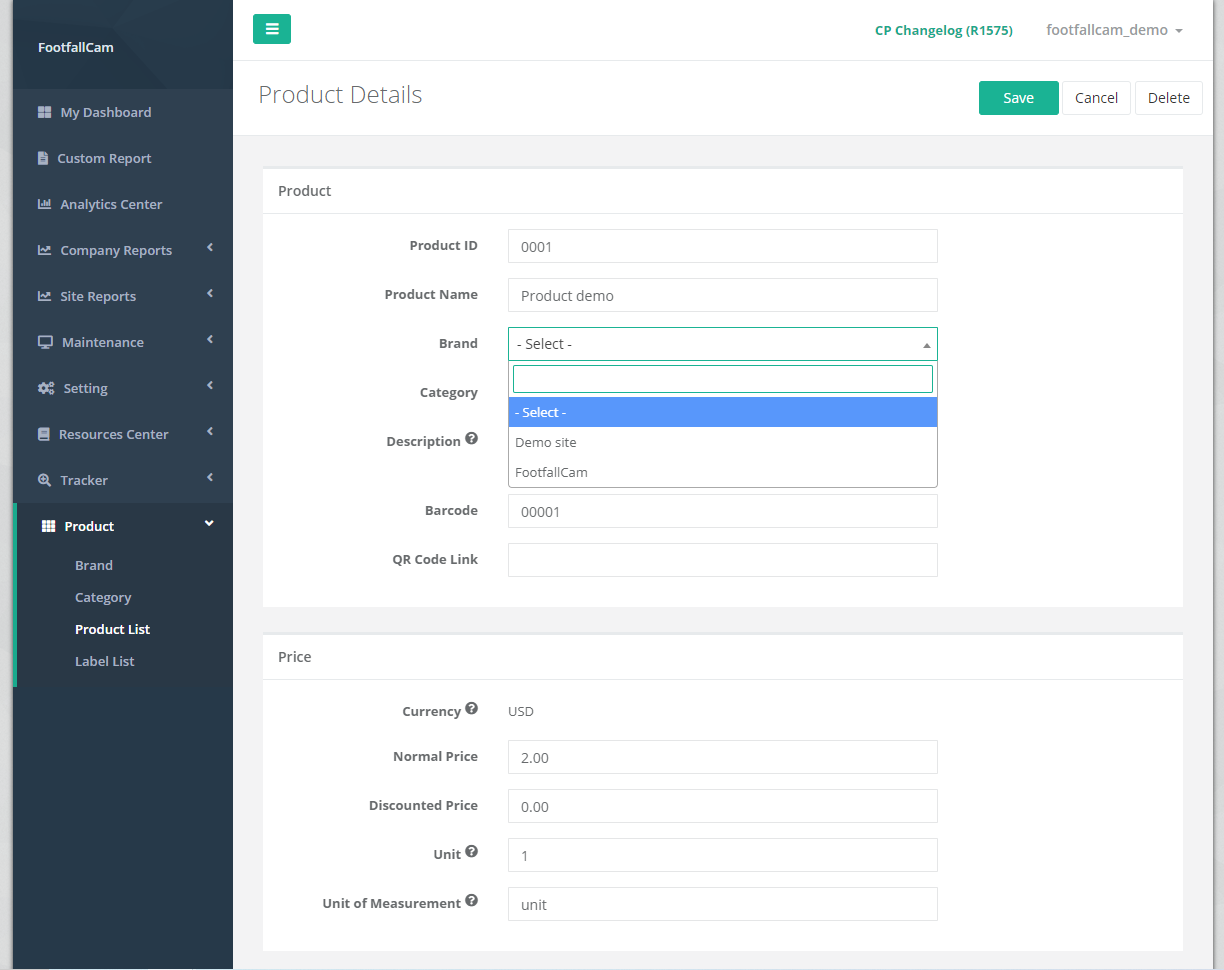
There are 6 major parts of product's details, which are product general information, units information, prices information, others information, custom fields input and action log. Below are the details of each field.
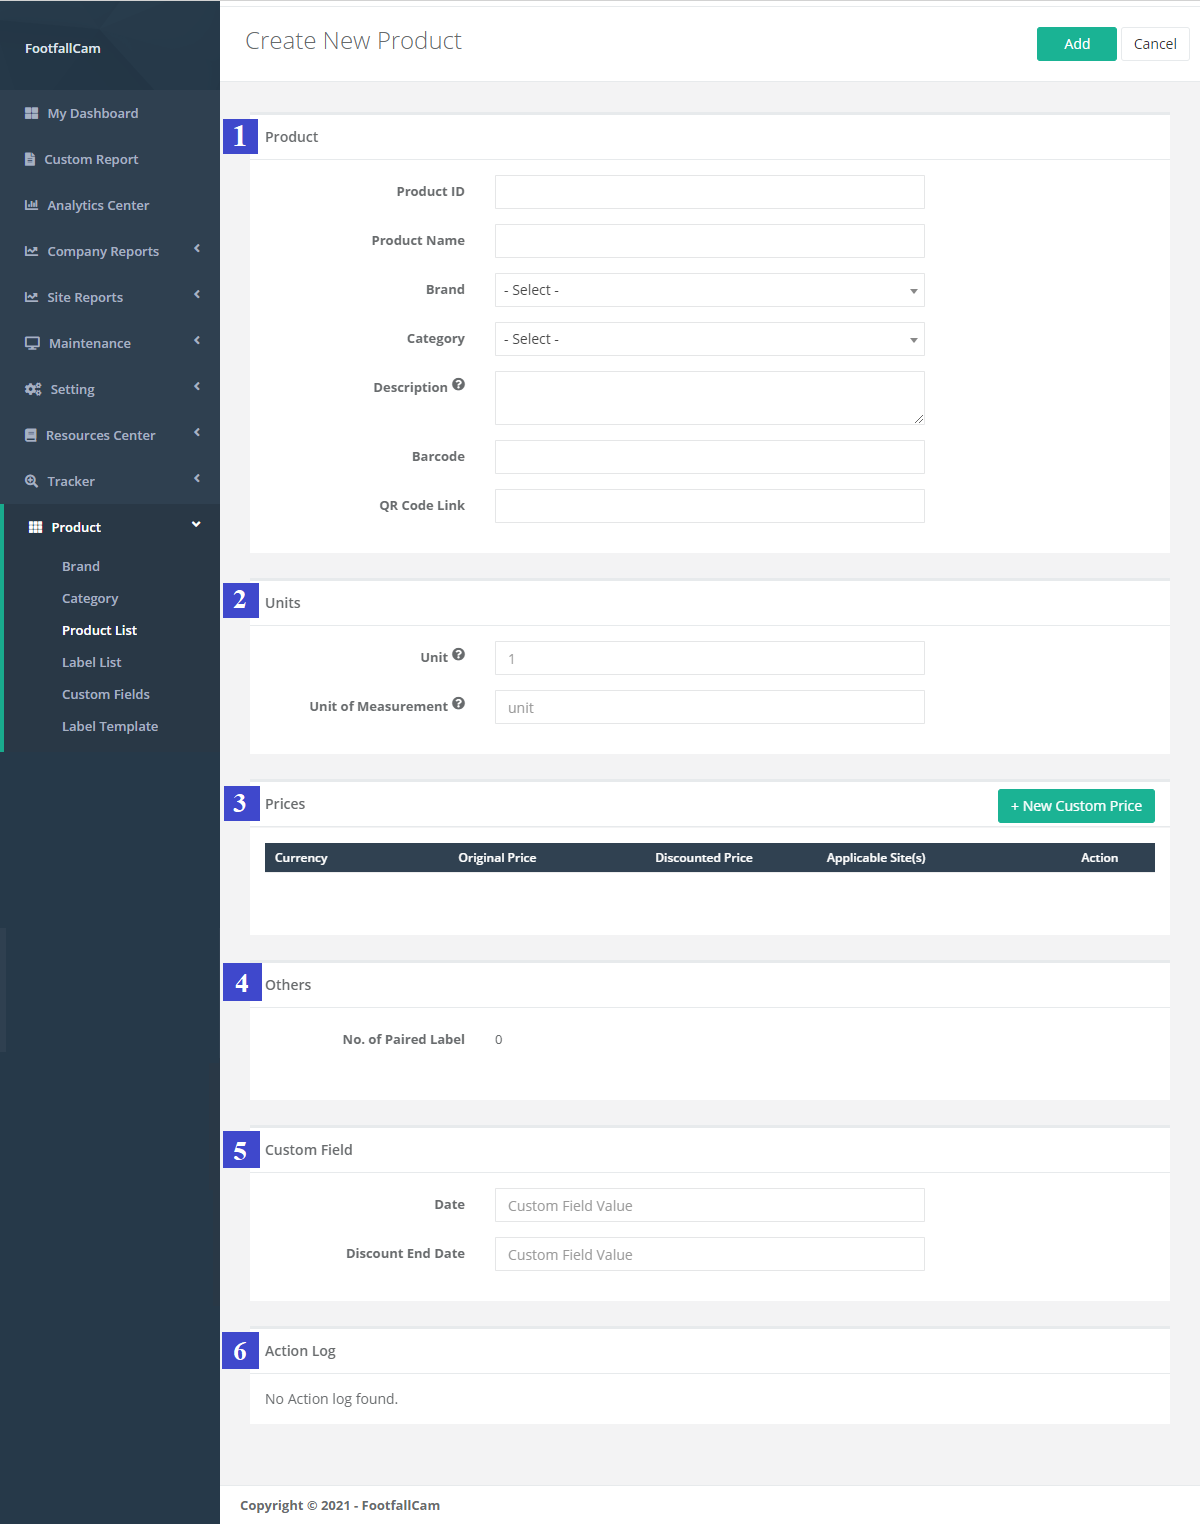
Part 1: Product General Information:
|
Item |
Description |
|
1. Product ID |
Enter a preferred product ID. |
|
2. Product Name |
Enter a preferred product name. (Info: Product Name inserted will be display on ESL.) |
|
3. Brand |
Select the product brand to pair the product to selected brand. (Info: For more information on brand, please refer to Section 8.1.2 Create Brand and Category of the product.) |
|
4. Category |
Select the product category to pair the product to selected category. (Info: For more information on Category, please refer to Section 8.1.2 Create Brand and Category of the product.) |
|
5. Description |
Enter the product description. (Info: Product description inserted will be display on ESL.) |
|
6. Barcode |
Enter the product barcode. (Info: Product barcode inserted will be display on ESL.) |
|
7. QR Code Link |
Enter the product QR code link. (Info: Product QR code inserted will be display on ESL.) |
Part 2: Product Unit Information:
|
Item |
Description |
|
1. Unit |
The number of physical units assigned to the price of the product (eg. $10 per 100g, unit = 100) (Info: Unit inserted will be display on ESL.) |
|
2. Unit of Measurement |
The physical units to quantify the product sold (eg. Metter, kg, dozen etc.) (Info: Unit of Measurement inserted will be display on ESL.) |
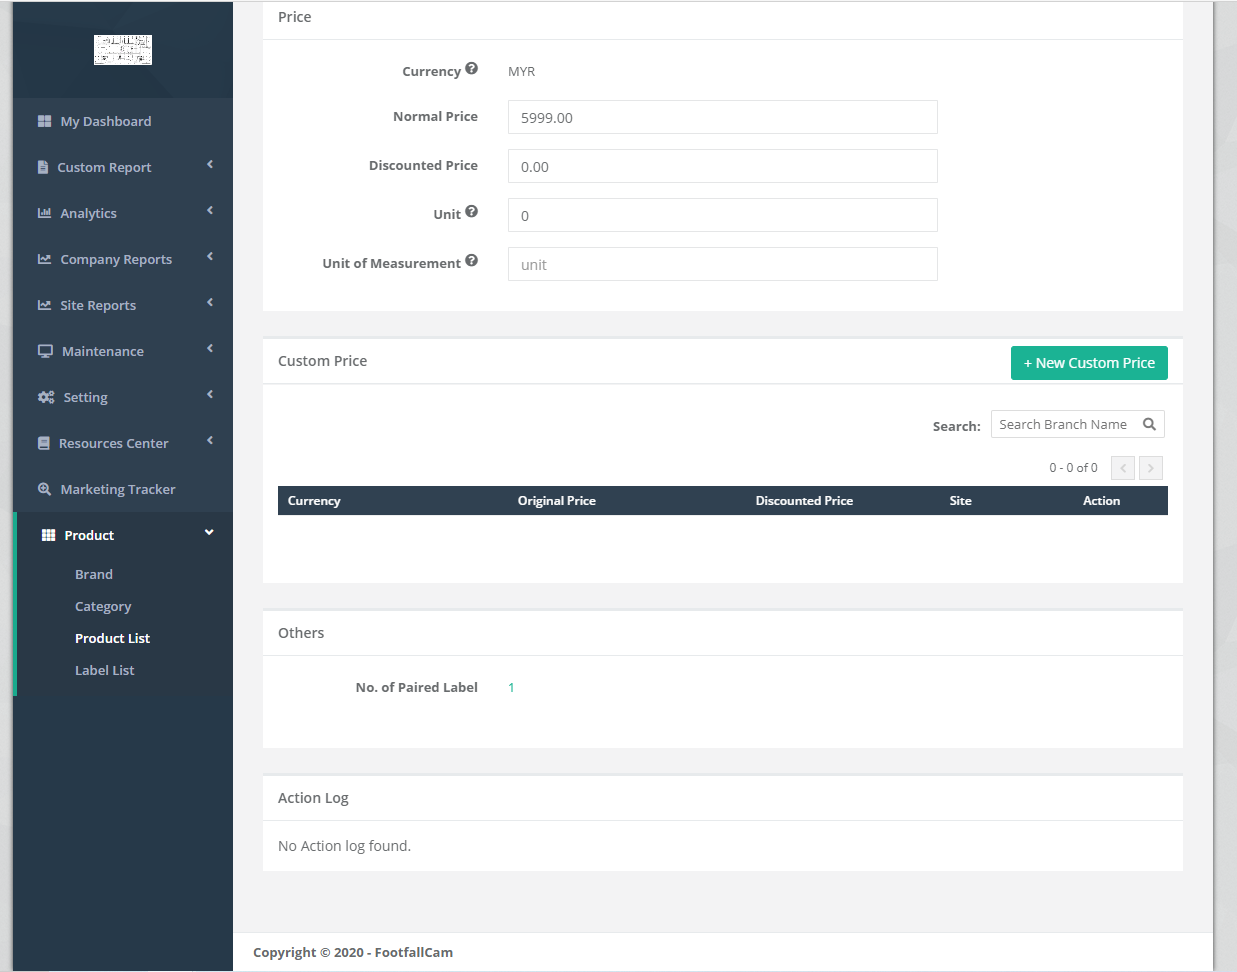
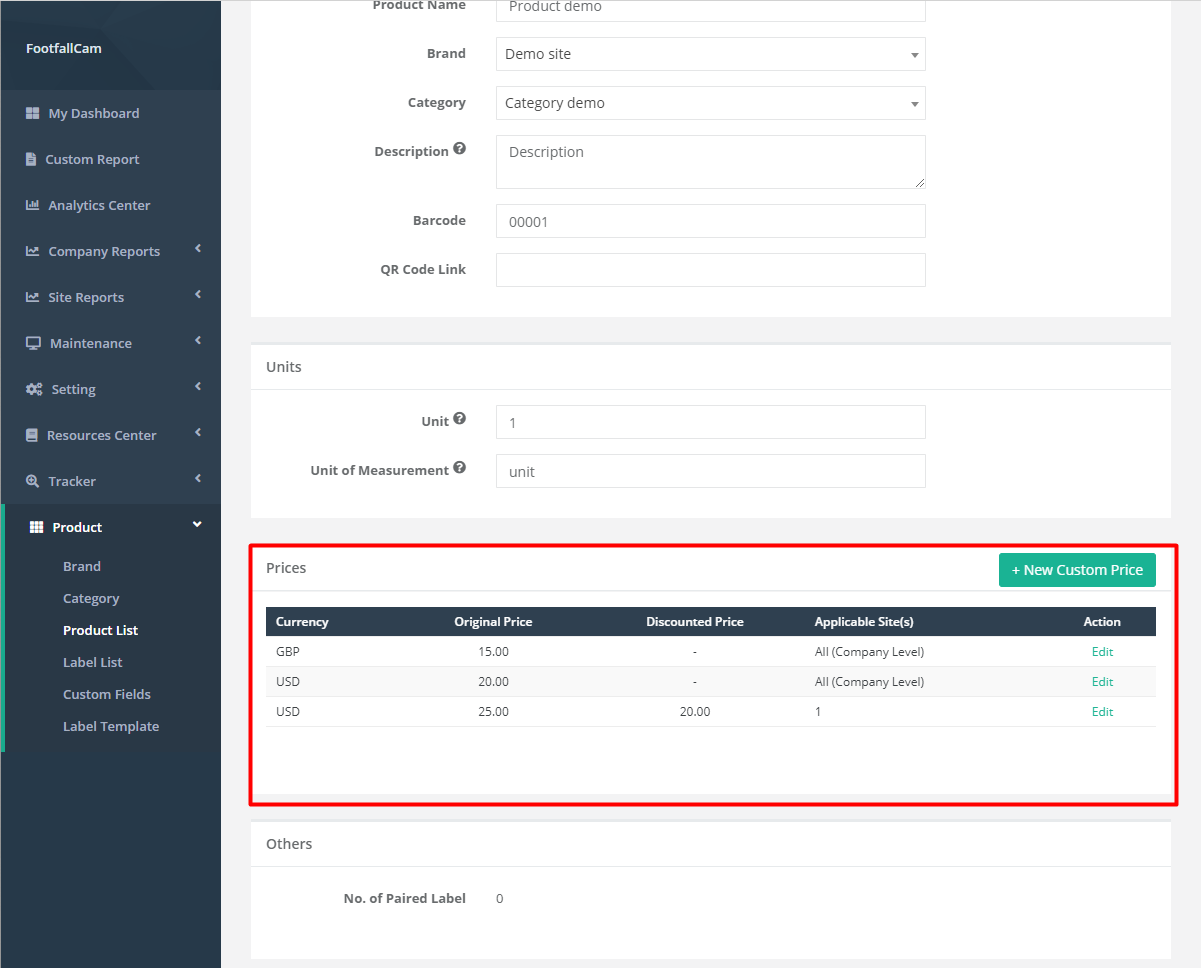
Part 3: Product Price Information:
|
Item |
Description |
|
1. Currency |
The default currency selected in company profile (Info: Default Currency will be display on ESL, please refer to FFC portal) |
|
2. Normal Price |
The normal price of the product (Info: Normal Price inserted will be display on ESL.) |
|
3. Discounted Price |
The discounted price of the product (Info: Discount Price is optional and will be display on ESL if inserted.) |
|
4. Applicable Site(s) |
Display the number of sites applied for the selected currency. If the currency is a company level price, then it is applied to all sites. |
|
5. Action |
To trigger the Custom Price pop up to manage the selected custom price. |
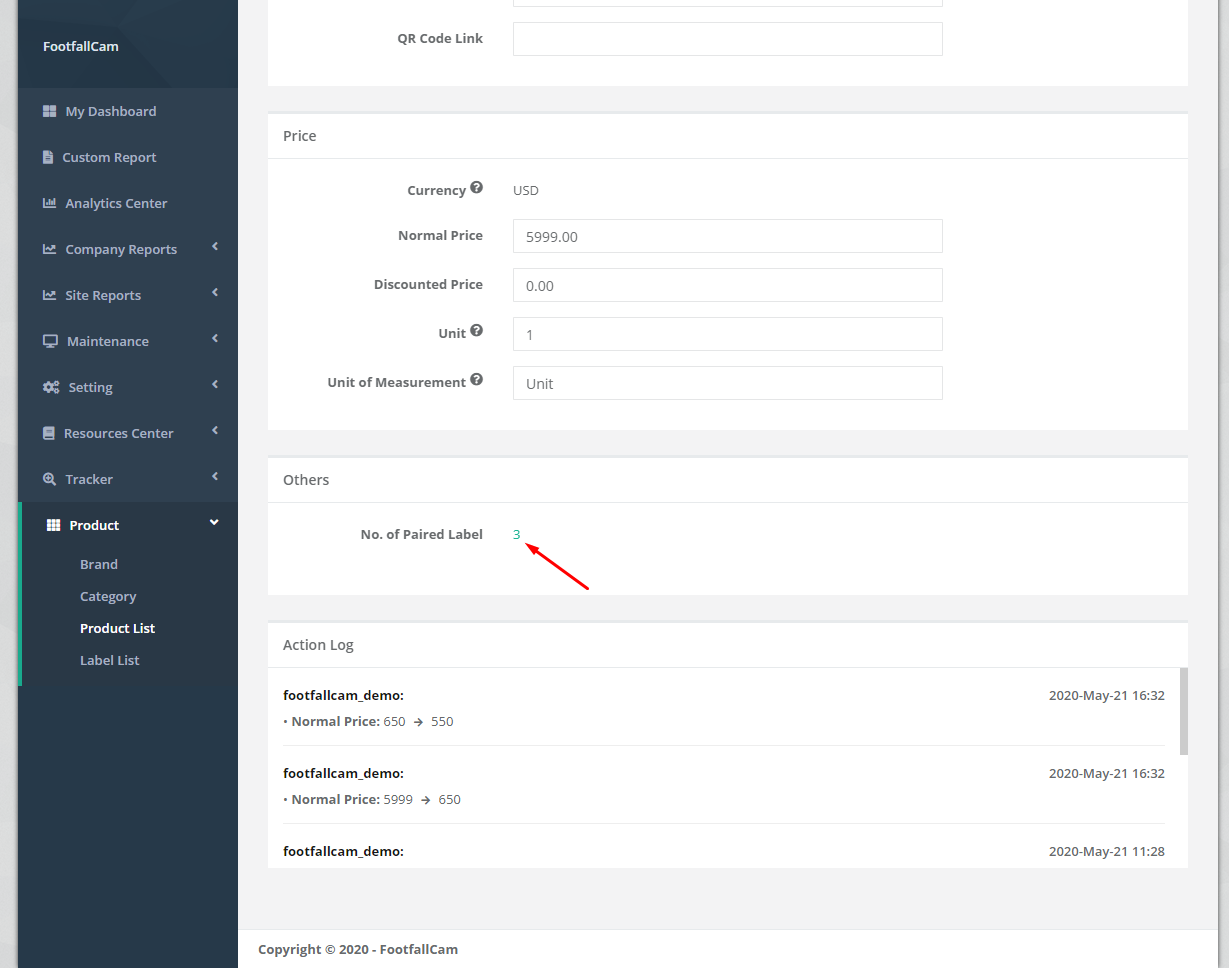
Part 4: Product Others Information:
|
Item |
Description |
|
1. No. of Paired Label |
Display he number of labels being paired to this product information. |
Part 5: Product Custom Field Information:
If the custom field is set up, then the list of custom field will appeared here for input. (For more information regarding custom field, please refer to Section 8.1.2 Create Custom Field List)
Part 6: Action Log:
Action Log displayed the detail of actions being done to the product page by Login User
8.1.3.2 Manage Product
This section focuses on the management of product details. Product general details and pricing details can be updated if required. If a product is having promotion, the ESL label supposed to display the discounted price while after the promotion ended, the ESL label should displays the original price of the product. This can be done by updating the product pricing details Discounted Price field when the promotion started and after the promotion ended.
STEP 1 - Click on Product > Product List to access the Product List page.
STEP 2 - Select the product to manage and click on Edit button.
STEP 3 - Update the required fields and click on Save button.
8.1.3.3 Unpair Brand and Category
Product can be paired to a brand and category and it can be unpaired as well. This section focuses on the way to unpair brand or unpair category.
STEP 1 - Click on Product > Product List to access the Product List page.
STEP 2 - Select the product to manage and click on Edit button.
STEP 3 - Click the Brand field (or Category field) dropdown menu and choose - Select - to unpair the brand (or Category)
STEP 4 - Complete the process by clicking on Save button.
8.1.3.4 Product linked to Paired Label
The No. of Paired Label column in the Product List indicates the total number of label paired to the product. If there is at least one label paired to the product, by clicking on the No. of Paired Label field in the product details can link to the Label List to view the paired labels information.
STEP 1 - Click on Product > Product List to access the Product List page.
STEP 2 - Select the product to manage and click on Edit button.
STEP 3 - Click on the No. of Paired Label to link to Label List with paired labels information.
8.1.3.5 Create New Custom Price
Custom price is a feature that enable users to customise the price by site level as well as by different type of currency. A product can have only one company level custom price for each currency and it can have different site level custom prices for different sites. If the site level custom price is not defined, then company level custom price is used to display on the ESL label.
This section focuses on the creation of new custom price and next section will explain on the management of custom price for different sites.
STEP 1 - Click on Product > Product List to access the Product List page.
STEP 2 - Select the product to manage and click on Edit button.
STEP 3 - Navigate to Custom Price Section and click + New Custom Price .
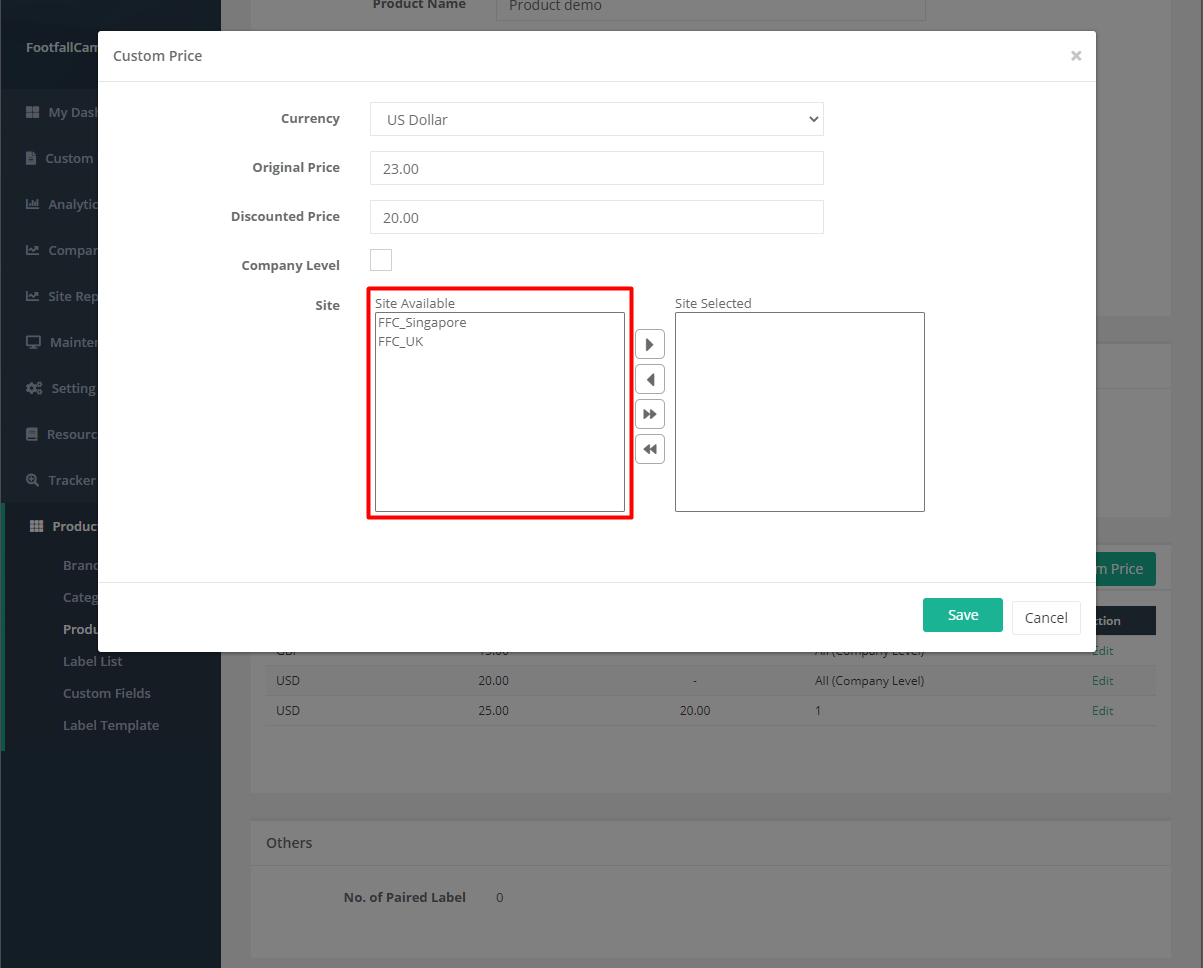
STEP 4 - Fill in details, select site to apply pricing and click Save to add custom price.
STEP 5 - Complete the overall process by click on the Save button at the top-right of the page.
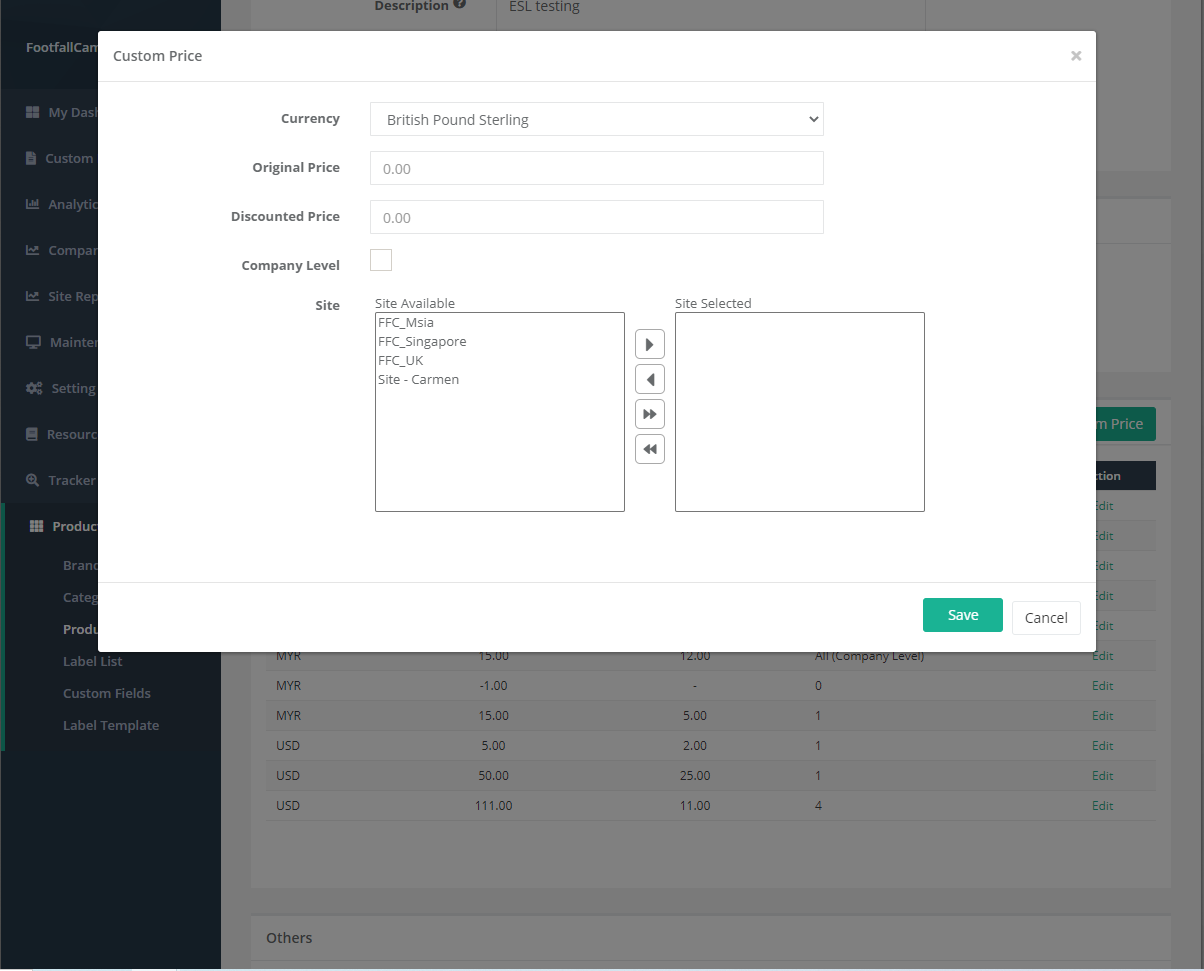
| Item | Description |
| 1. Currency | Select the currency for the custom price. |
| 2. Original Price | Input the original price with respect to the currency selected. |
| 3. Discounted Price | Input the discounted price with respect to the currency selected. |
| 4. Company Level |
If the company level field is ticked, the custom price is company level custom price. Else it is site level custom price. |
| 5. Site | Select the sites to apply the custom price. |
A product can only have one company level custom price for each currency. An error message will prompt if user tried to create the second company level custom price for the same currency.
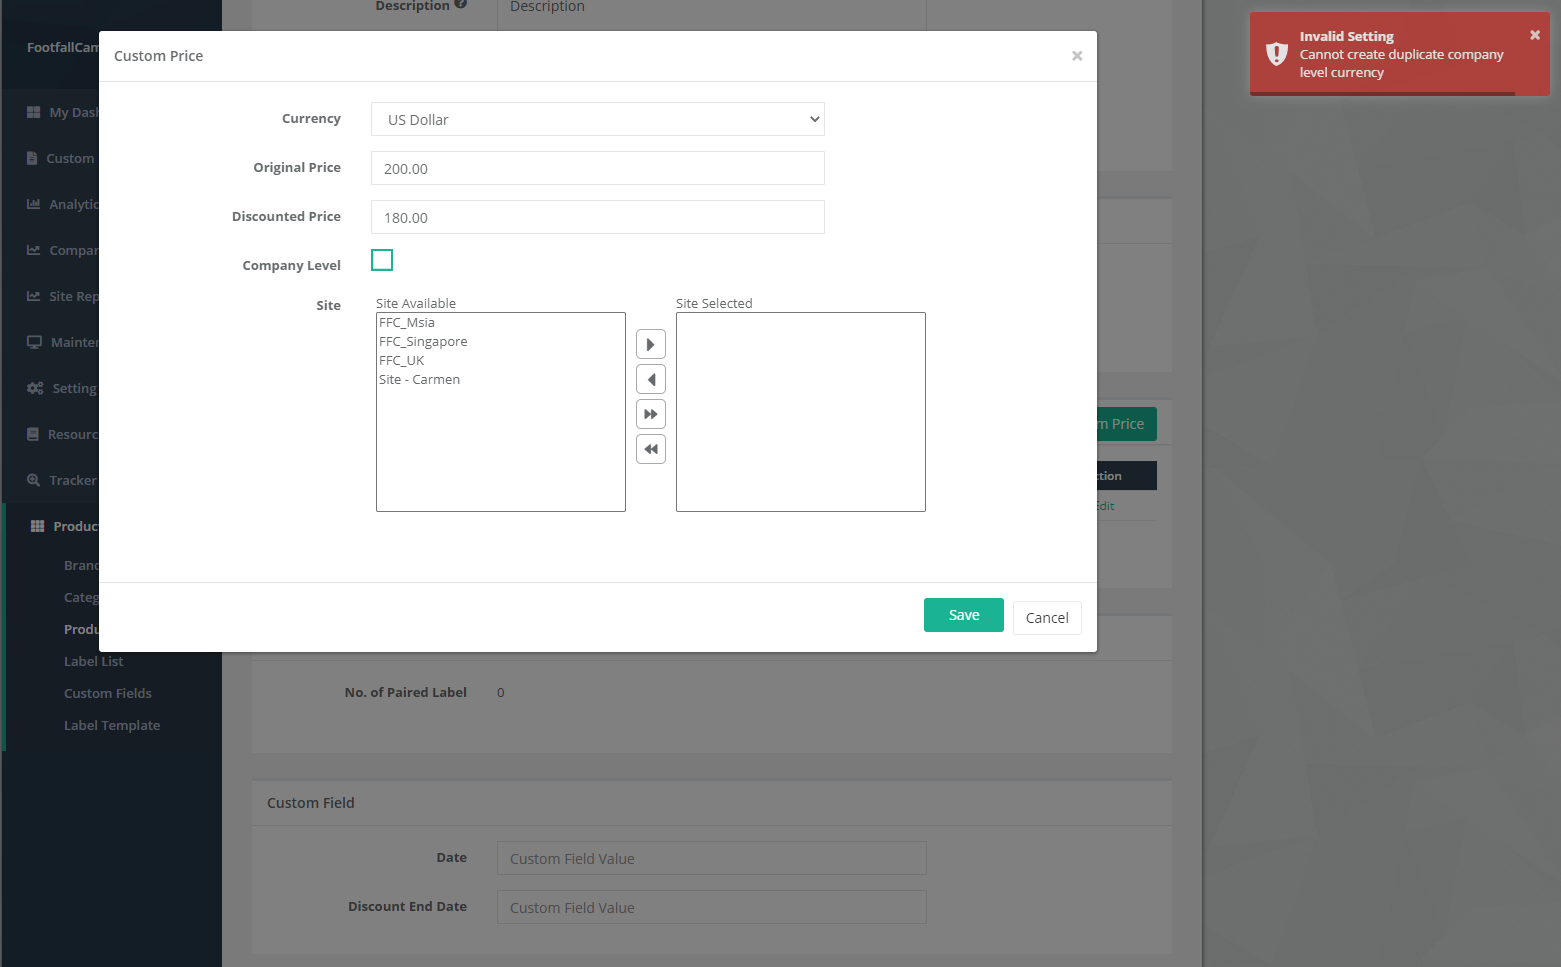
However, a product can have one company level custom price for different currency.
Each site can only have one site level custom price for the same currency. If the site already have site level custom price for the selected currency, it will not appeared in the site available field.
8.1.3.6 Manage Custom Price
This section focuses on the management of custom price for different sites to update the prices or change the site paired.
STEP 1 - Click on Product > Product List to access the Product List page.
STEP 2 - Select the product to manage and click on Edit button.
STEP 3 - Select Custom Price to manage, click Edit and configure the details and click Save to apply latest change.
STEP 4 - Complete the overall process by click on the Save button at the top-right of the page.
8.1.4 Create ESL Label template
ESL label template is the label template that will be displayed on the ESL tag. The label template can be designed and customised based on your preference.
8.1.4.1 Create New ESL Display Template
STEP 1 - Access to FootfallCam Analytic Manager V9™: http://v9.footfallcam.com via Google Chrome.
STEP 2 - Click on Product > Label Template to access the Label Template List page.
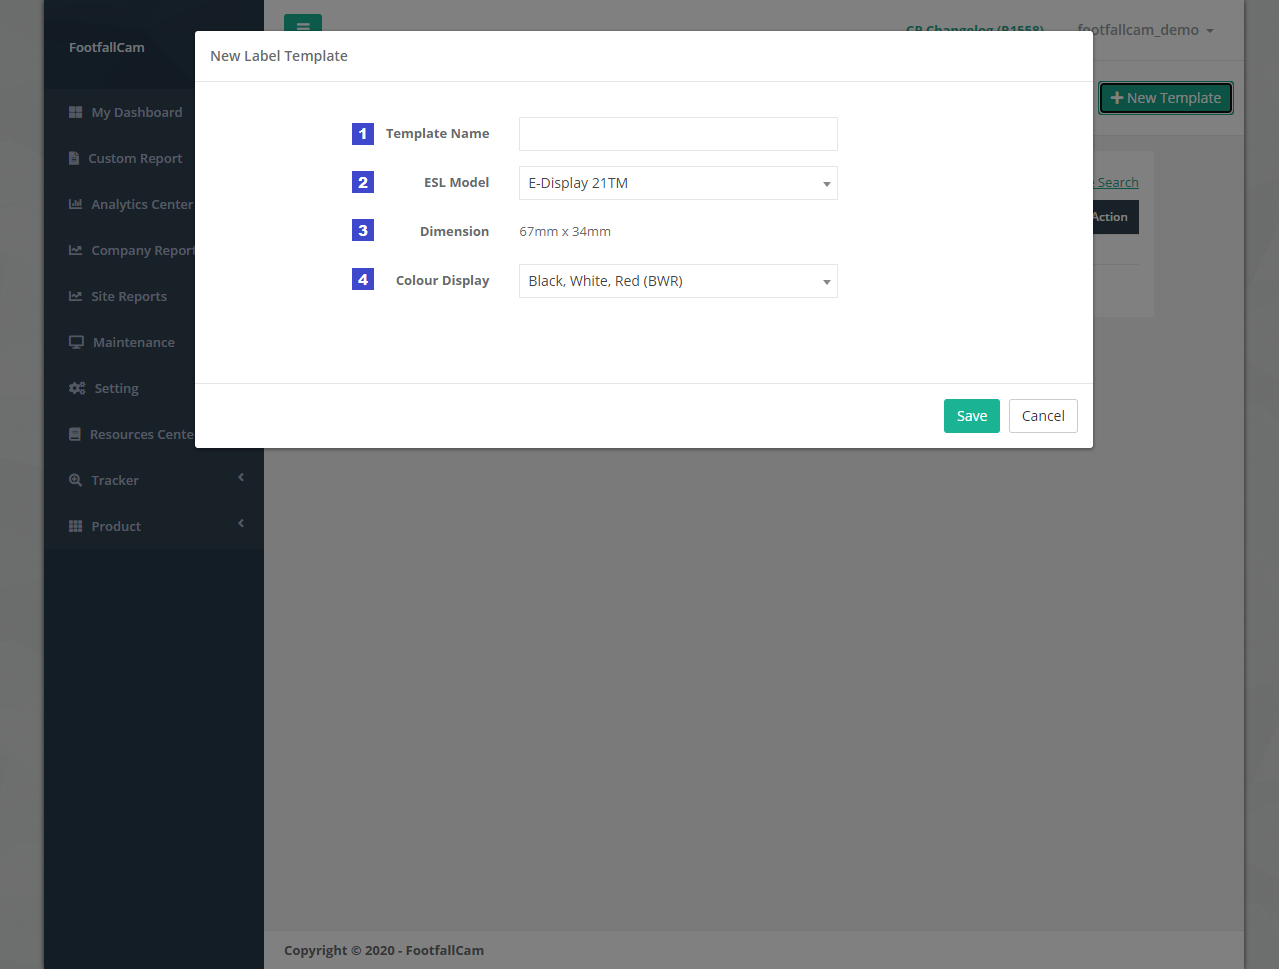
STEP 3 - Click on + New Template button to trigger the New Label Template pop up.
STEP 4 - Fill up all the required fields and click on Save button.
STEP 5 - Complete the process by click on Confirm button and go into Template Design page.
|
Item |
Description |
|
1. Template Name |
Enter a preferred template Name. |
|
2. ESL Model |
Select the ESL Model. (Info: 2 ESL Model: E-Display 21TM, E-Display 42TM) (Info: ESL model selected cannot be change in the future. ) |
|
3. Dimension |
The dimension of template display according to ESL Model selected. E-Display 21TM - 67mm x 34mm E-Display 42TM - 99mm x 84.9mm |
|
4. Colour Display |
Select the colour combination to use for template design on the colour of text, shape and border. Only the selected colour will be displayed on the ESL label tag, image with other colour will be converted to the selected colour combination. There are 3 set of colour combinations:
(Info: Colour display selected cannot be change in the future. ) |
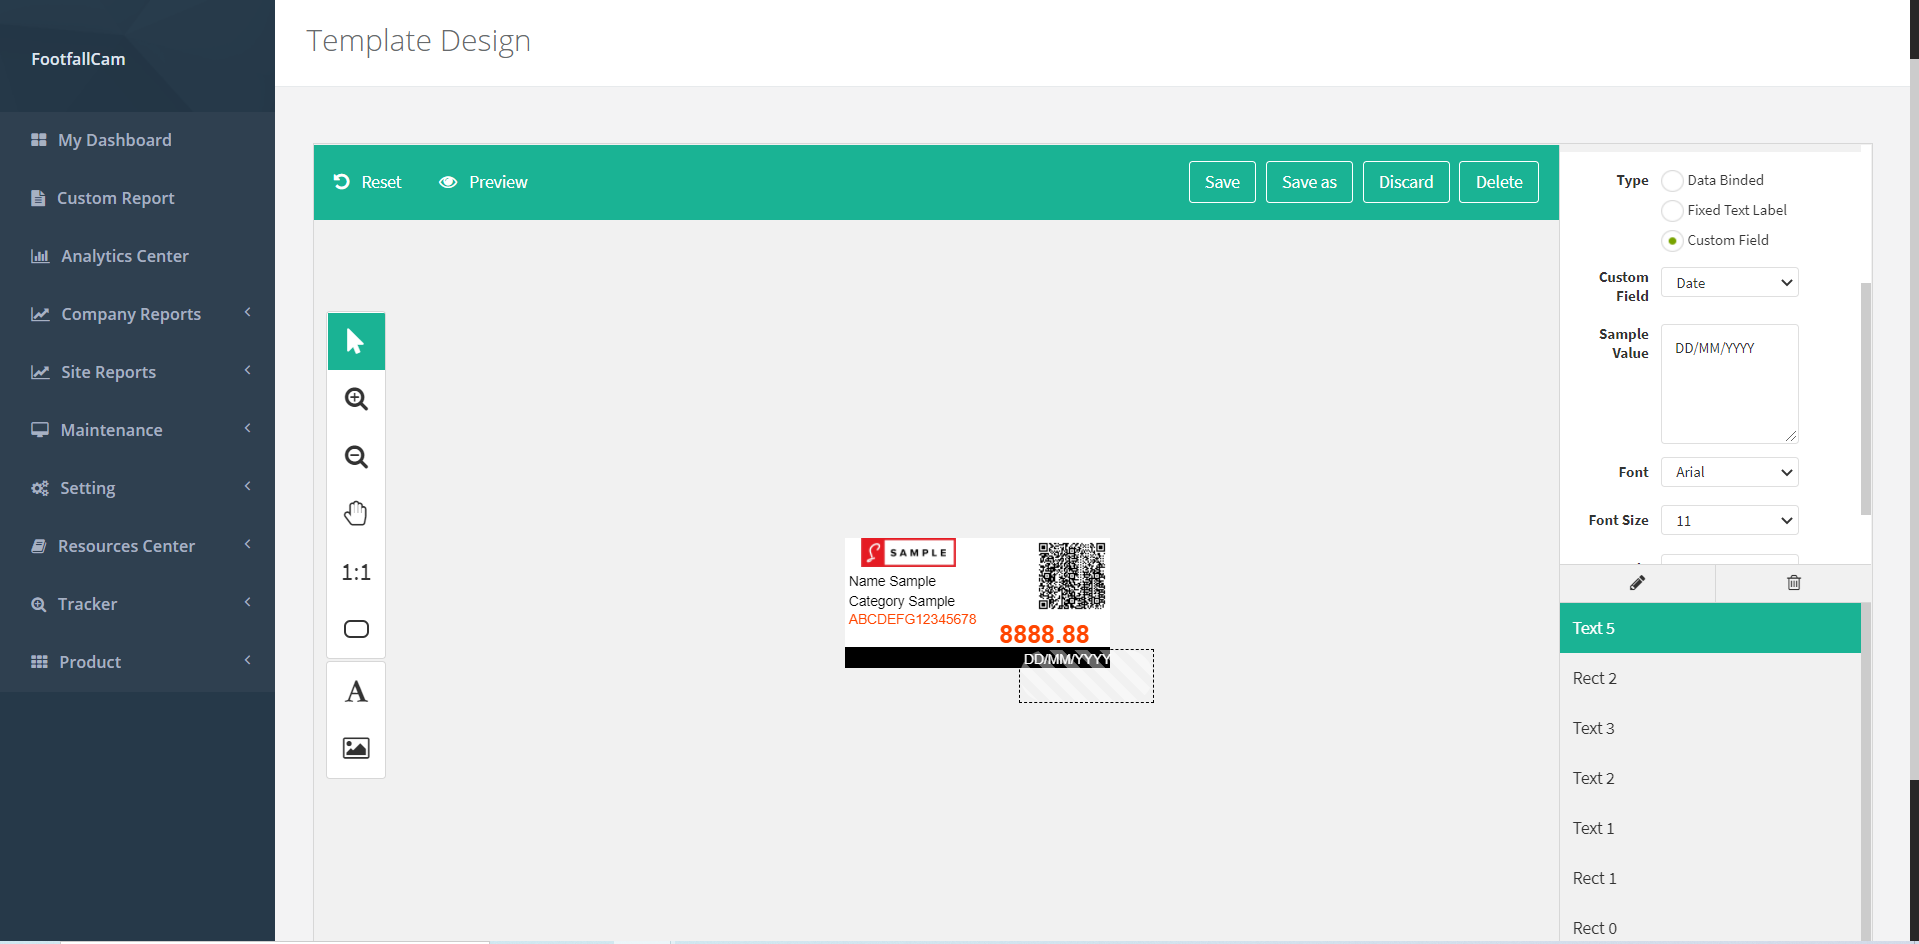
8.1.4.2 Design Label Template
ESL label template design is a feature that enables customisation on the design of the template according to own preference and purposes.
STEP 1 - Click on Product > Label Template to access the Label Template List page.
STEP 2 - Select the Label Template to manage and click on the Edit button at the Action column.
STEP 3 - Design the template as your preference.
STEP 4 - Complete the process by click on Save button.
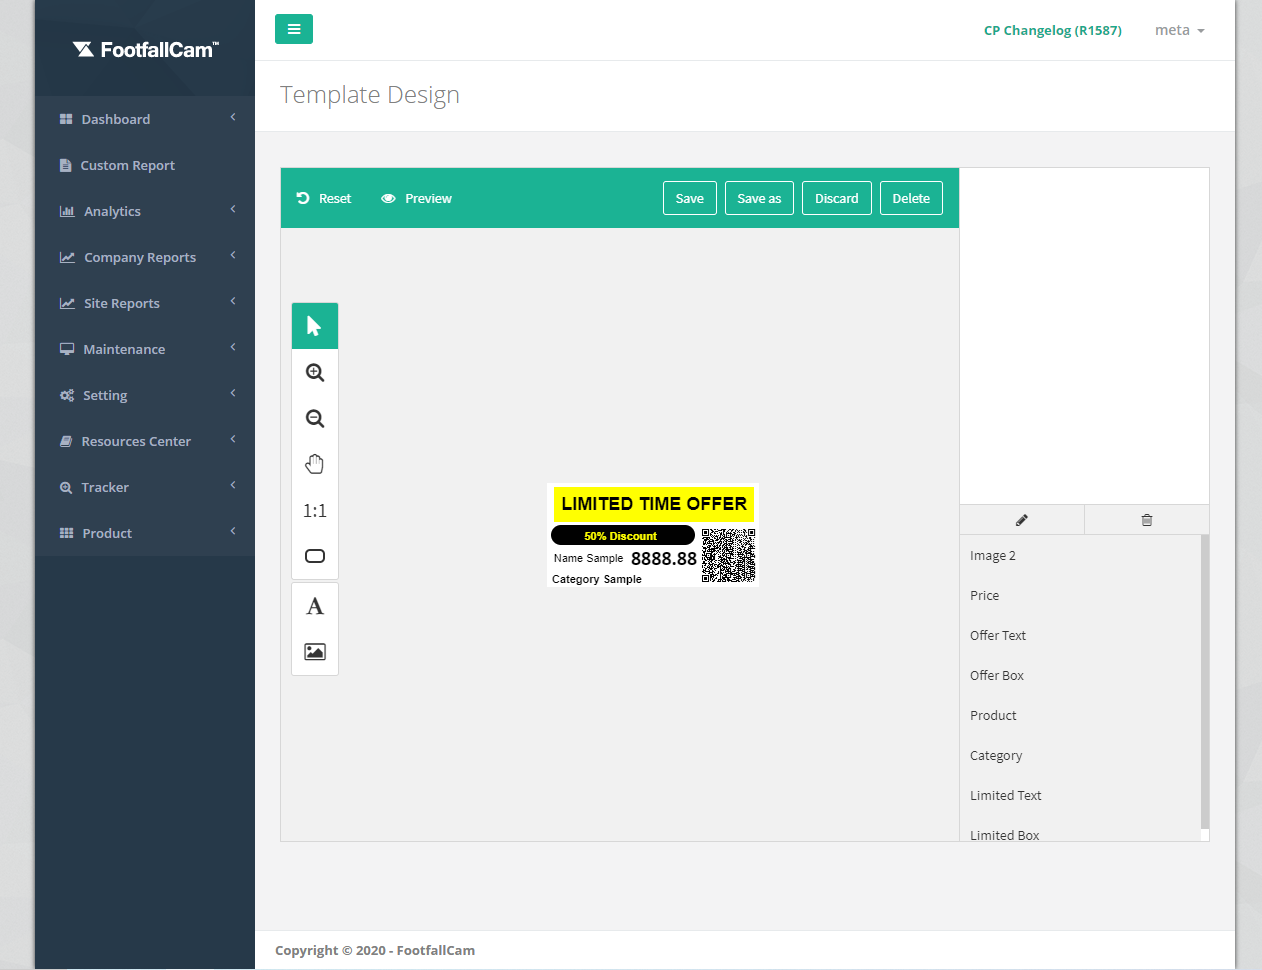
Toolbar on top:
|
Item |
Description |
|
1. Reset |
To restored the template design to last saved version. |
|
2. Preview |
To display the template shown on the ESL label tag. (Info: The display on ESL label will be the same as per preview) |
|
3. Save |
To save the updated template design as latest version and return to Label Template List. |
|
4. Save as |
To save the latest template design as a new template without changing the existing template. |
|
5. Discard |
To return to Label Template List without save. |
|
6. Delete |
To delete the label template design. (Info: Label Template selected MUST be unpaired with ESL in order to perform this action.) |
Toolbar on the left:
|
Item |
Description |
|
1. Select |
To select item on the canvas. |
|
2. Zoom In |
To zoom in the canvas for design. (Info: Press Ctrl + for zoom in shortcut key.) |
|
3. Zoom Out |
To zoom out the canvas for design. (Info: Press Ctrl - for zoom out shortcut key.) |
|
4. Drag Canvas |
To move the canvas for design. (Info: Hold space bar and drag for shortcut key.) |
|
5. Reset Canvas Zoom |
To reset canvas to original size (reset zoom). |
|
6. Rectangle |
To draw a rectangle. |
|
7. Text |
To add text for the template design. There are 2 text type:
|
|
8. Custom Image |
To add custom image for the template design. There are 2 image type:
|
Toolbar on the right:
|
Item |
Description |
|
1. General |
General information of item on template design. (Info: This field will be shown when an item is selected and will be hide when no item is selected.) |
|
2. Text / Default Style |
Text information or style information. (Info: This field will be shown when an item is selected and will be hide when no item is selected.) |
|
3. Rename |
Rename the item on the template design to your preferred name. A pop up will be shown to rename. |
|
4. Delete |
Delete the selected item. |
|
5. Item List |
The list and order of items in the template. Drag the item to arrange the sequence. |
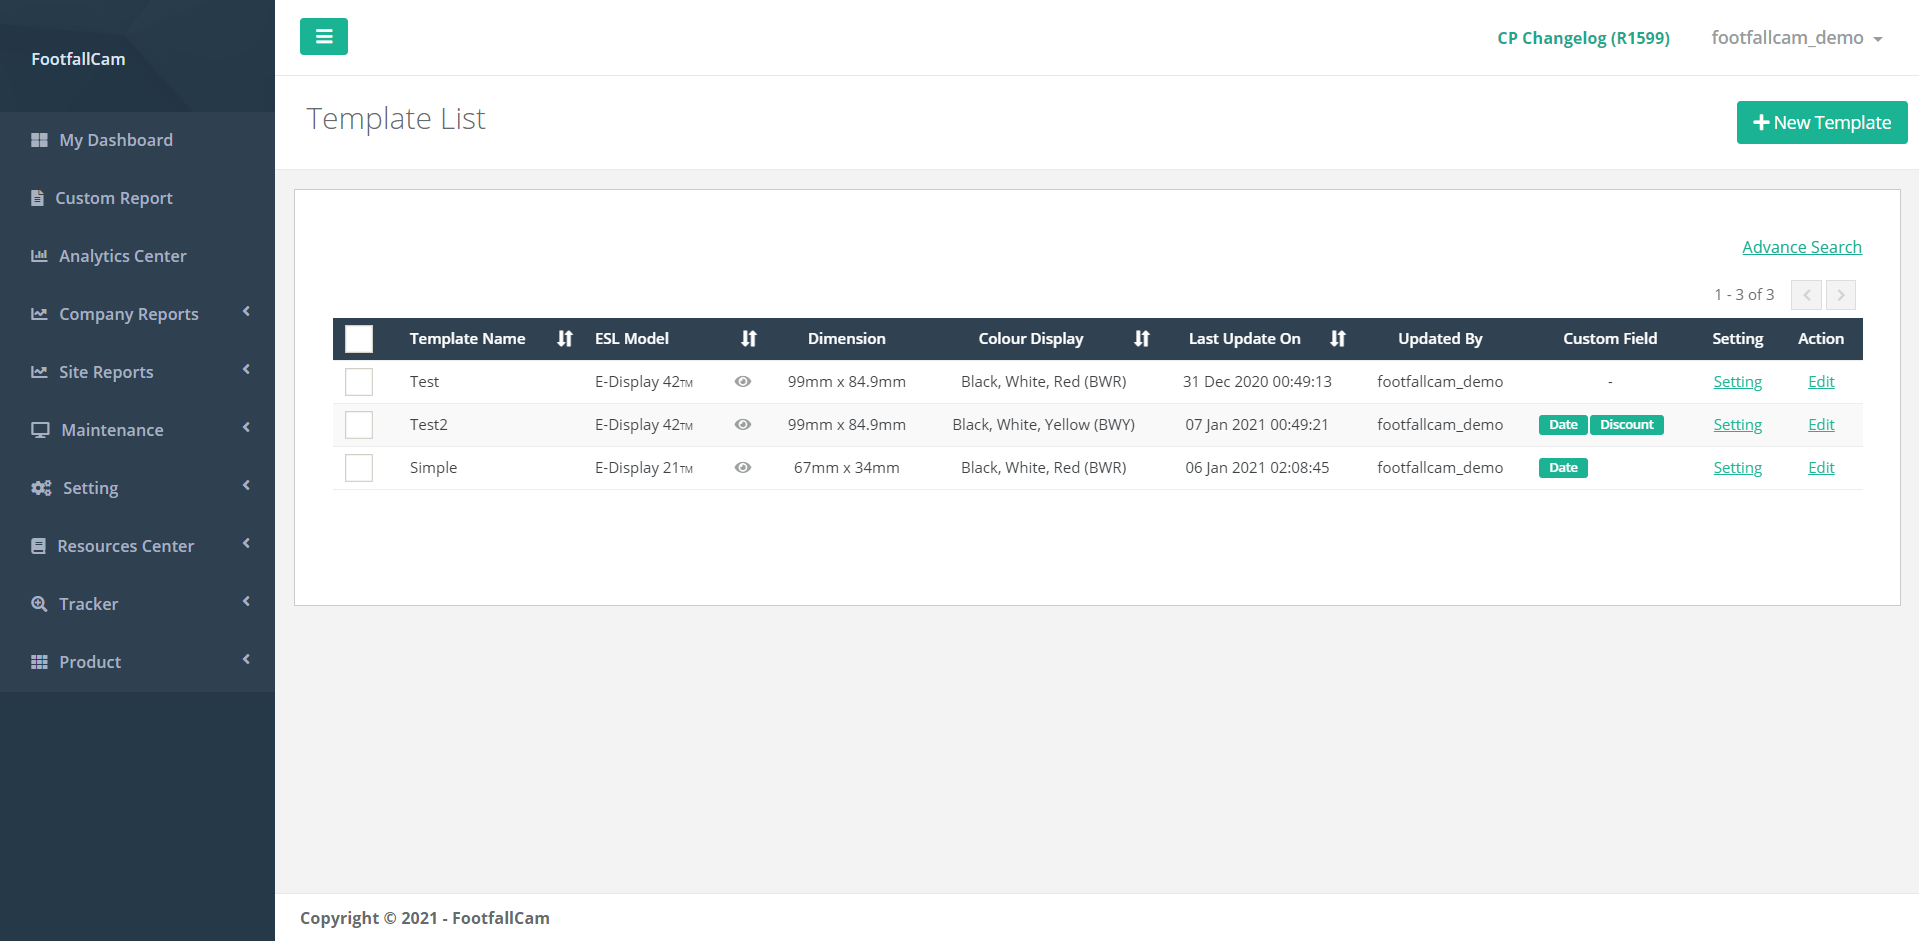
8.1.4.3 Manage Label Template
This section focuses on the management of the label templates created. The details of the template are displayed in the template list. The template design can be preview by mouse over to the preview icon and can be updated if required.
STEP 1 - Click on Product > Label Template to access the Label Template List page.
STEP 2 - Select the Label Template to manage and click on the Edit button at the Action column.
STEP 3 - Update the template design as your preference.
STEP 4 - Complete the process by click on Save button.
|
Item |
Description |
|
1. Template Name |
Name of the template. |
|
2. ESL Model |
ESL model of the template. (Info: 2 ESL Model: E-Display 21TM, E-Display 42TM) |
|
3. Preview |
Preview the template by mouse over to the icon. |
|
4. Dimension |
Dimension of the template according to the ESL model selected. (Info: E-Display 21TM - 67mm x 34mm ; E-Display 42TM - 99mm x 84.9mm ) |
|
5. Colour Display |
The colour combination of the template. |
|
6. Last Update On |
Last template updated date time |
|
7. Updated By |
Last login user to update the template |
|
8. Custom Field |
The custom field paired in the template. |
|
9. Setting |
To trigger Label Template Setting Pop up to manage selected template. |
|
10. Action |
To trigger Template Design page to update the template design. |
8.1.4.4 Unpair Custom Field
STEP 1 - Click on Product > Label Template to access the Label Template List page.
STEP 2 - Select the Label Template to manage and click on the Edit button at the Action column.
STEP 3 - Select the custom field to be unpaired and click on the delete (dustbin icon) and the right toolbar.
STEP 4 - Complete the process by click on Save button.
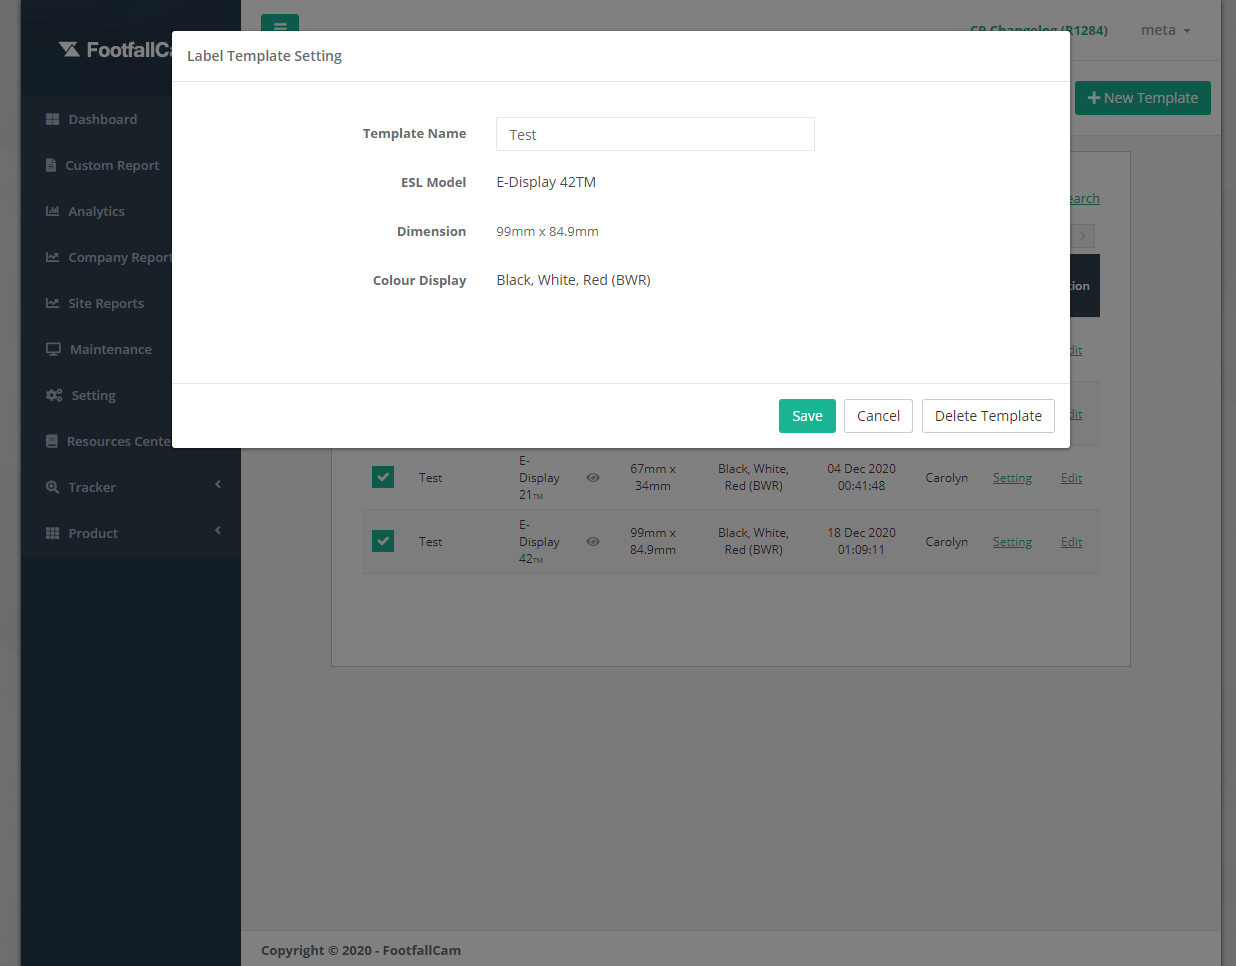
8.1.4.5 Delete Label Template
STEP 1 - Click on Product > Label Template to access the Label Template List page.
STEP 2 - Select the label template to manage and click on Setting button.
STEP 3 - Complete the process by click on the Delete Template button.
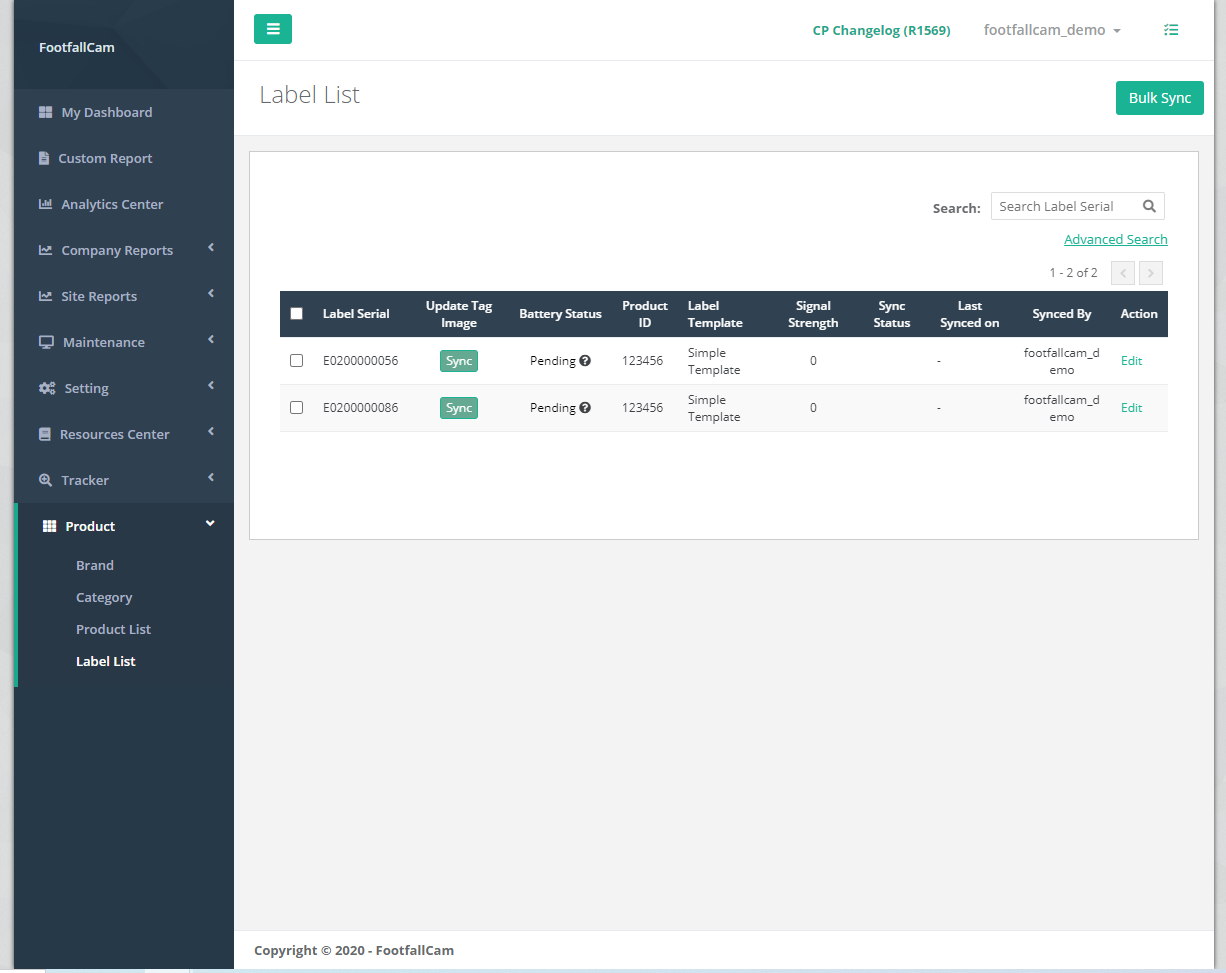
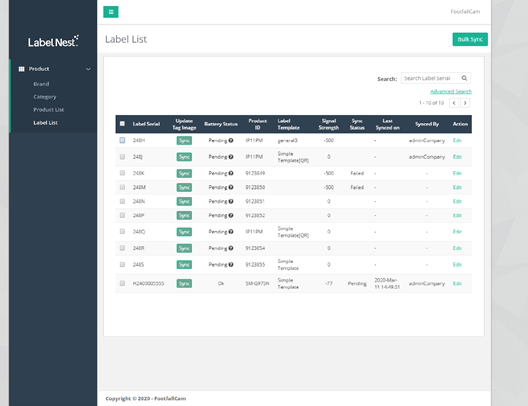
8.1.5 Manage Label
After the ESL pairing process is completed, the ESL label is displayed in Label List. The label in the label list shows the information of the ESL and can be updated accordingly.
8.1.5.1 Label Display
STEP 1 - Access to FootfallCam Analytic Manager V9™: http://v9.footfallcam.com via Google Chrome.
STEP 2 - Click on Product > Label List to access the Label List page.
|
Item |
Description |
|
1. Label Serial |
The Unique Serial Number for the ESL Tag (Info: Label Serial is uploaded by scanning the serial barcode of the ESL) |
|
2. Update Tag Image |
Click to update the detail changes onto ESL Tag |
|
3. Battery Status |
Show ESL battery status (Info: At Low status recommend to change ESL batteries.) |
|
4. Product ID |
Product ID detail that is bound to the ESL Tag (Info: Selected product ID detail will be displayed on ESL Tag.) |
|
5. Label Template |
Type of label template selected for the ESL Tag (Info: Selected label template will be displayed on ESL Tag.) |
|
6. Signal Strength |
The Signal connection between the ESL Tag and Base Station |
|
7. Sync Status |
Update tag image status (Info:3 status: Synced, Pending, Request Sent) |
|
8. Last Sync On |
Last successfully image updated time |
|
9. Last Synced By |
Last Login User to Sync the Label |
|
10. Action |
To trigger Label Setting Pop up to manage selected Label. |
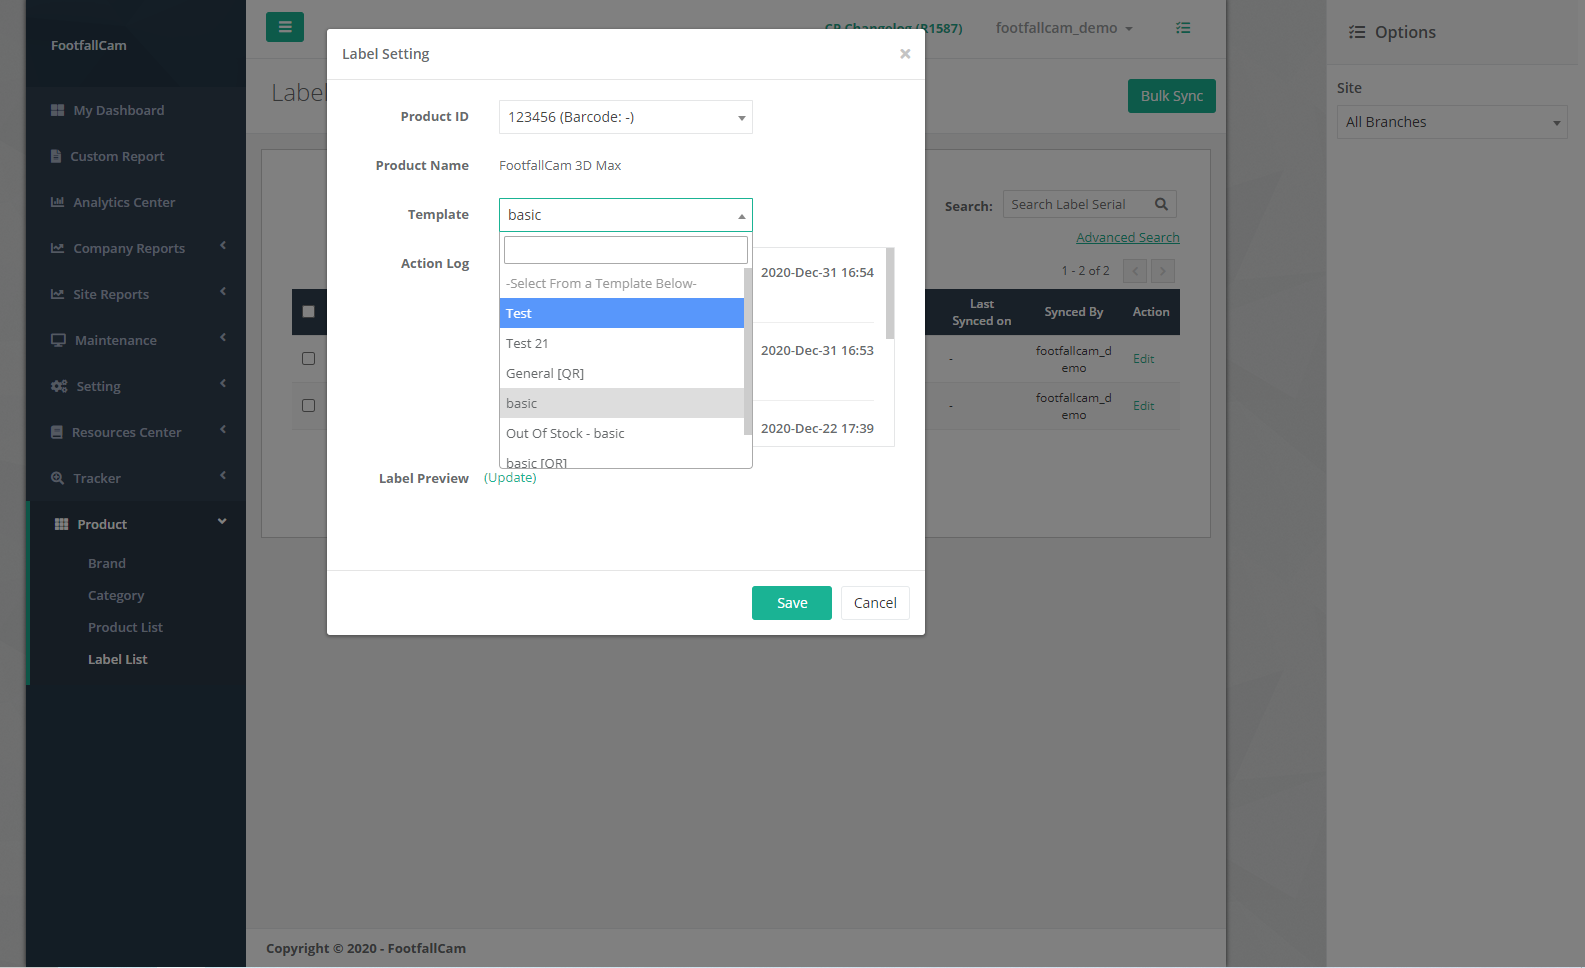
8.1.5.2 Manage Label Setting
STEP 1 - Access to FootfallCam Analytic Manager V9™: http://v9.footfallcam.com via Google Chrome.
STEP 2 - Click on Product > Label List to access the Label List page.
STEP 3 - Select the label to manage and click on Edit button.
STEP 4 - Select Product ID and Template then click Preview Template to preview the template.
STEP 5 - Complete the process by clicking on Save button.

|
Item |
Description |
|
1. Product ID |
The Product's Product ID to be bind with the selected label (Info: Product ID's Product Detail will be displayed on ESL Tag.) |
|
2. Product Name |
The selected product ID name |
|
3. Template |
The type of Template Design Available for the selected Label (Info: Template Design will be displayed on ESL Tag.) |
|
4. Last Updated On |
Latest time where there is change(s) in the Label Setting. |
|
5. Action Log |
The details of action being done to the label setting by Login User |
8.1.5.3 Unpair Label Template
Label can be paired to a label template to display on the ESL tag and it can be unpair as well. This section focuses on the way to unpair label template from the label.
STEP 1 - Click on Product > Label List to access the Label List page.
STEP 2 - Select the label to manage and click on Edit button.
STEP 3 - Click the Template field dropdown menu and choose a new template to unpair the it with the old template.
STEP 4 - Complete the process by clicking on Save button.
8.1.6 Sync Display template with ESL tags
After setup for product information and display template, the next step is to sync the display template with the ESL tags. There are two ways of sync, which are Single Label Sync and Multiple Label Sync.
8.1.6.1 Single Label Sync
STEP 1 - Click on Product > Label List to access the Label List page.
STEP 2 - Select the label to sync and click on Sync button.
STEP 3 - Process will be completed and sync status will be updated once syncing is done.
8.1.6.2 Multiple Label Sync
STEP 1 - Click on Product > Label List to access the Label List page.
STEP 2 - Filter Pending or Failed Sync Status Labels via Advanced Search
STEP 3 - Check all the labels to be synced and click on Bulk Sync button.
STEP 4 - Process will be completed and sync status will be updated once syncing is done.