


This guideline provides step-by-step instructions on how to set up the Centroid monitor and use the DVR Playback function to review recorded video footage.
Tools Required
Hardware:
- Monitor
- HDMI Cable
- Mouse
Centroid Monitor Set up
This section provides instructions for setting up the Centroid monitor.

-
Plug in mouse and HDMI cable
-
Once the channels are displayed, the setup is complete.

Navigate to PlayBack Video Function
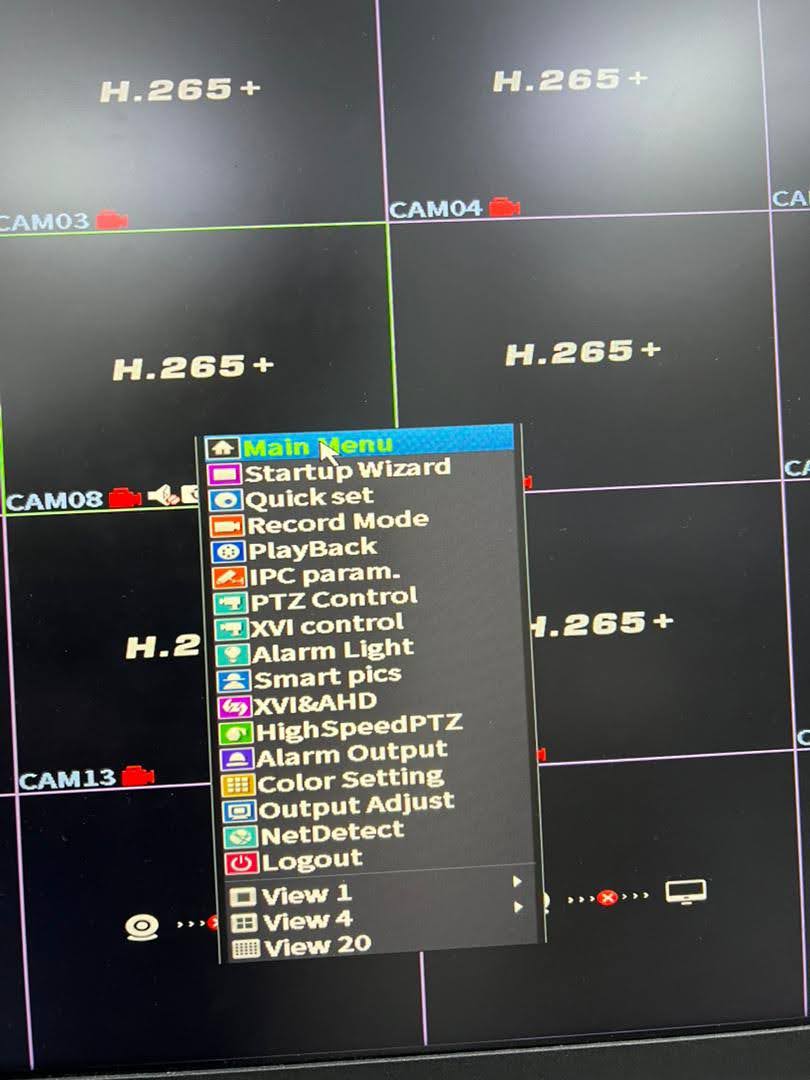
After set up the monitor, Right-Click and choose Main menu function
*You can also directly select Playback instead of entering the Main Menu.
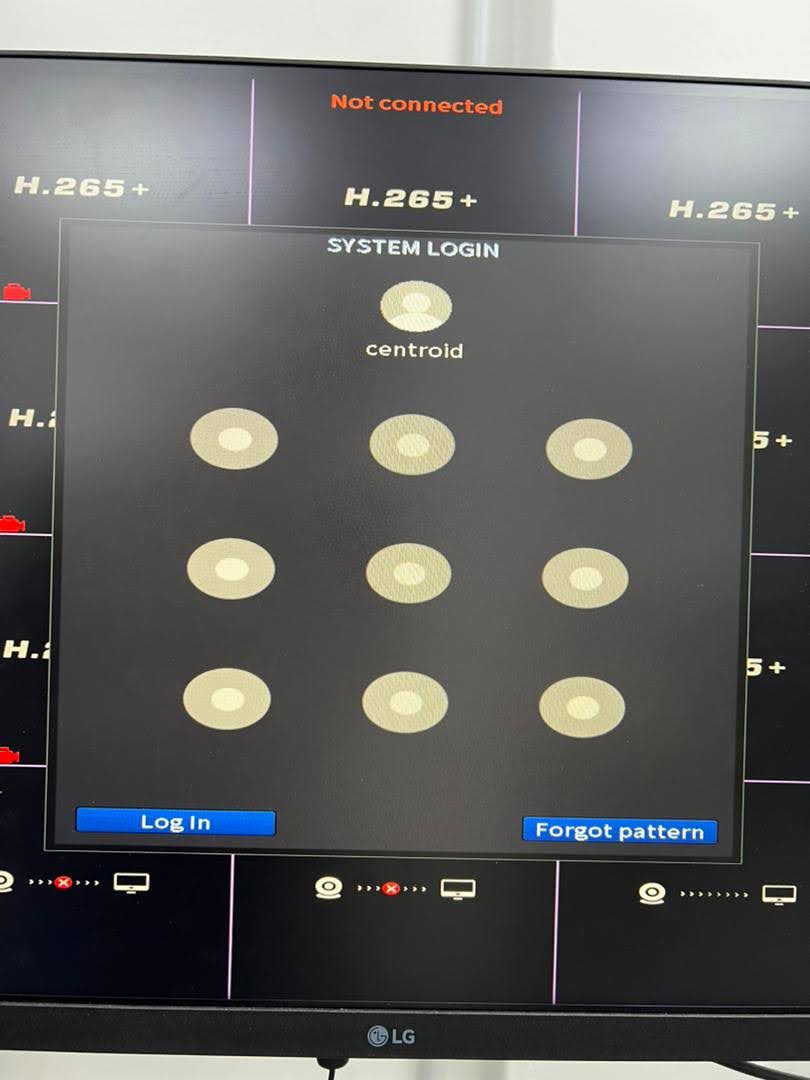
A pattern password screen will appear. Please follow the pattern shown in the right image (default password).

Click the Playback button to proceed and you have finished this section.

DVR Video PlayBack function Guideline
This section explains how to use the Playback function and its features.

-
After clicking Playback, two boxes will appear
- The bottom box is for selecting the date.
- The top box is for selecting the channel.
*A maximum of four channels can be selected at the same time.
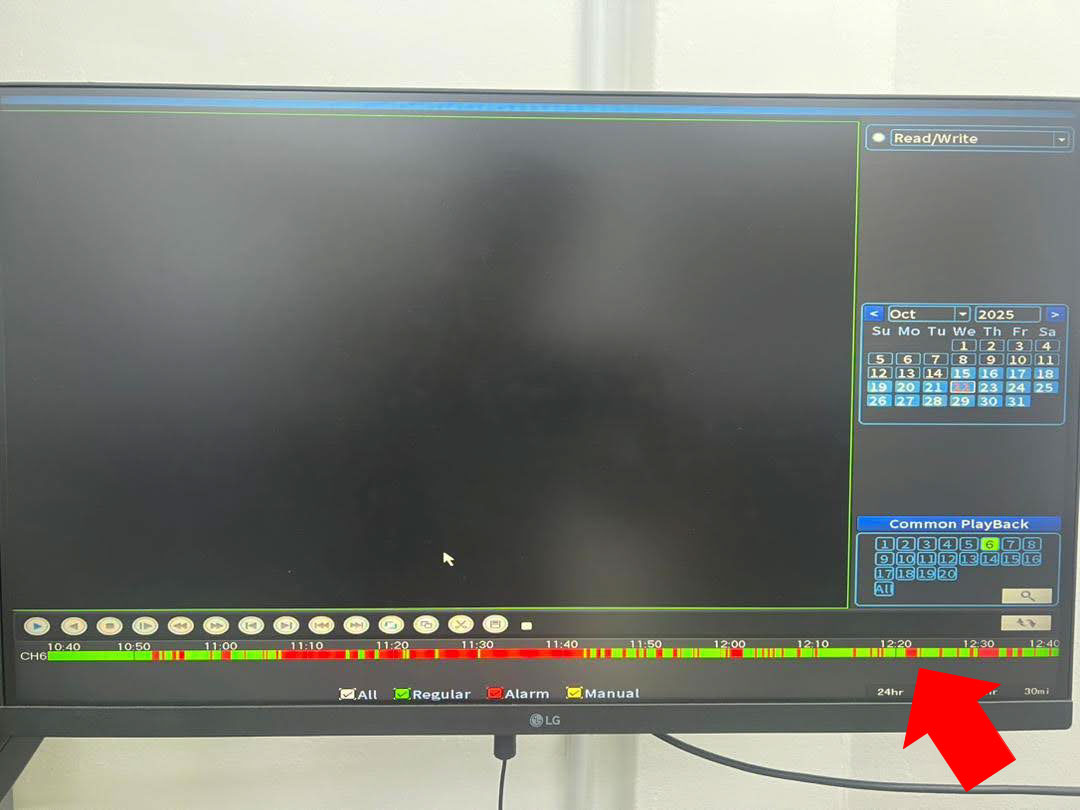
The box below shows the timeline.

Below the timeline is the time unit selector, where you can choose:
-
24 hours, 2 hours, 1 hour, 30 minutes and you can drag the timeline to move to the desired time period.
Playback Filters (Green & Red)
There are two colours indicating motion detection levels on the timeline:
Green- Represents timelines with less motion detection.

Red - Represents timelines with more motion detection.
