


Prerequisite
- A V9 Account with a bound Centroid DVR/NVR.
- Port 34567 must be port forwarded on the router or allowed on VPN to which the DVR/NVR is connected.
- The FootfallCamVMS app installed on an Android device (App available at: https://play.google.com/store/apps/details?id=com.footfallcamvms).
1. Login into V9 account
To retrieve DVR/NVR details from the server, please log in to your V9 account via the Keycloak portal as shown in the image below.


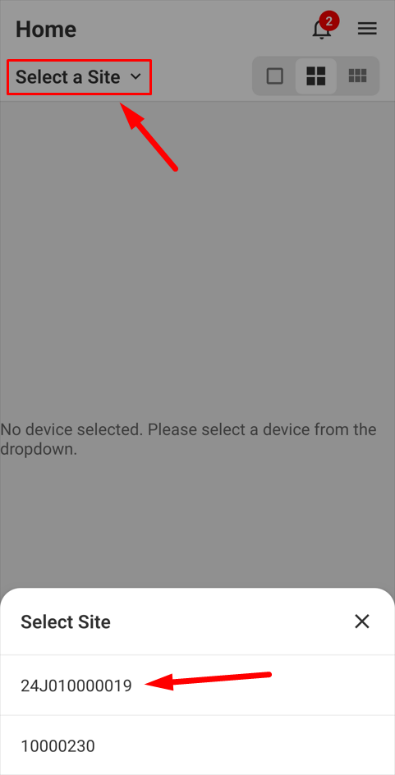
If the login is successful, you will be redirected to the Home page to select the serial number of the DVR/NVR you wish to connect. If a valid DVR/NVR is bound to your V9 account, tap the `Select a Site` dropdown. The list at the bottom will display the serial number of the DVR/NVR. Please refer to the image below.
2. Select Connection Method
You will be prompted to select a connection method for the DVR/NVR as shown in the image below:
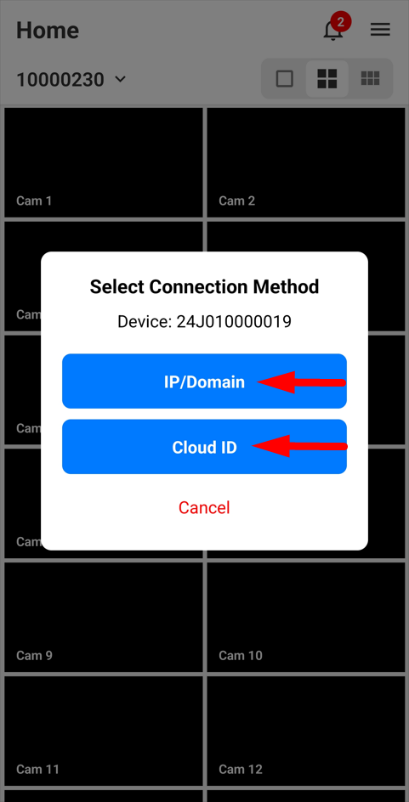
There are multiple ways to connect to the DVR/NVR.
- IP/Domain Address: Ensure that port 34567 is already forwarded on your router or VPN.
-
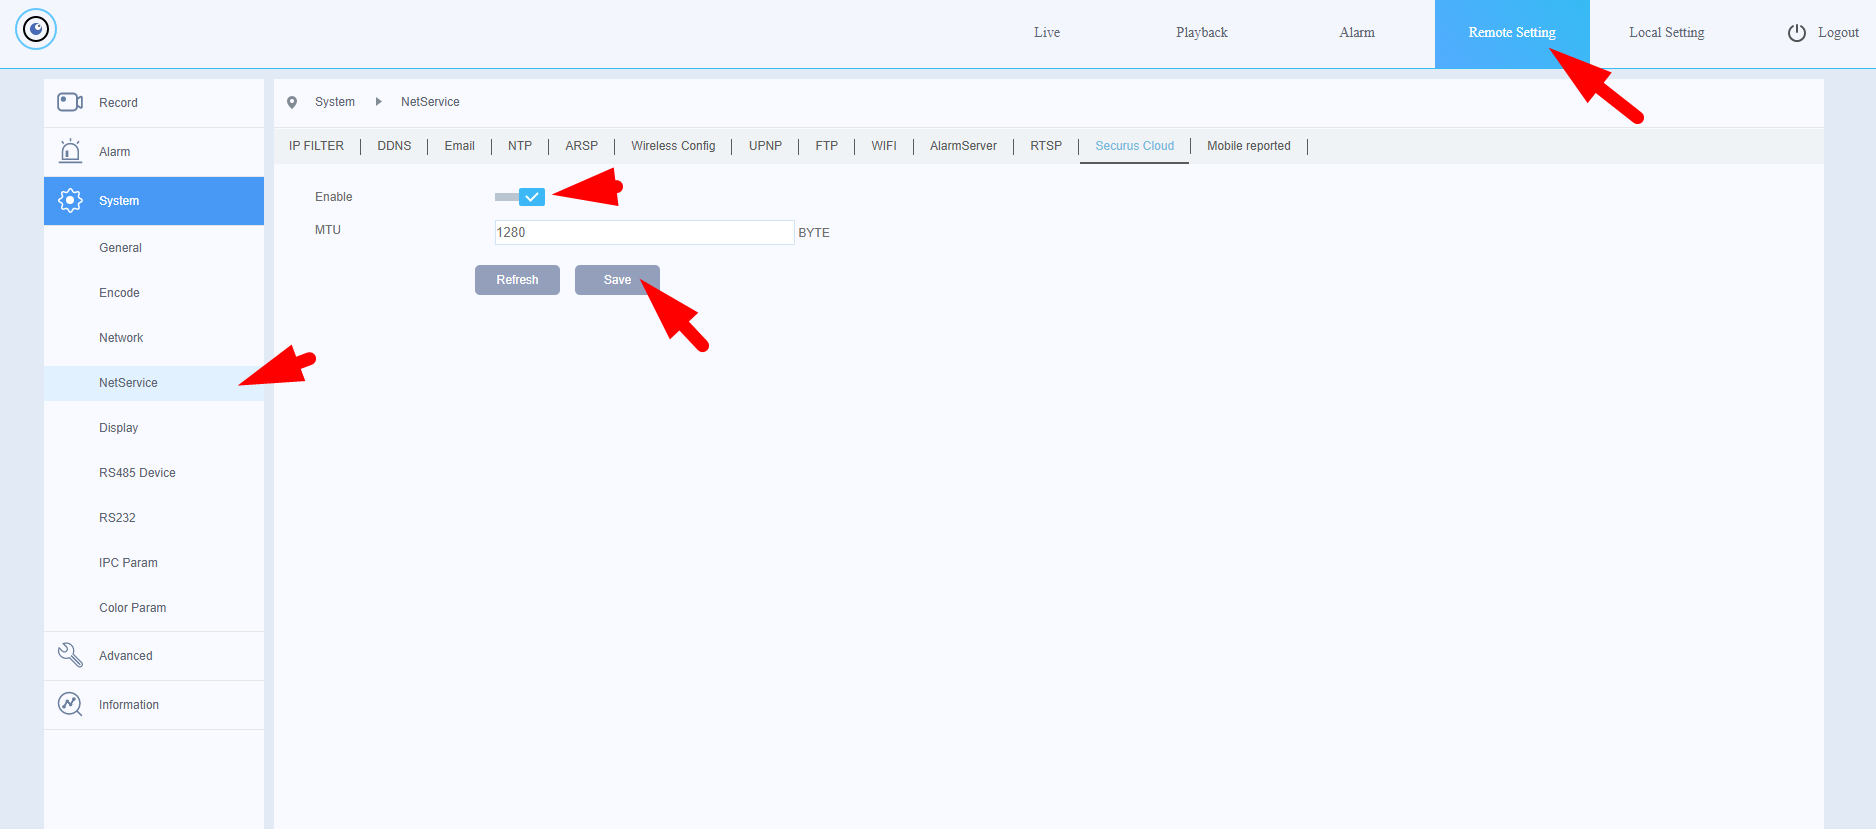
Cloud ID: To connect via Cloud ID, Securus Cloud must be enabled in the DVR/NVR Control Panel. By default, it is enabled.
3. Viewing the Camera Feed
Upon successful connection, the grid view will initialize with the respective channel numbers. You can select a 1-column, 2-column, or 3-column grid view. Tap on a specific channel to view it.

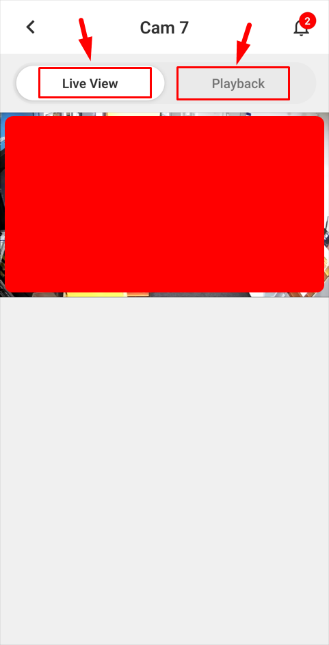
You will then be redirected to a page where you can switch between Live View and Playback.
-
Live View: Displays the real-time feed of the selected channel in a larger view.
-
Playback: Provides access to historical recordings on the DVR/NVR for the specific channel, as shown in the image below:

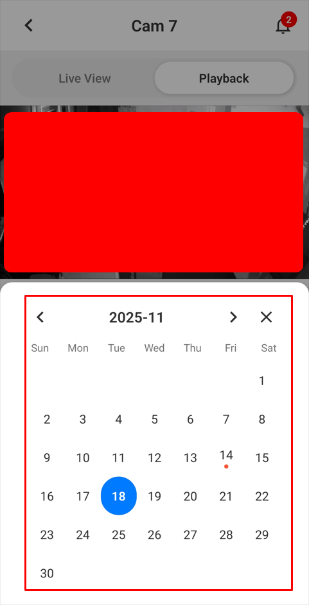
Using the Timeline A date picker and timeline are located below the video stream.
- Timeline: Drag the vertical bar or simply tap on a specific time to watch the recorded footage. The video stream will update to the selected time.
-
Date Picker: Tap the date picker to select the specific date for which you wish to view recorded footage, as shown below:
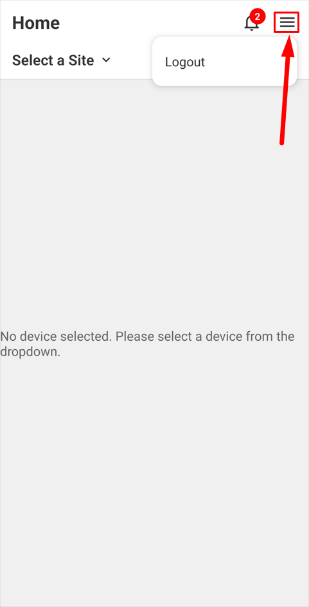
4. Log Out
To log out of your V9 account, return to the Home page, tap the menu button (the three horizontal bars icon), and select Logout as shown in the image below: