


Why?
- Measure Marketing Effectiveness - Track the footfall and sales impact of events, promotions, and festive seasons to assess ROI and refine future strategies.
- Optimize Store Performance - Compare store-level and regional analytics to identify successful campaigns, peak shopping periods, and areas for improvement.
- Enhance Strategic Decision-Making - Use data-driven insights to allocate budgets efficiently, evaluate event success, and adjust marketing efforts for maximum profitability.
Target Audiences:
Marketing Agencies, Brand Managers, and Marketing Teams
1.0 App Configurations
Before proceeding with any app marketing analysis, users must create an event for each relevant site.
1.1 Events
This page displays all existing events and allows users to create new events or edit current ones. It also includes filtering options to help locate specific events more easily.
1.1.1 How to Create New Event
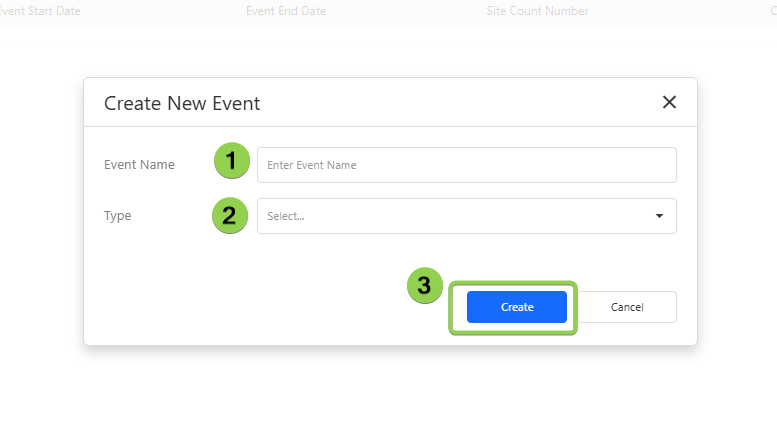
Step 1 - Navigate to Retail Marketing ROI > App Configurations > Events and click the New Event button at the top right of the page.
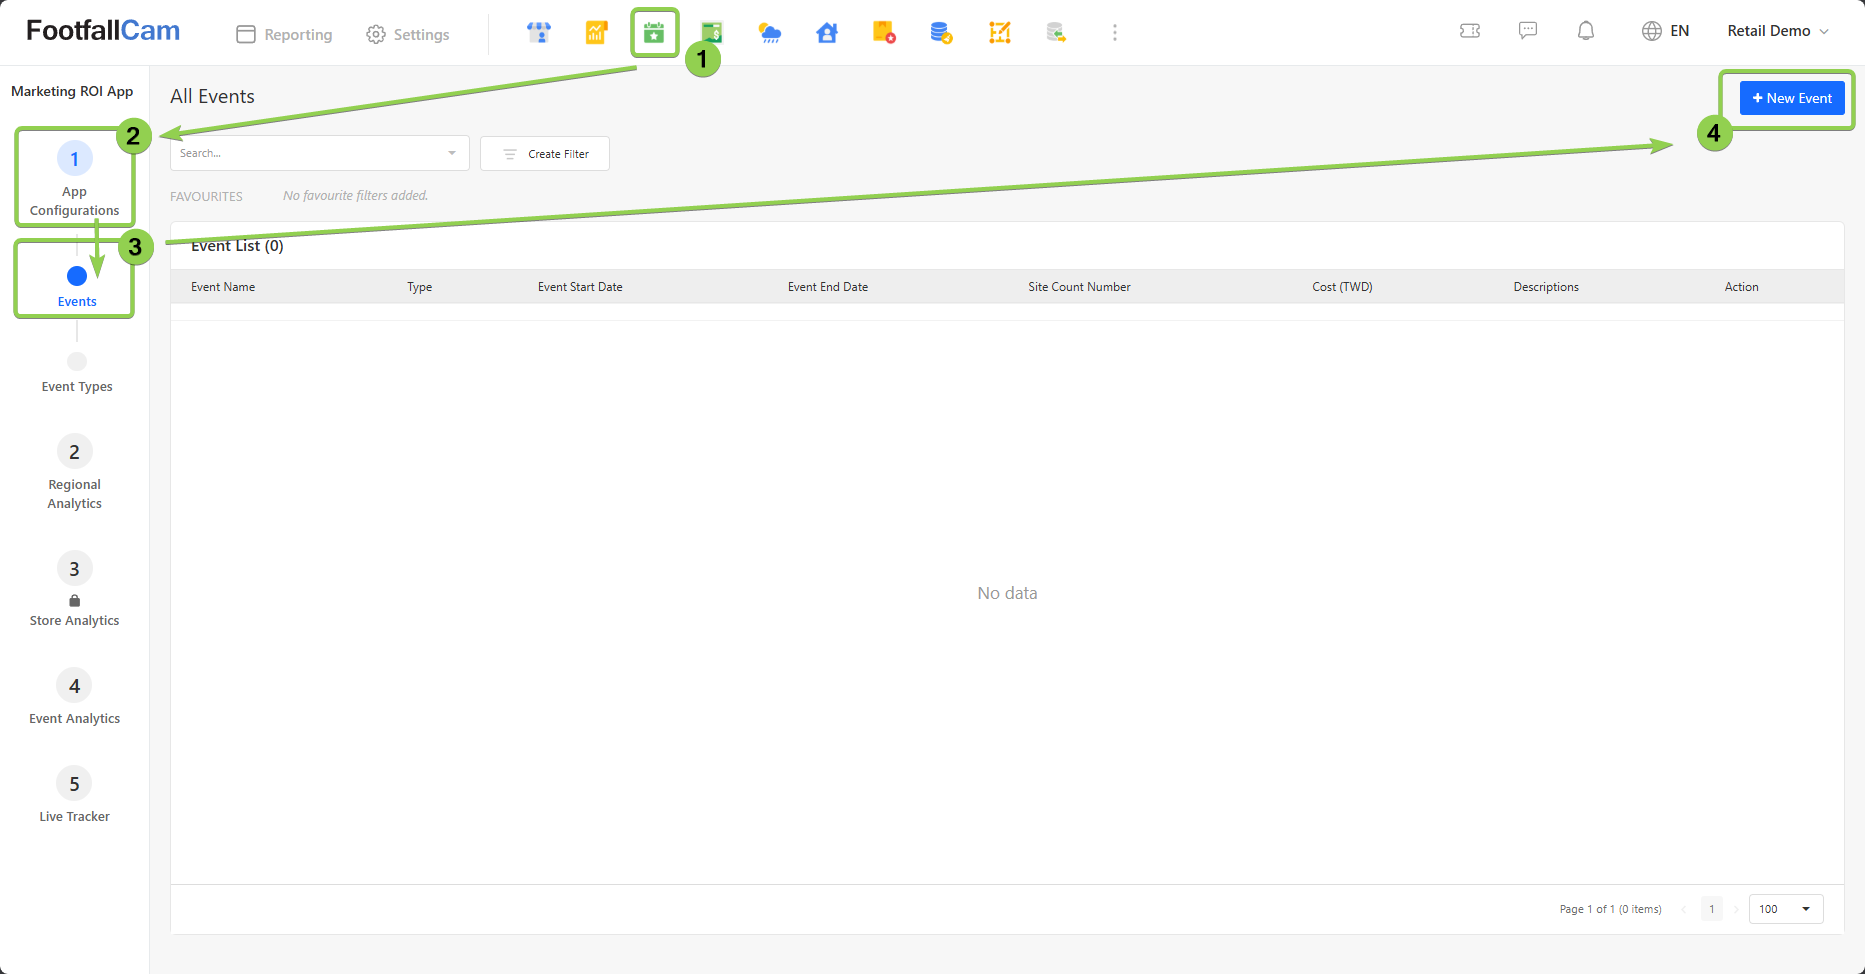
Step 2 - Enter the event name and select the expected event type, then click on the Create button to open the Event Settings Page.
1.1.1.1 New Promotion Event
Please select the Promotion as the Event type in the Create New Event pop-up. (Refer to Section 1.1 to create an Event and open the Event Settings page.)
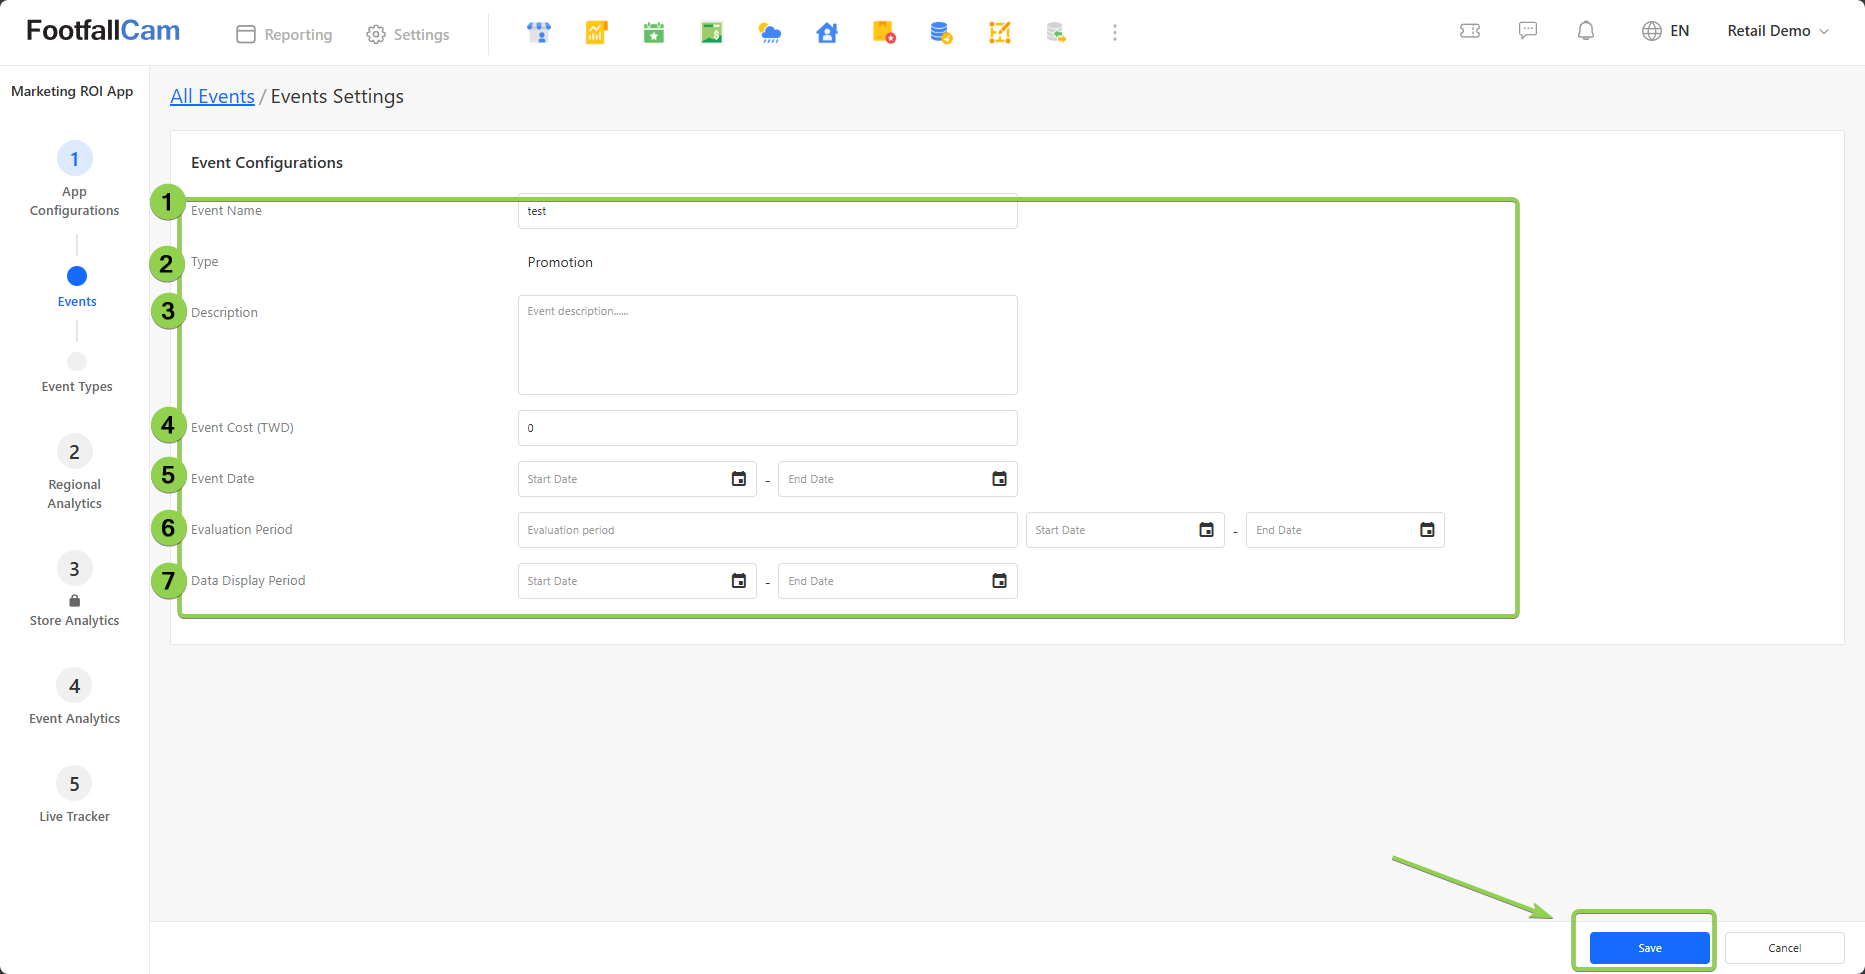
| Column | Description |
| 1. Event Name | Enter the name of the event. (Info: The event name will be filled in and taken from the Create New Event popup) |
| 2. Type | Display the Event type of the new event. |
| 3. Description | Enter the description of the event. |
| 4. Event Cost | Enter the expected cost of the event. (Info: The currency will be obtained from the Company Settings page) |
| 5. Event Date | Choose the event's start and end dates. |
| 6. Evaluation Period | Enter the name of the Evaluation period and choose the start and end dates for this evaluation period. |
| 7. Data Display Period | Enter the data display period. (Info: This data display period defines the date range you want to display in the chart.) |
After filling in all the information, click on the Save button at the bottom to save the event information.
1.1.1.2 New Festive Season Event
Please select the Festive Season as the Event type in the Create New Event pop-up. (Refer to Section 1.1 to create an Event and open the Event Settings page.)
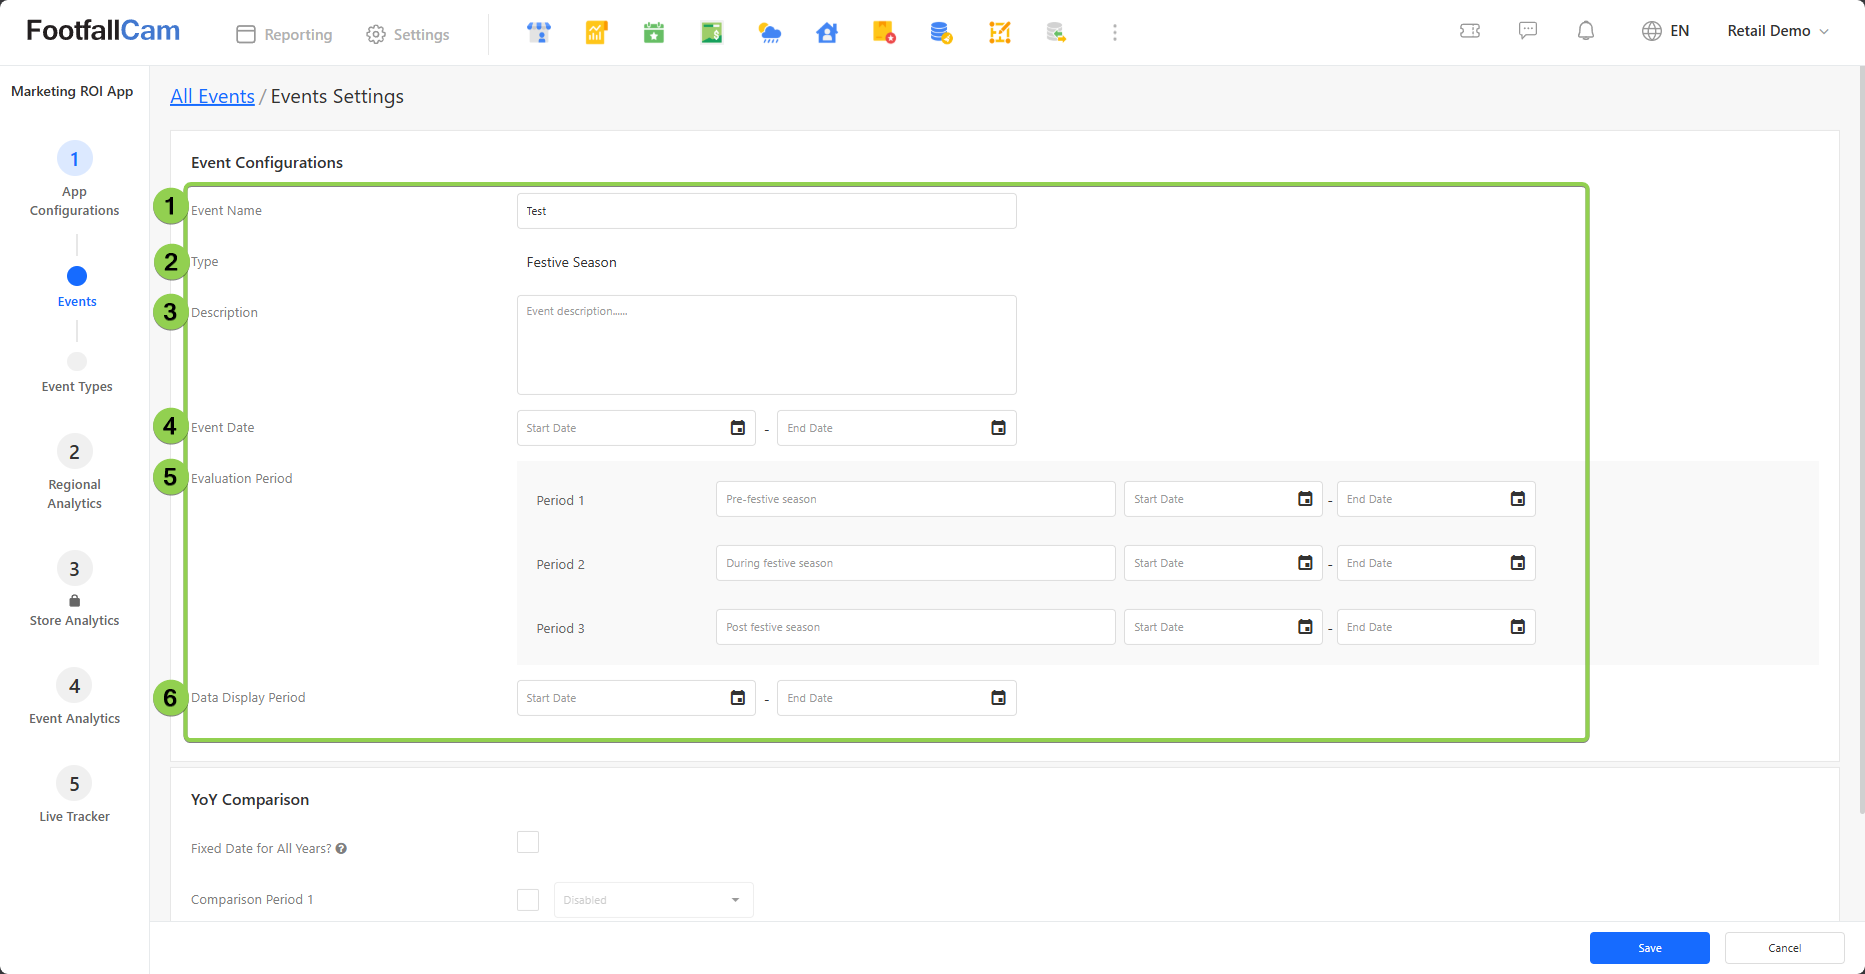
| Column | Description |
| 1. Event Name | Enter the name of the event. (Info: The event name will be filled in and taken from the Create New Event popup) |
| 2. Type | Display the Event type of the new event. |
| 3. Description | Enter the description of the event. |
| 4. Event Date | Choose the event's start and end dates. |
| 5. Evaluation Period | Enter a name for the evaluation period and select the start and end dates for this evaluation period. (Info: During the festive season, need to define three evaluation periods for the event, namely before the event, during the event, and after the event) |
| 6. Data Display Period | Enter the data display period. (Info: This data display period defines the date range you want to display in the chart.) |
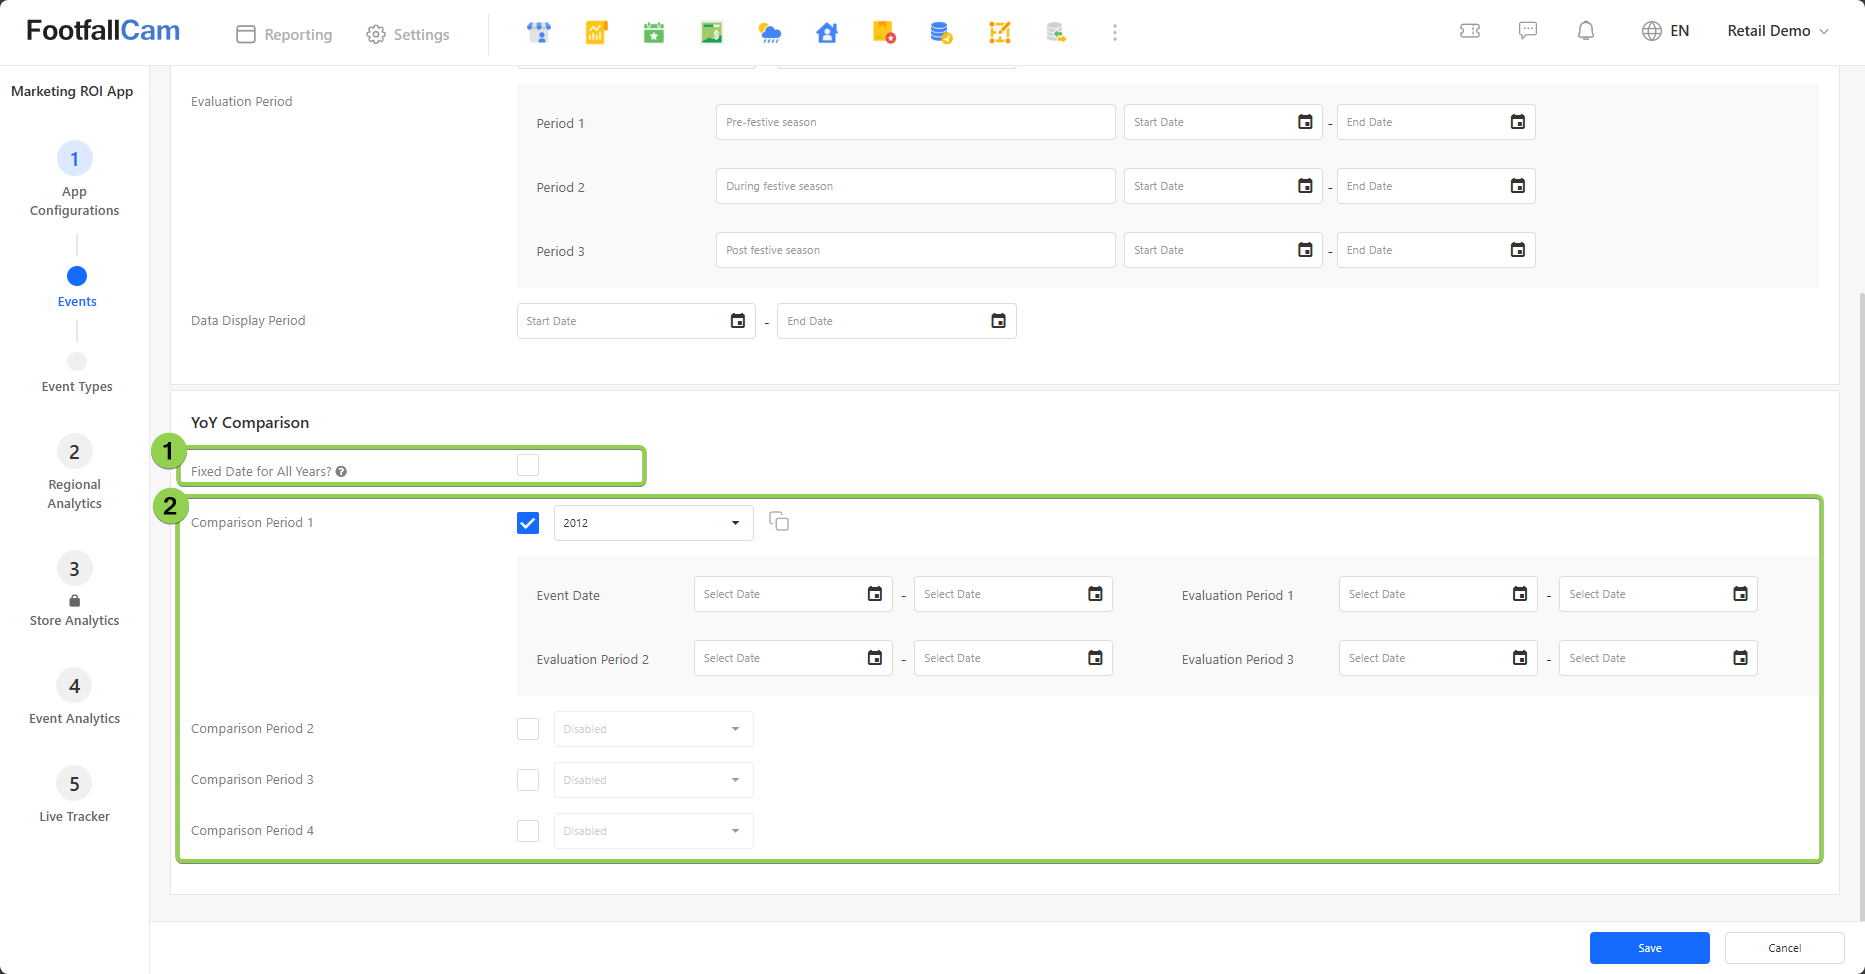
If want to compare the above Event and Evaluation Period dates with those from other years, specify the desired comparison year in the section below the Comparison Period column. A maximum of four years can be selected for comparison.
| Column | Description |
| 1. Fixed Date for All Years |
Check this box to indicate the use of the same dates as above for the event and evaluation periods. (Info: The year will be replaced by the year chosen for each comparison period. All grey containers will be hidden.) |
| 2. Comparison Year |
Click on the checkbox to select the desired comparison year (Info: Event and Evaluation Period columns (grey container) are displayed only if the checkbox is selected and the year is not empty.
|

After filling in all the information, click on the Save button at the bottom to save the event information.
1.1.2 How to Edit the existing Event
Step 1 - Navigate to Retail Marketing ROI > App Configurations > Events
Step 2 - Click on the Edit button of the particular event row to open the event settings page.

Step 3 - Update the information and click on the Save button to save the changes.
1.2 Event Types
Users can create and categorise different event types in this section.
1.2.1 How to Create New Event Types
Step 1 - Navigate to Retail Marketing ROI > App Configurations > Event Types and click the Add Event Type button.
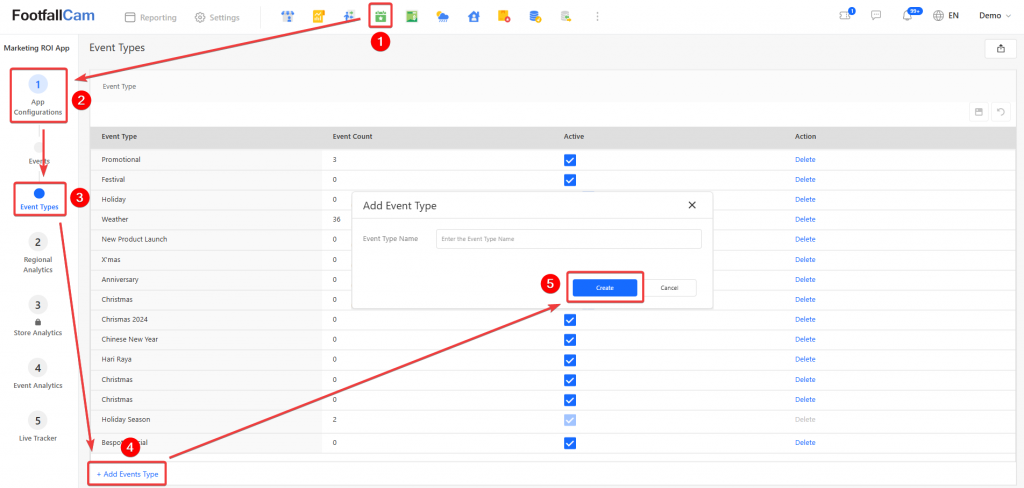
Step 2 - Enter the Event Type Name and click Create button to finalise the new event type.
2.0 Regional Analytics
2.1 Festive Season Footfall and Sales
Coming soon......
3.0 Event Analytics
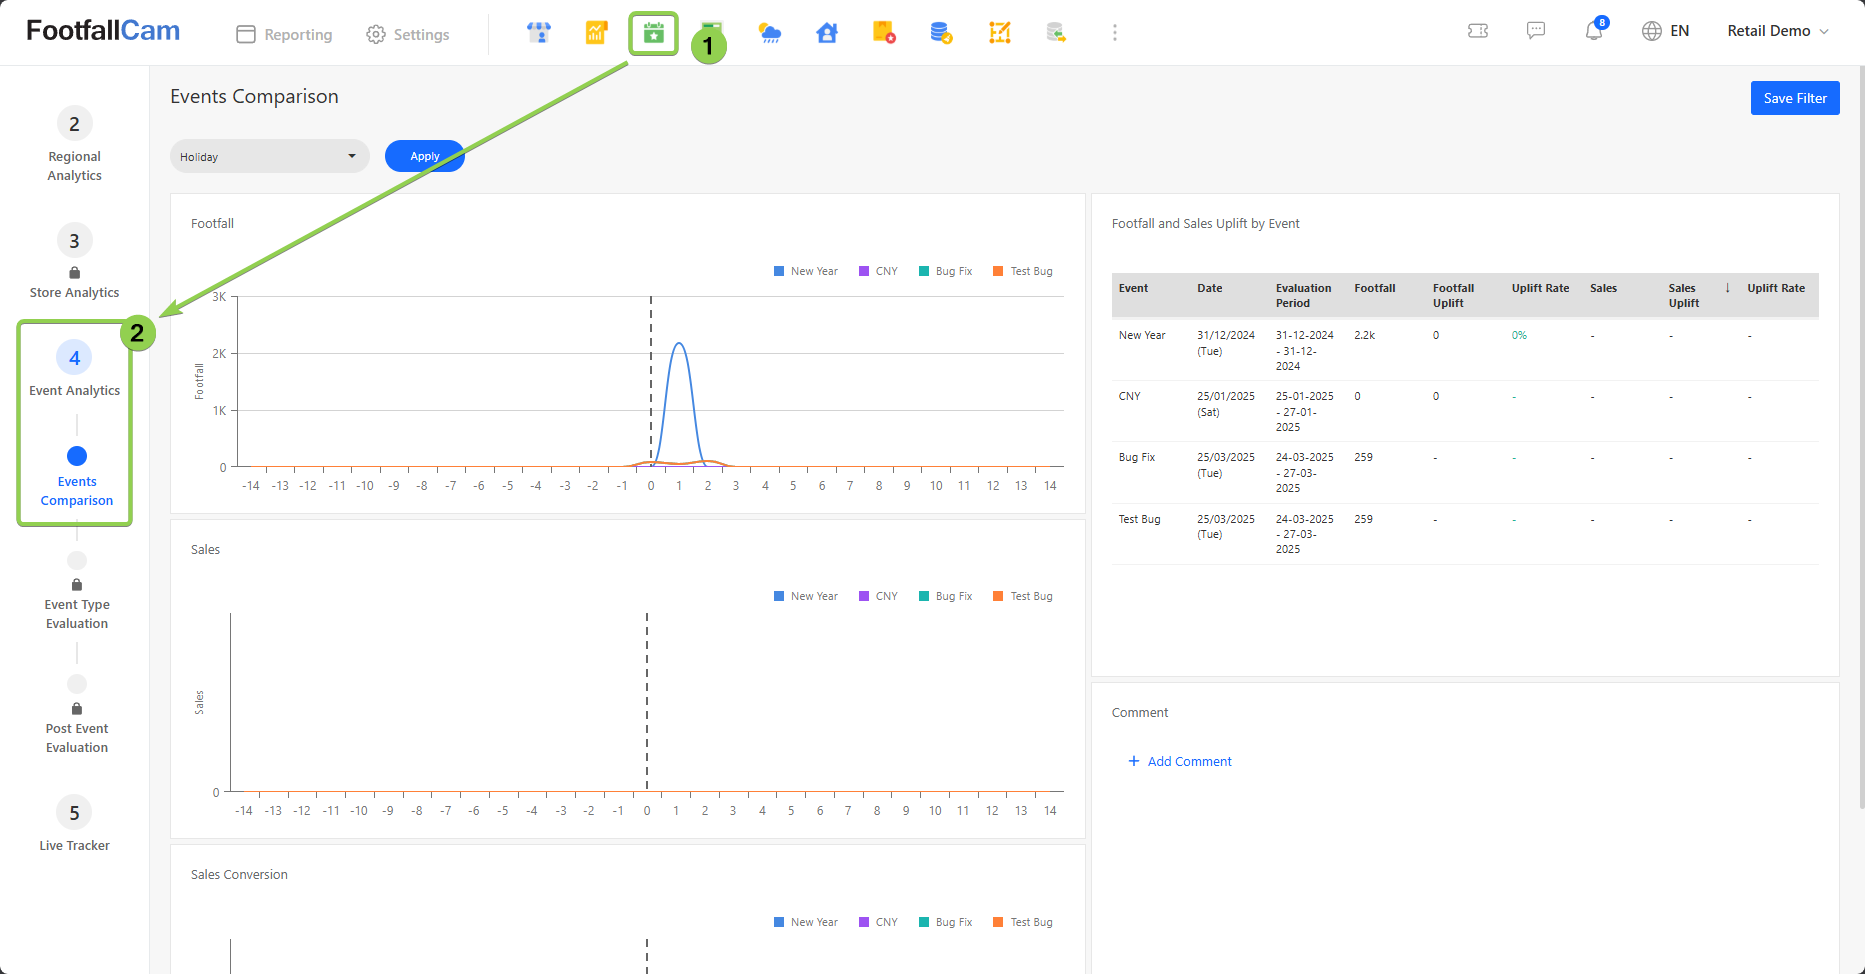
3.1 Events Comparison
The Event Comparison section enables users to analyse the performance of events within the same category by selecting an event type. Three line graphs visualise footfall, sales, and conversion trends across multiple events, while a table on the right breaks down footfall and sales uplift. A comment section at the bottom enables users to document key insights. This section helps businesses assess event effectiveness and refine marketing strategies for better results.
Use Cases:
- Measure Event Performance - Compare footfall and sales uplift across events to identify the most successful marketing initiatives.
- Optimize Marketing Investments - Assess sales conversion rates to allocate budget effectively for high-impact events.
- Refine Event Strategies - Use data insights to improve event planning, timing, and execution for better customer engagement.