


1. What is the Account Profile App
The Account Profile App groups all settings and preferences related to the user in one app. The user can directly update all personal settings at once using this app. The app is accessible via your list of available apps. If the app is not among your available apps, kindly contact "[email protected]".
2. User Profile Settings
In the "User Profile Settings" section, the user can view and/or update key details of their account. The settings are split into two tabs: "User Account" and "Preferences".
The "User Profile Settings" tab is accessible in the side navigation bar after entering the app.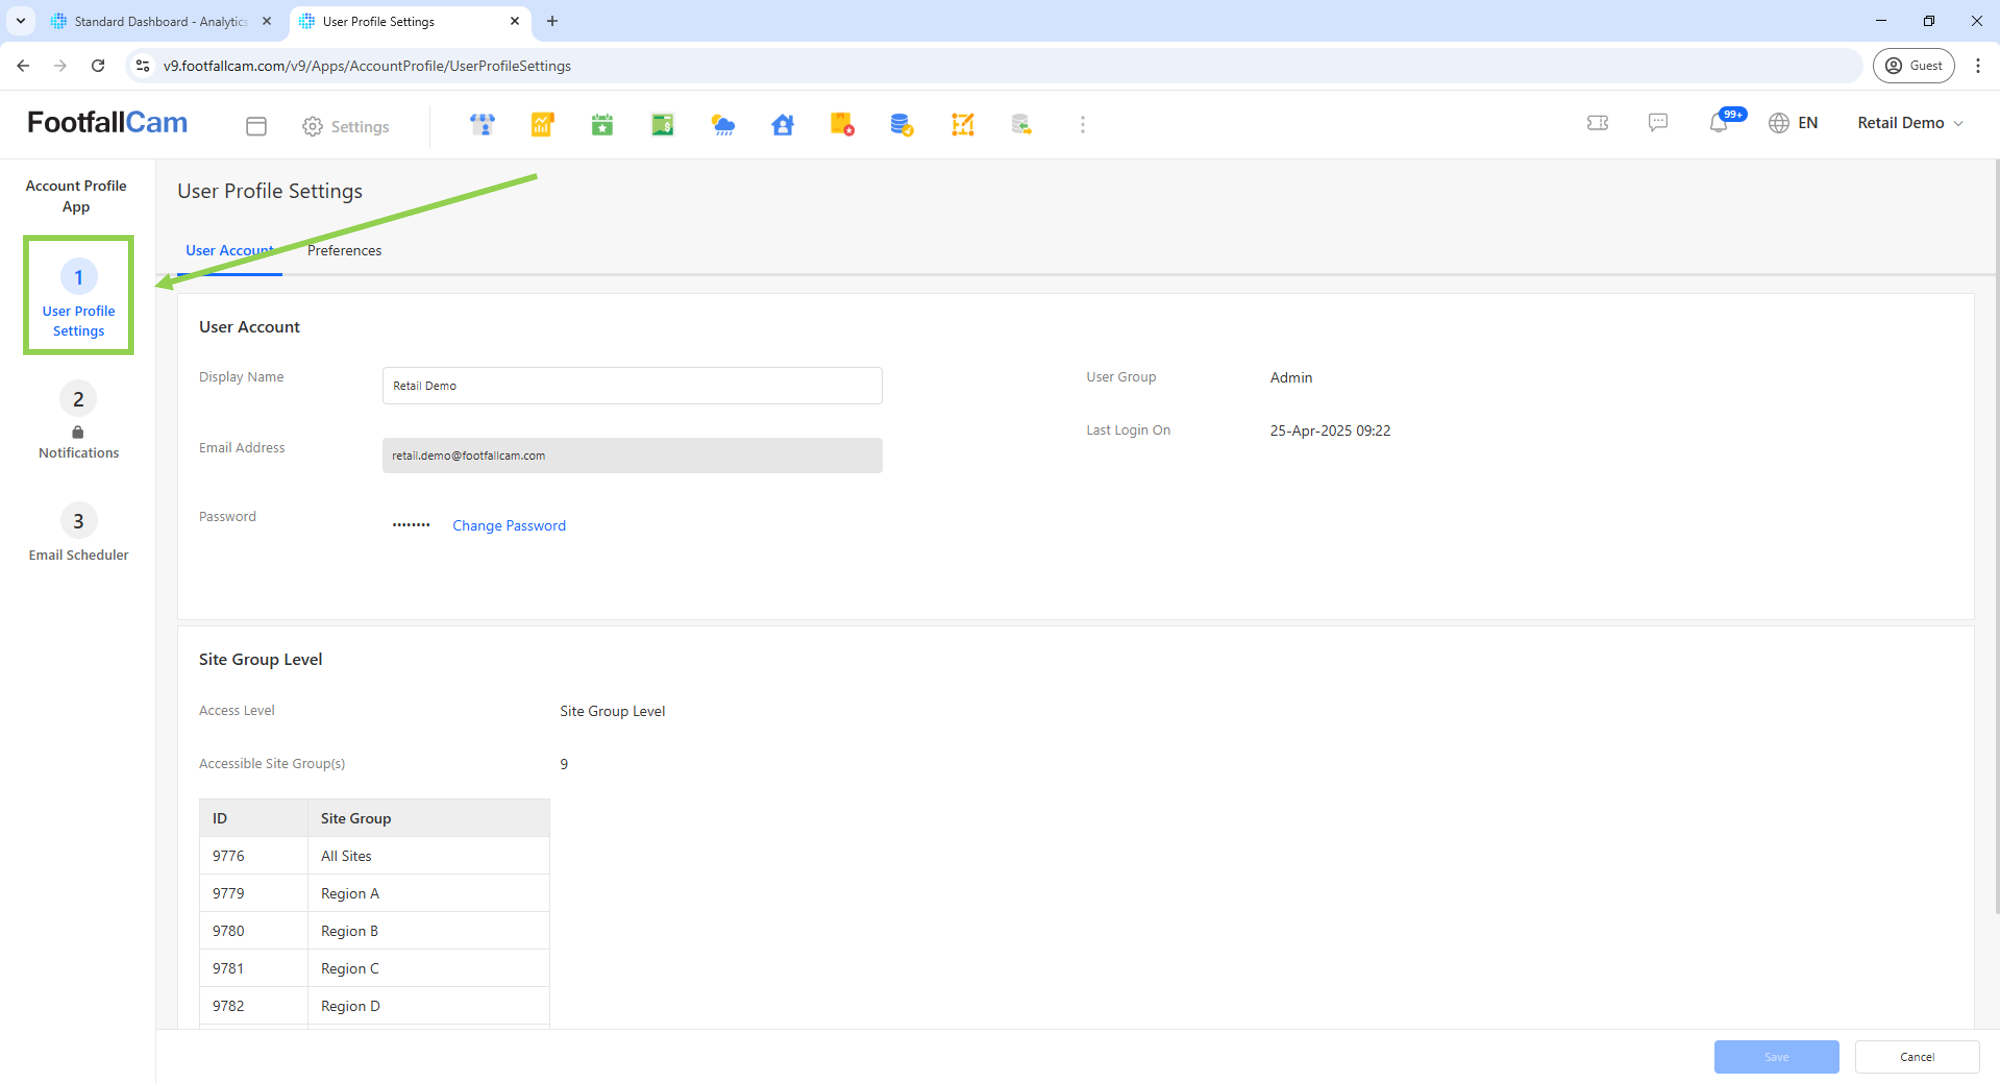
2.1. User Account
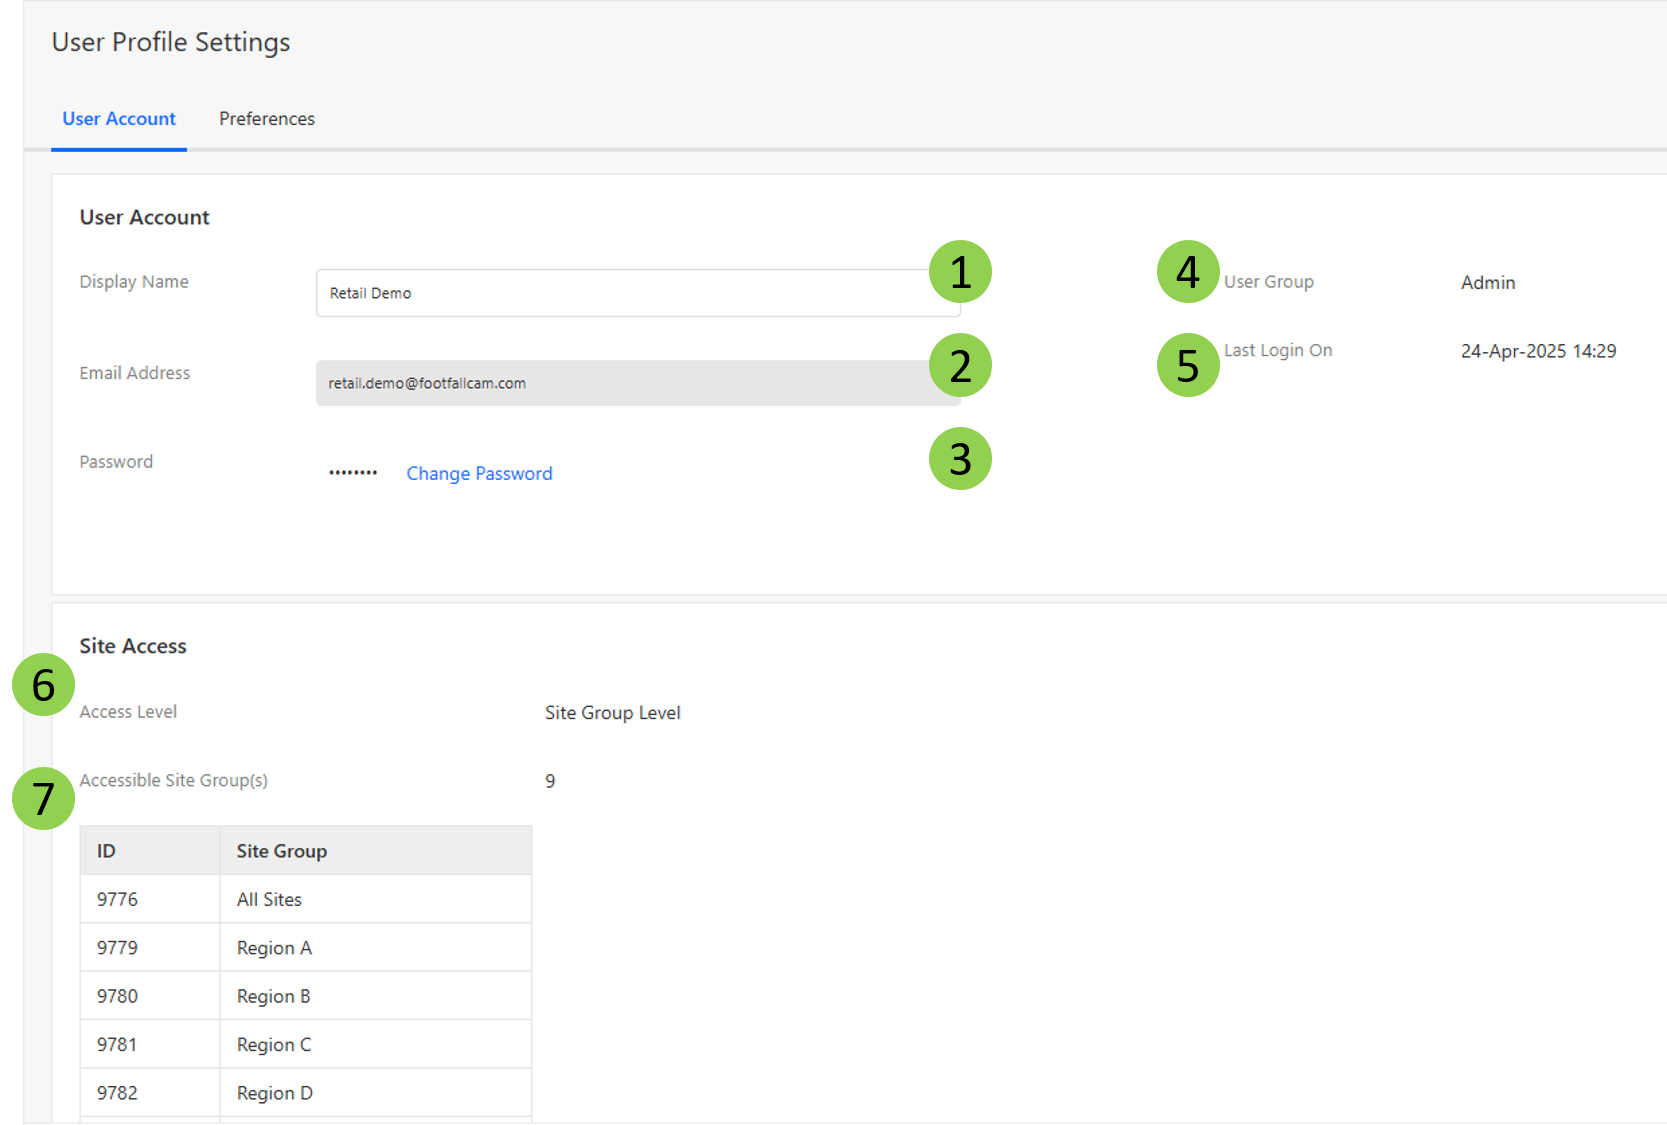
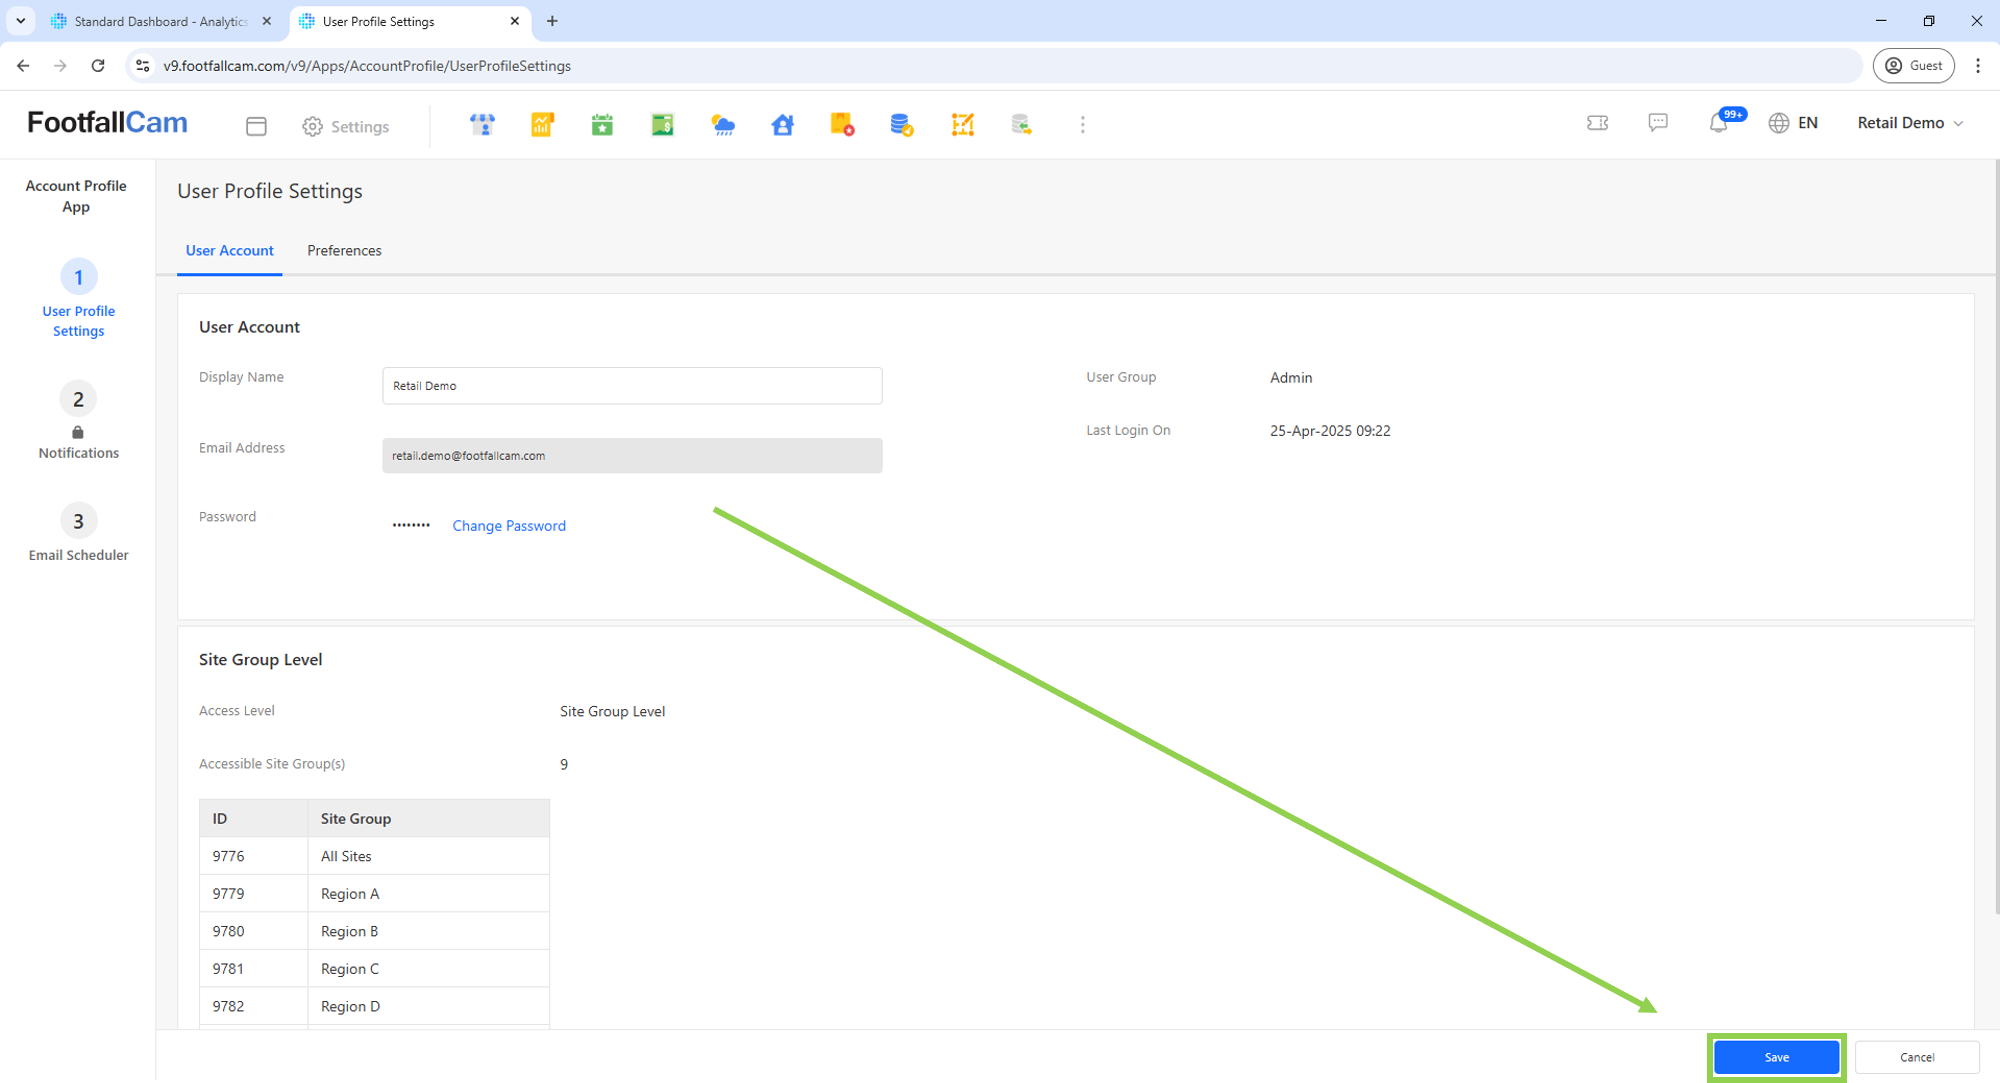
This section summarises the attributes of the user's account. Certain attributes can be updated, while others are "Read Only".
| Item | Description | Can be updated? |
| 1. Display Name | The name that is displayed to all other users of the same company. For example, other users will observe this name in an action log and recognise the identity of the user who committed the action. | Yes - Update and click "Save" |
| 2. Email Address | The user's email address. | Read Only |
| 3. Password | Click the "Change Password" link to update the password. | Yes - See "2.1.1. Change Password" |
| 4. User Group | The name of the user group to which the user belongs. | Read Only |
| 5. Last Login On | The date and time of the latest login. | Read Only |
| 6. Access Level | Shows the user's access level as "Site" or "Site Group". | Read Only |
| 7. Accessible Site(s)/Site Group(s) | Shows the accessible sites or site groups and their IDs. | Read Only |
To update any details that can be updated from this tab, click the "Save" button in the bottom right corner.
2.1.1. Change Password
To change the password, the user can follow the steps below:
Step 1 - In the "User Account" tab, click the "Change Password" link.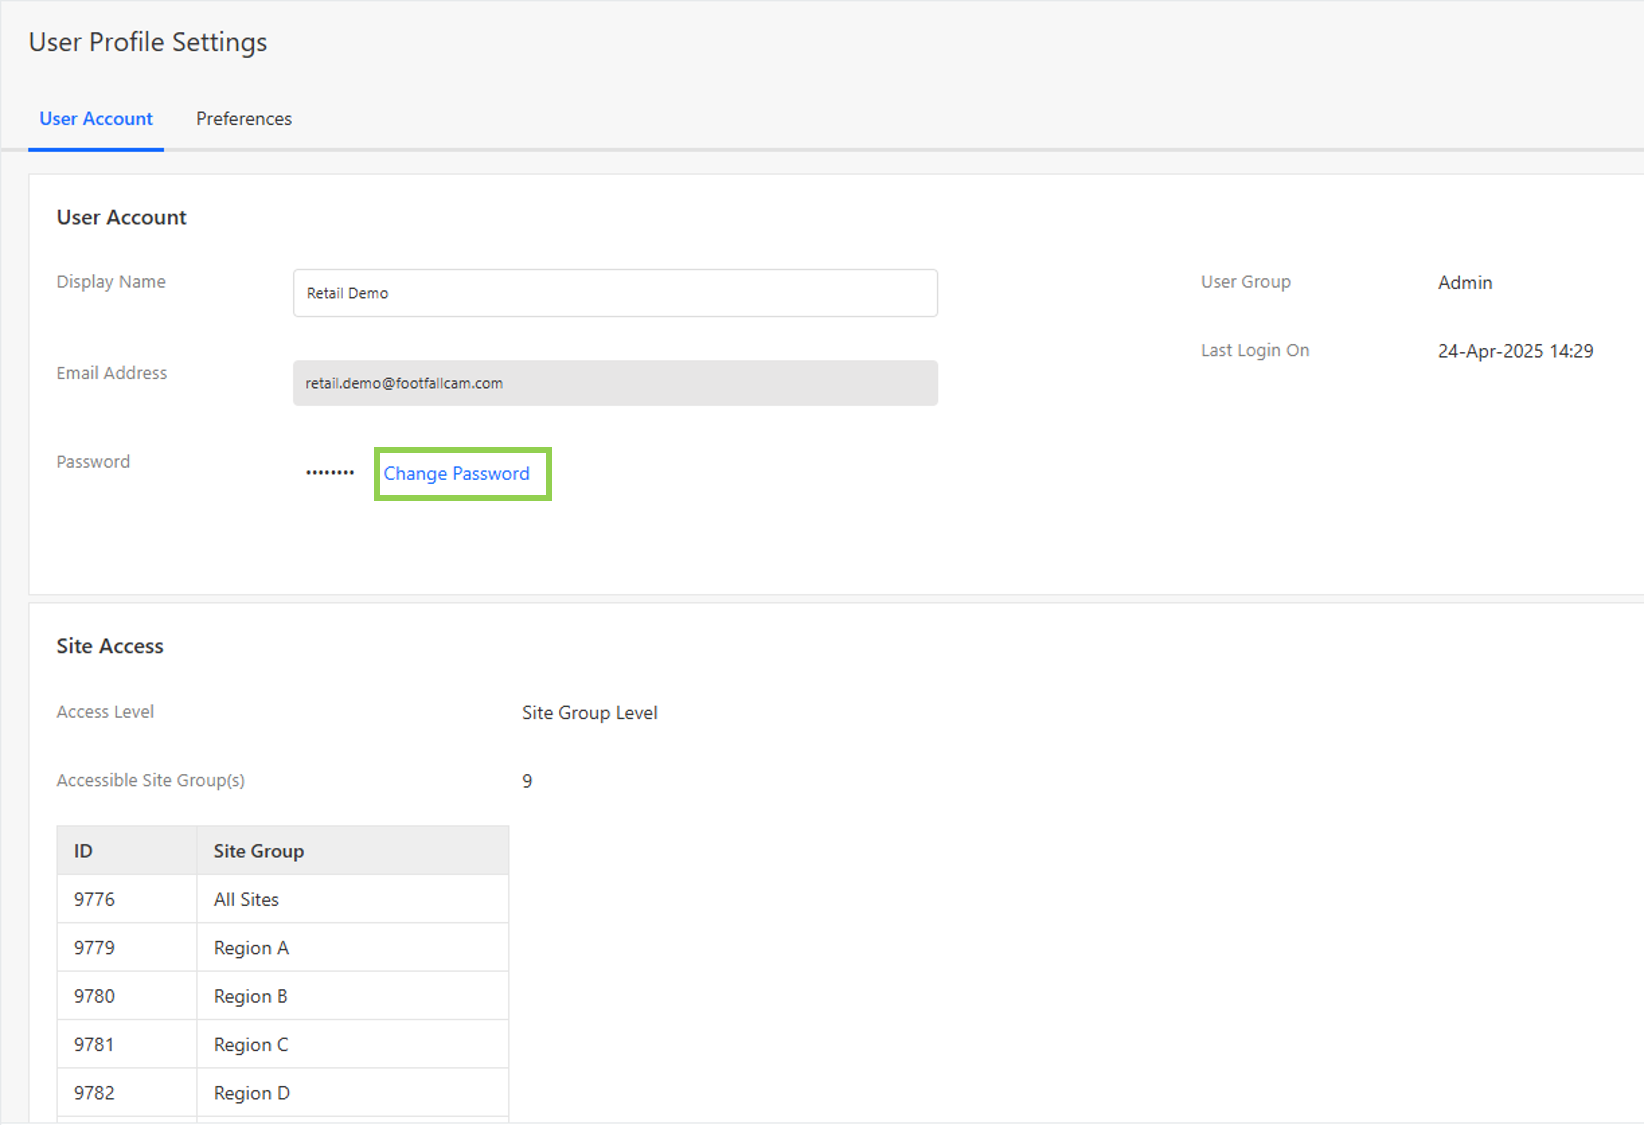
Step 2 - You are now directed to the "Change Password" page.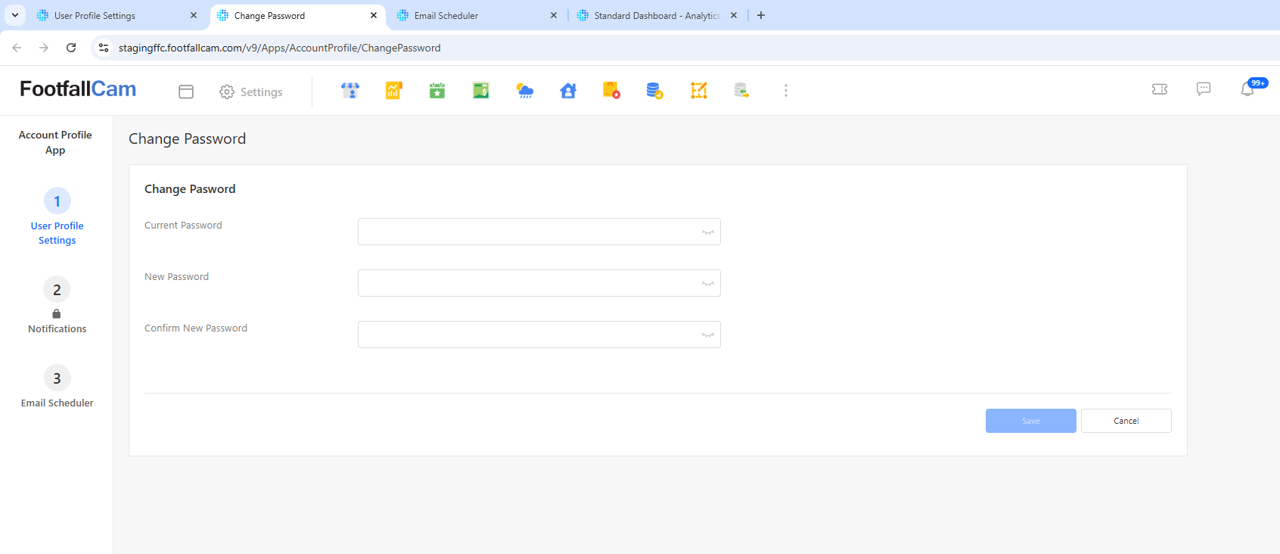
Step 3 - Key in the new password and confirm it. The new password must possess the following criteria:
- At least 8 characters
- At least one uppercase
- At least one lowercase letter
- At least one number
- At least one of the following symbols: @$!%*?&#
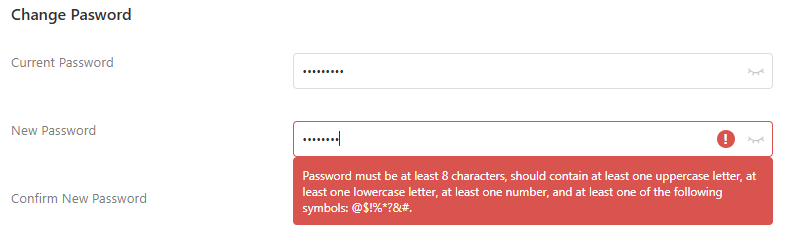
Step 4 - Click the "Save" button to complete the process.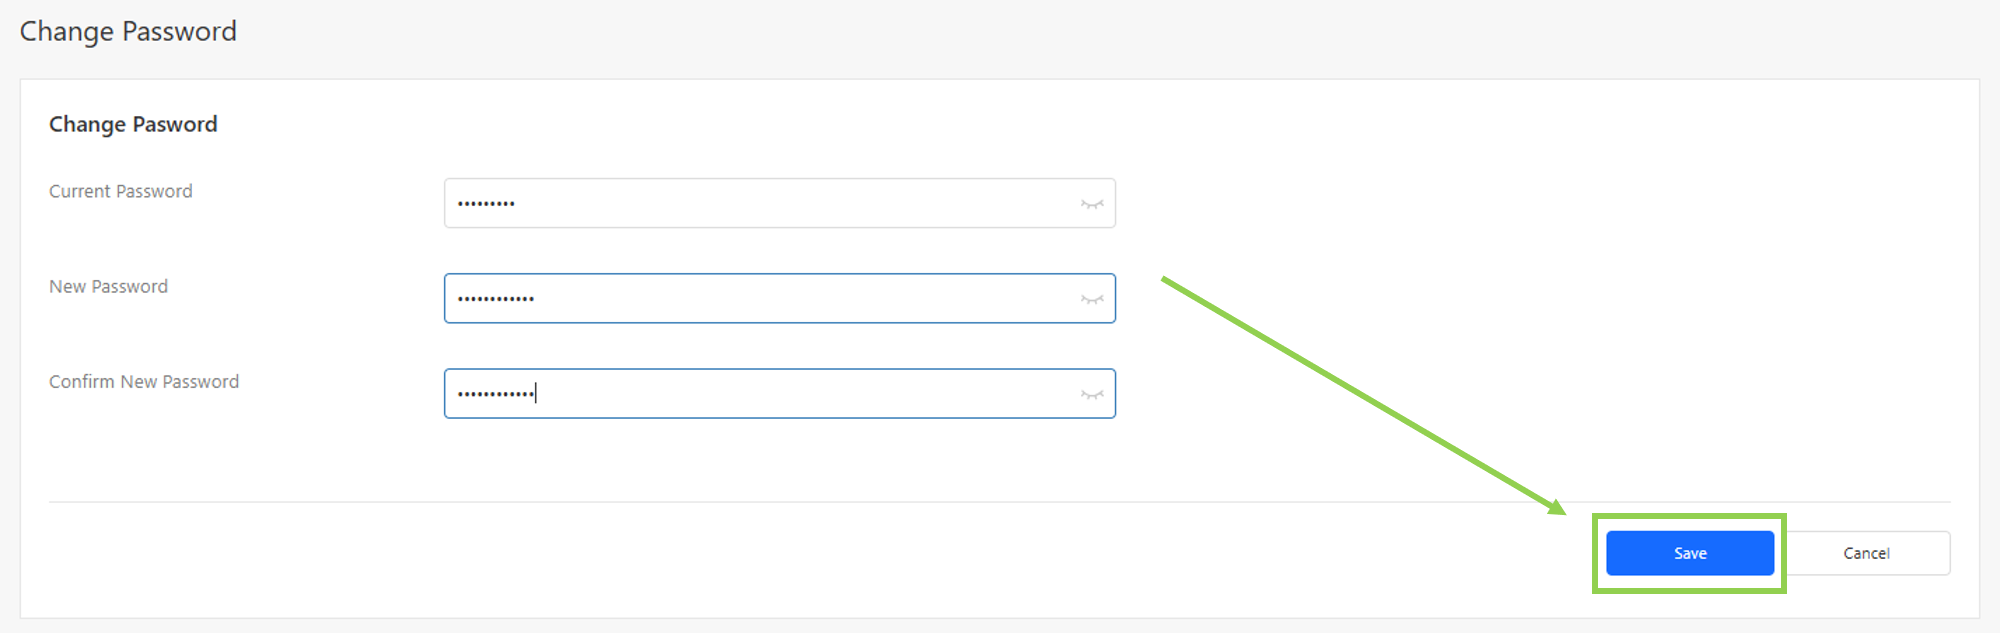
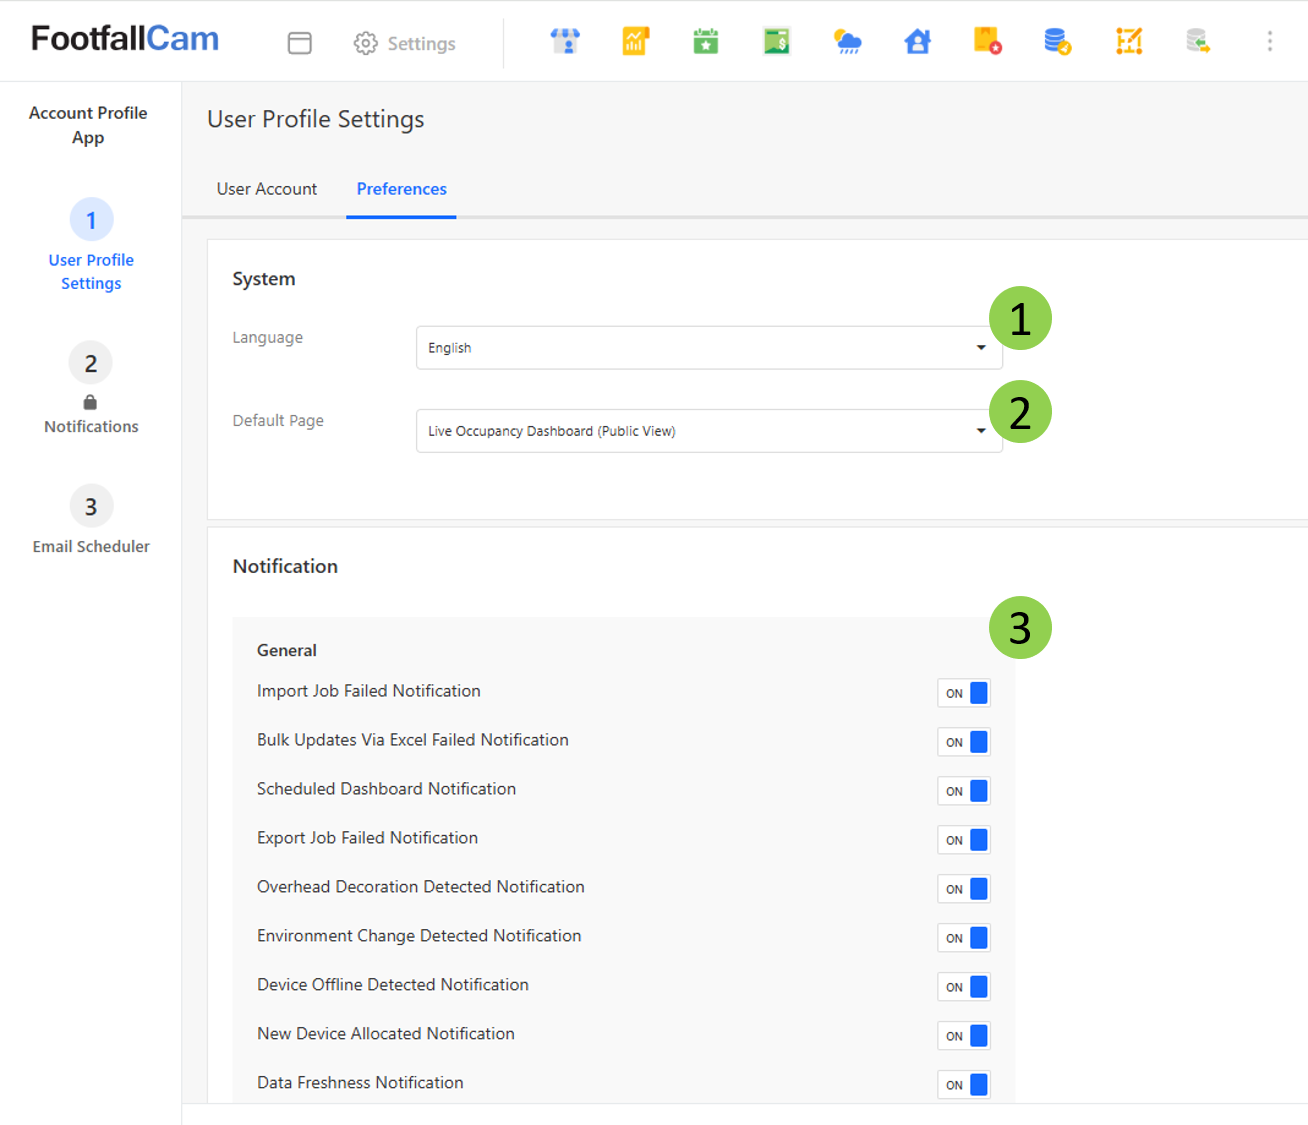
2.2. Preferences
This section summarises the preferences of the user's account.
| Item | Description | Can be updated? |
| 1. Language | The display language for this user. | Yes - Update and click "Save" |
| 2. Default Page | The first page that the user observes upon login. | Yes - Update and click "Save" |
| 3. Notification | A list of all current notification types. This list is subject to change without prior notice, as new notification types are introduced while older notification types may be retired. By default, a user will receive all types of notifications. However, if he wishes to opt out of a certain type of notification, he can turn it off in this list. | Yes - Update and click "Save" |
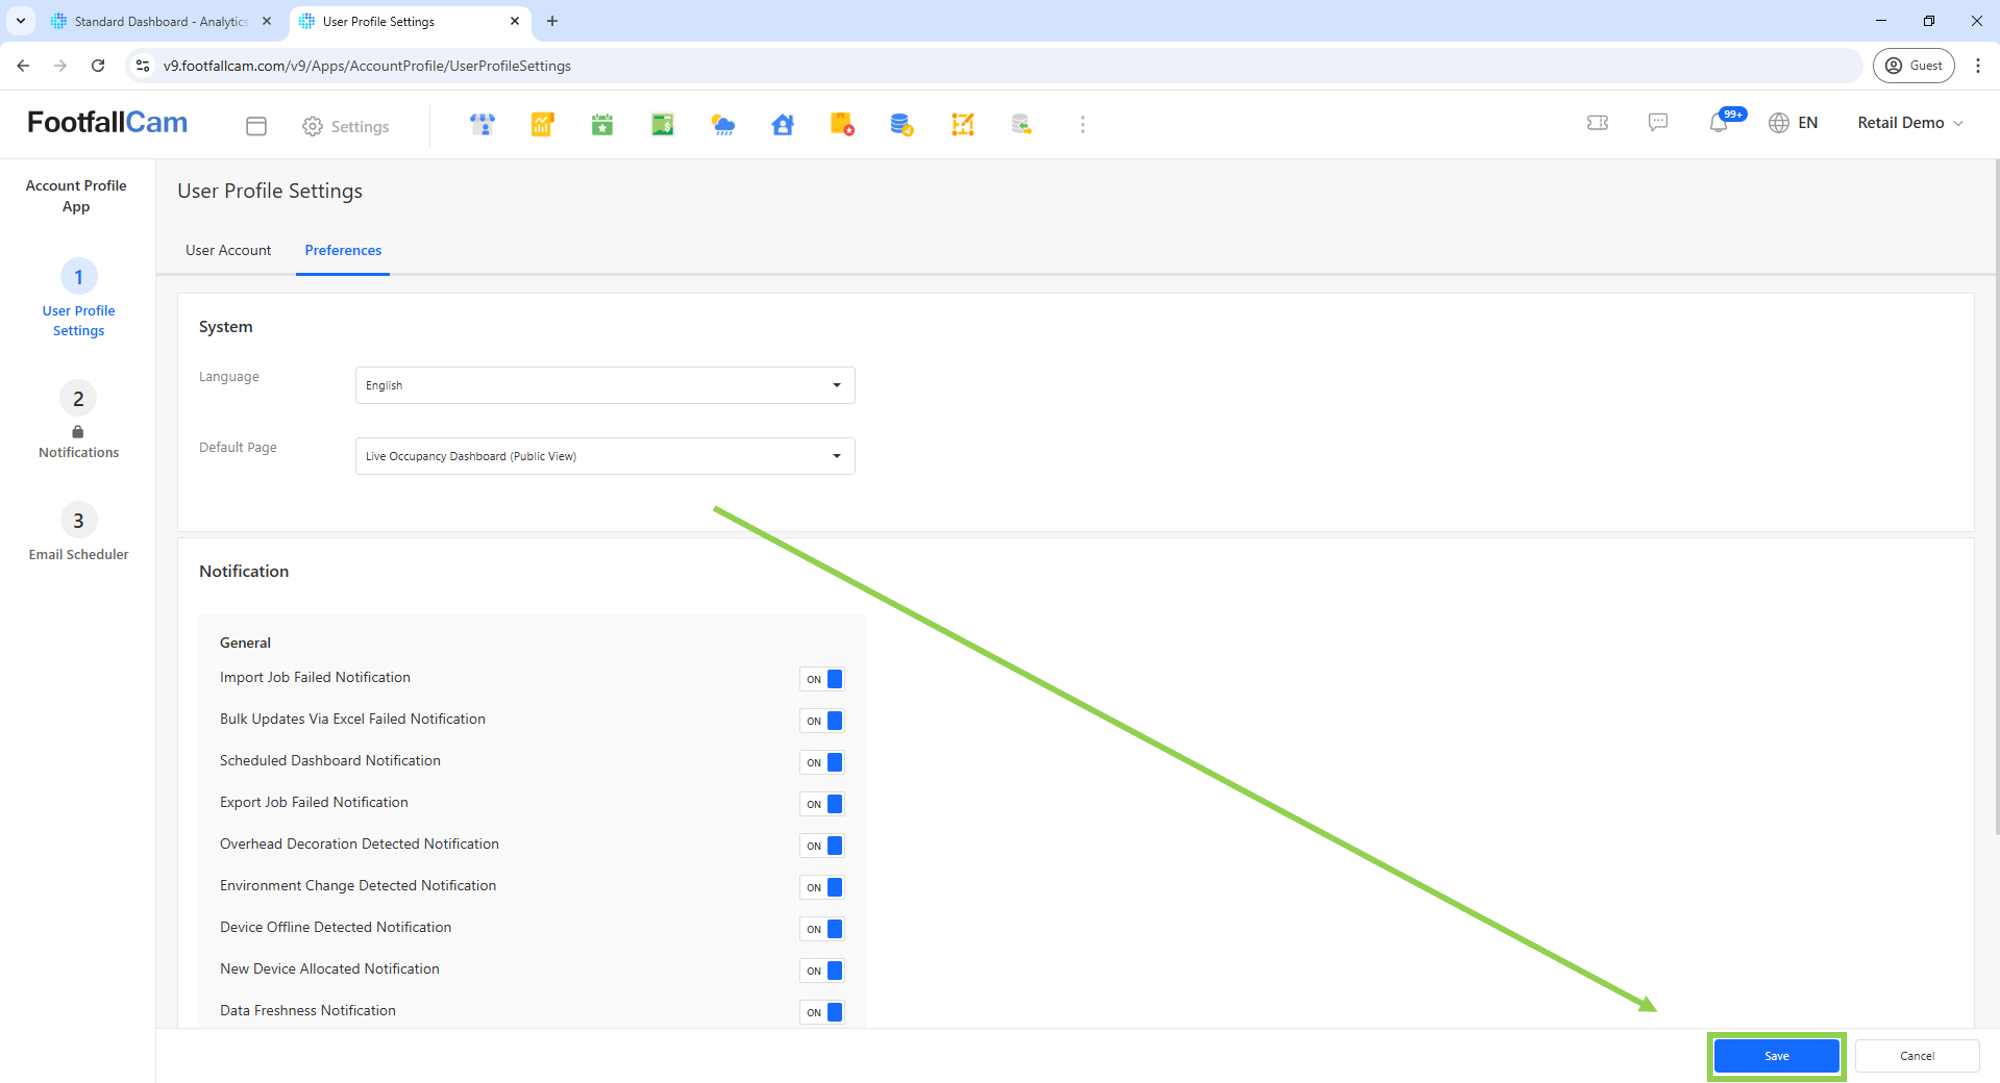
To update any details that can be updated from this tab, click the "Save" button in the bottom right corner.
3. Email Scheduler
What is a Email Scheduler?
The email scheduler allows the user to schedule a certain report to be delivered to selected recipients.
Who is it for?
The email scheduler allows business analysts to schedule recurring reports to observe the trend of data over time.
Where can I see it?
Step 1 - Access to FootfallCam Analytic Manager V9™: http://v9.footfallcam.com/Account/Login via web browser.
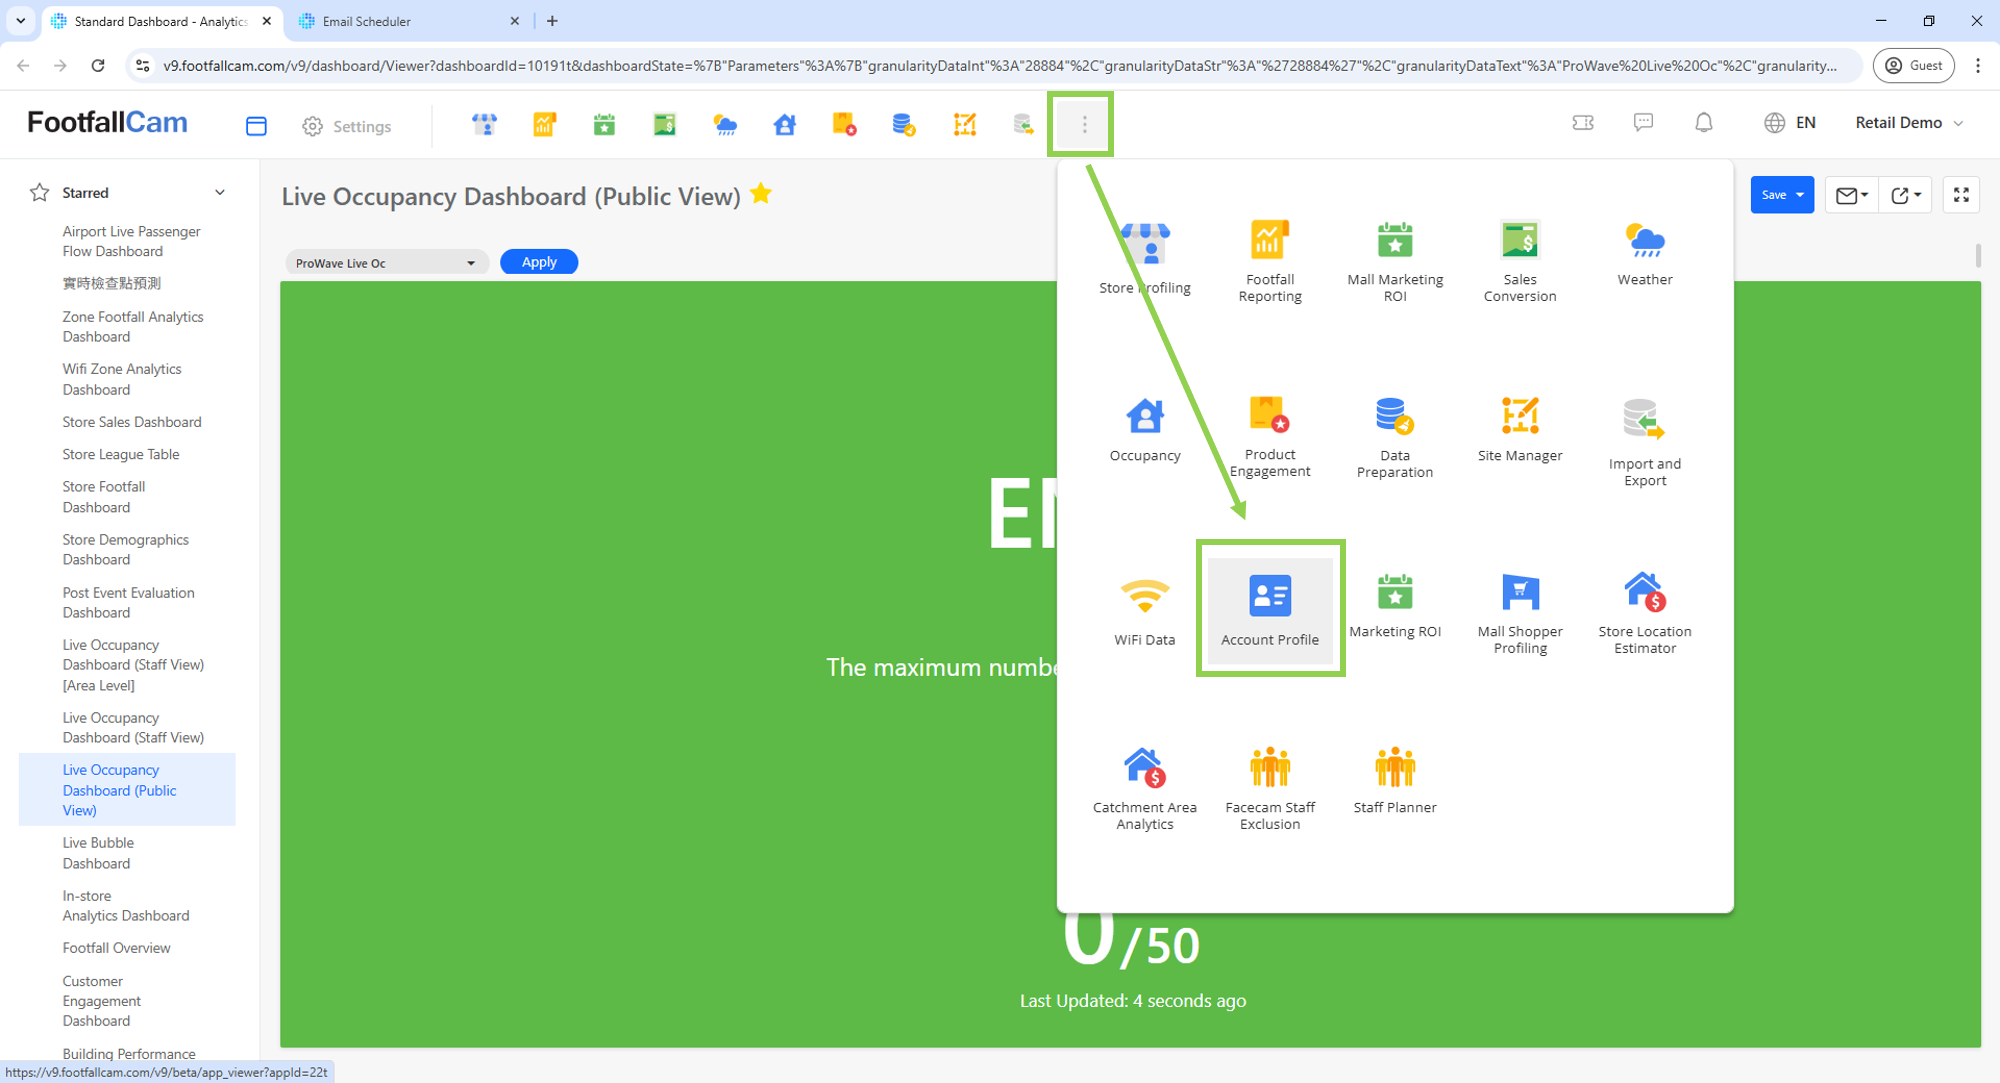
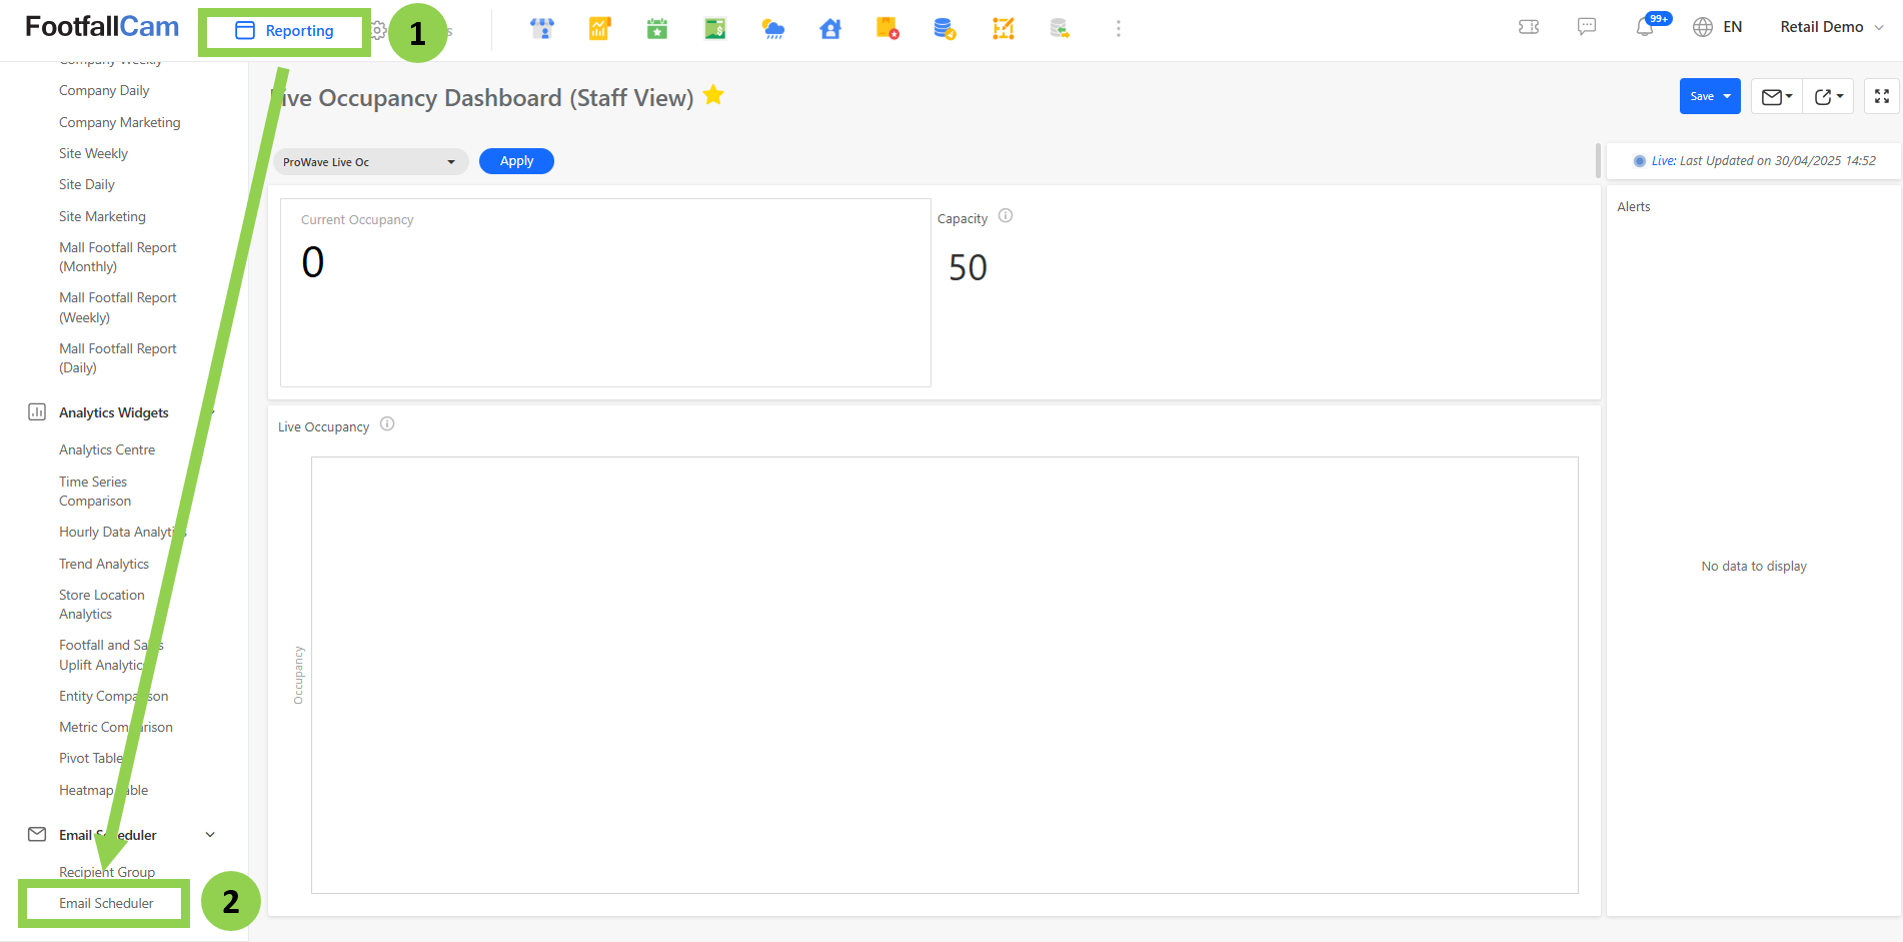
Step 2 - Navigate to Three-dot menu (⋮) > Account Profile > Email Scheduler to access the Email Scheduler list.
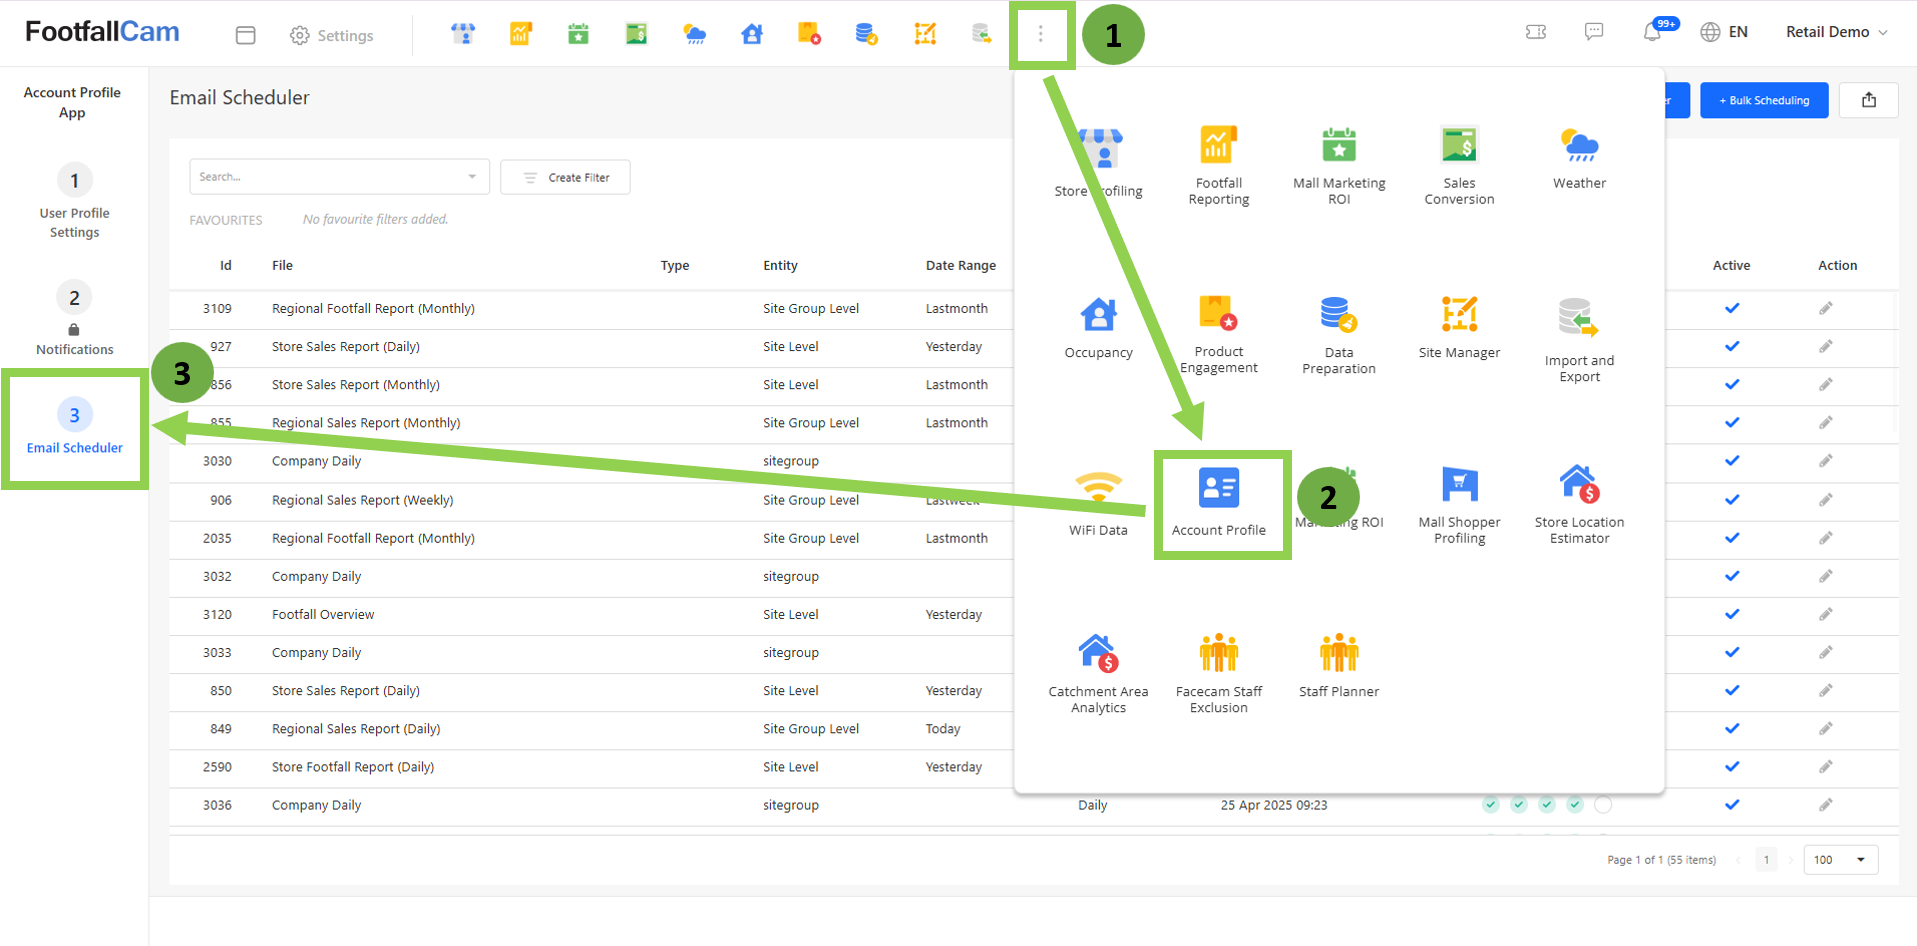
Hint: User can also access the Email Scheduler list by navigating to Reporting > Email Scheduler
3.1 How can I create a new scheduler?
Step 1 - At Email Scheduler page, click on "+ New Scheduler" button.
Step 2 - Select the type of the scheduler , then choose the specific report from the list. The system will automatically fill up the entity level and time granularity details. Click "Create" button to continue.
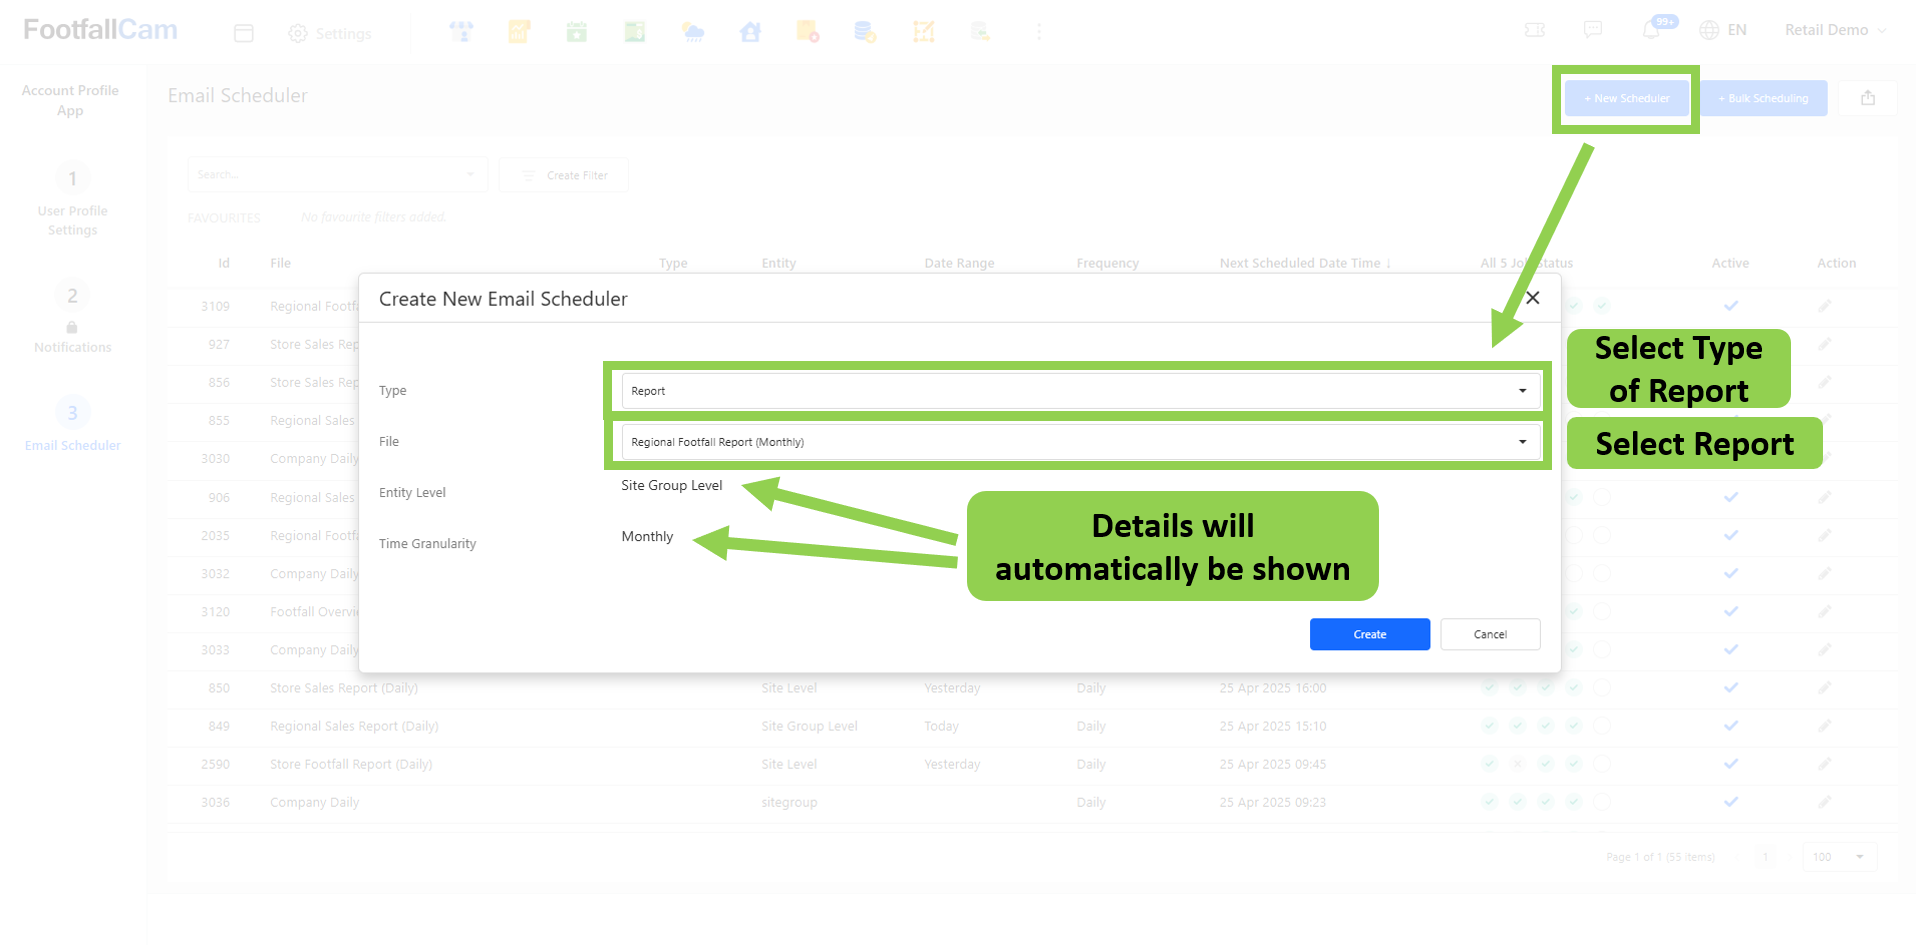
| Item | Description |
| 1. Type | Select the type of reporting to be scheduled, whether it is Report, DevExpress Report, Standard Dashboard, Custom Dashboard, Standard Analytic or Custom Analytics. |
| 2. File | Select the desired reporting name. |
| 3. Entity Level | Display only, showed the entity level of the selected reporting file. |
| 4. Time Granularity | Display only, showed the default time granularity of the selected reporting file. |
Step 3 - In the Email Scheduler Settings page, user is required to fill up more details of the created report scheduler job then click on "Save" button.
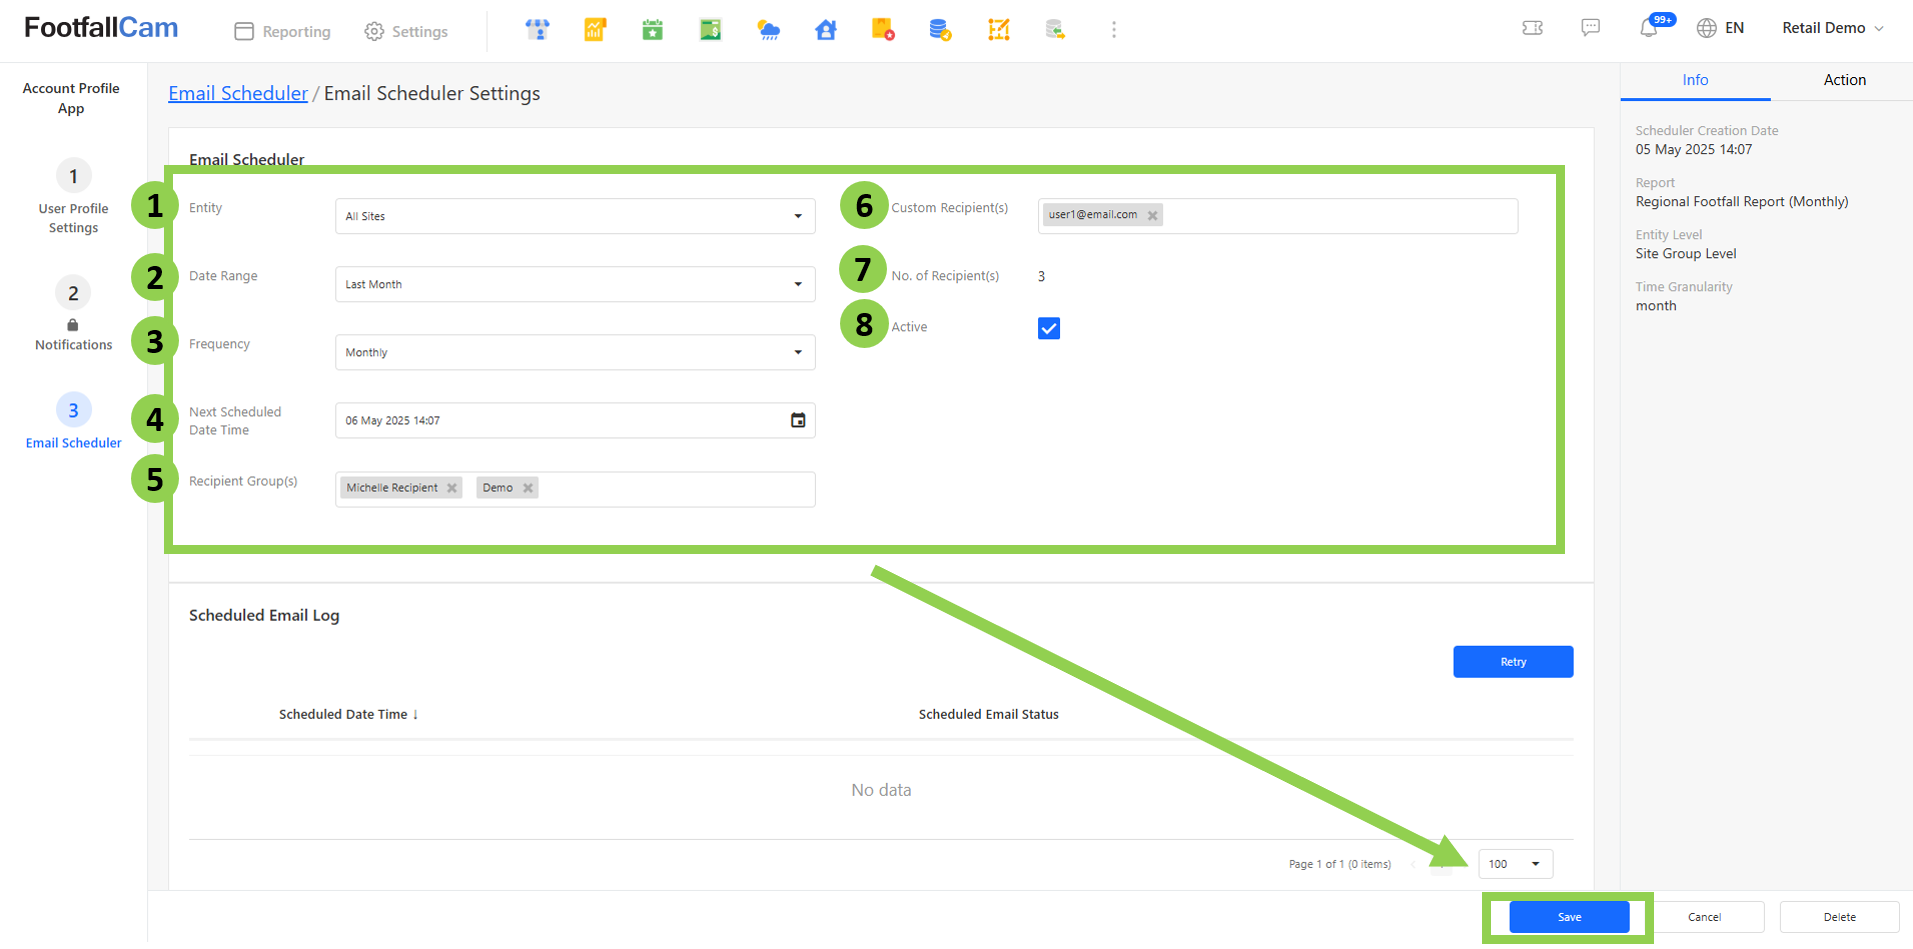
| Item | Description |
| 1. Entity | Select the entity to be included in the report |
| 2. Date Range | Select the date range of the data. |
| 3. Frequency | How frequent the report should be generated. |
| 4. Next Scheduled Date Time | Select the next date time to start scheduling report. |
| 5. Recipient Group(s) | Select predefined recipient groups to receive the report. Please refer to this link to create or edit the recipient group. |
| 6. Custom Recipient(s) | Input custom recipients to receive the report. |
| 7. No. of Recipient(s) | Number of recipients that will receive the report. |
| 8. Active | The status of the report scheduler, whether it is active or inactive. |
3.2 How can I update the details of a scheduler?
Step 1 - At Email Scheduler page, navigate to the email scheduler job that you wish to update and click on the pen icon to go into email scheduler settings page.
Hint : You can utilize the "Search" or "Filter" function to obtain the required scheduler if the list is too long.

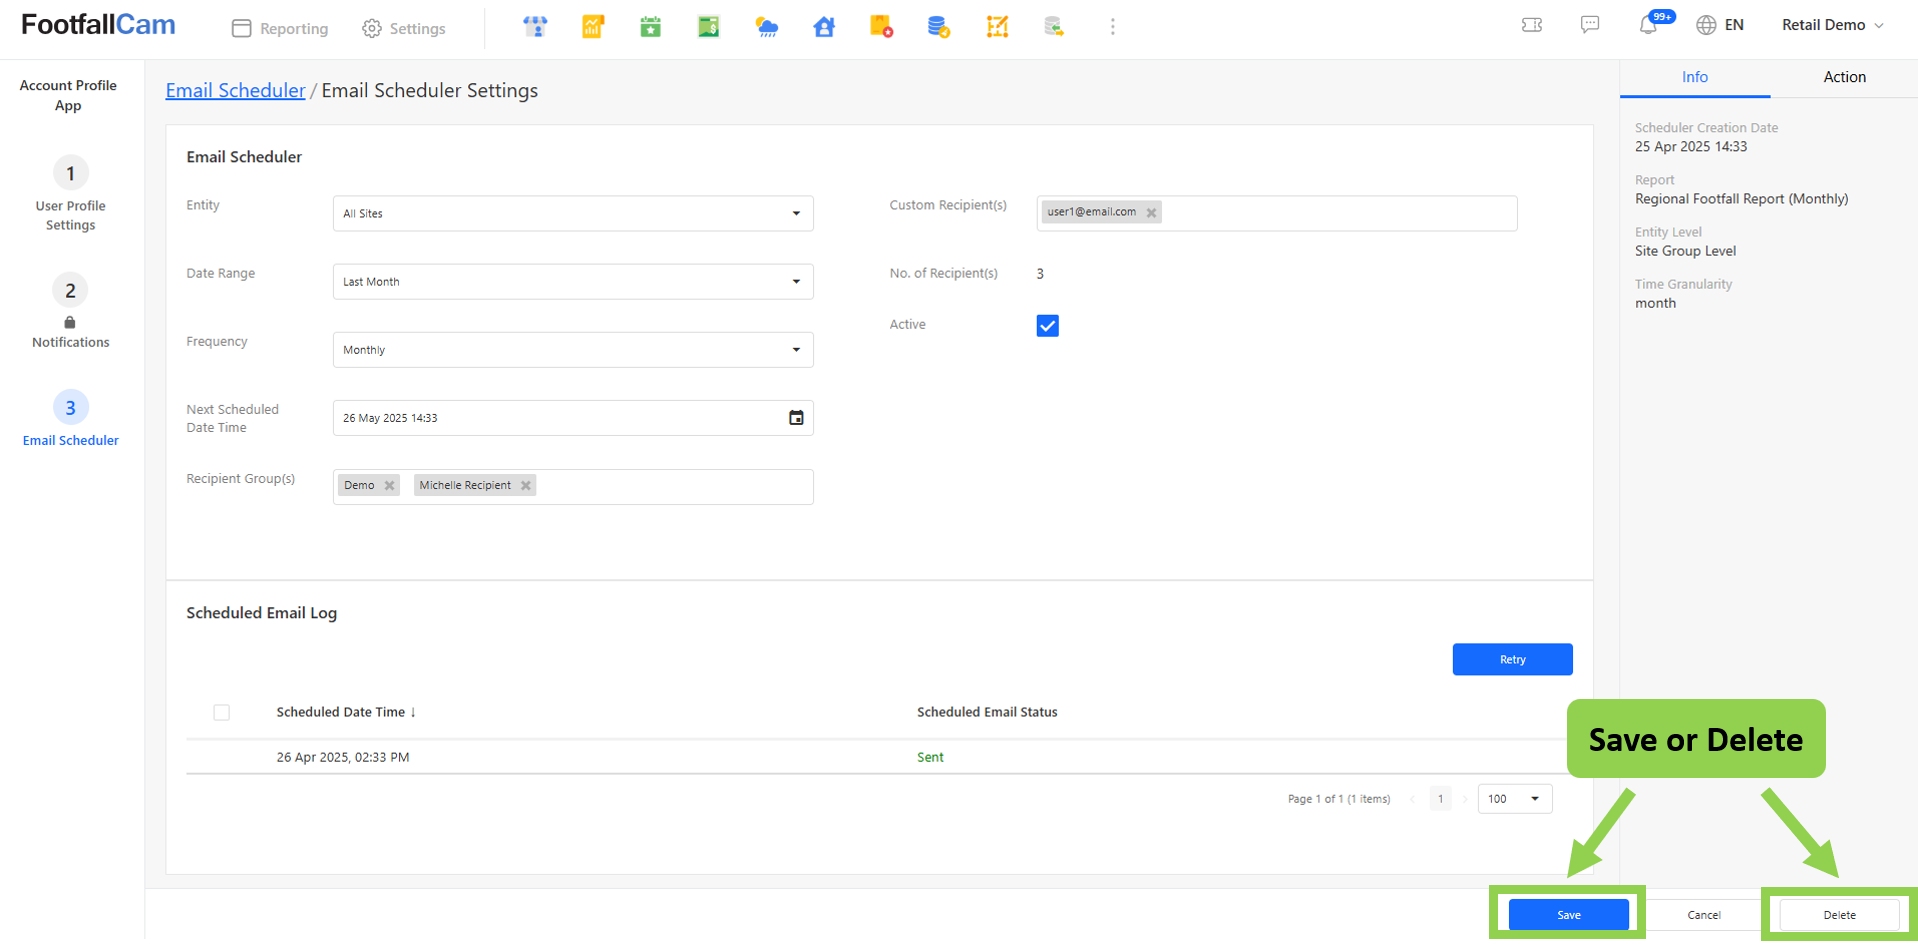
Step 2 - Update the details you wish and click on the "Save" button to save your changes.
3.3 How can I delete a scheduler?
Step 1 - At Email Scheduler page, navigate to the email scheduler job that you wish to delete and click on the pen icon to go into email scheduler settings page.
Step 2 - Click on the "Delete" button to delete the email scheduler job.
3.4 Can I bulk-schedule for multiple entities?
Yes! You can bulk create the email scheduler for multiple entities.
Step 1 - At Email Scheduler page, click on the "+ Bulk Scheduling" button.
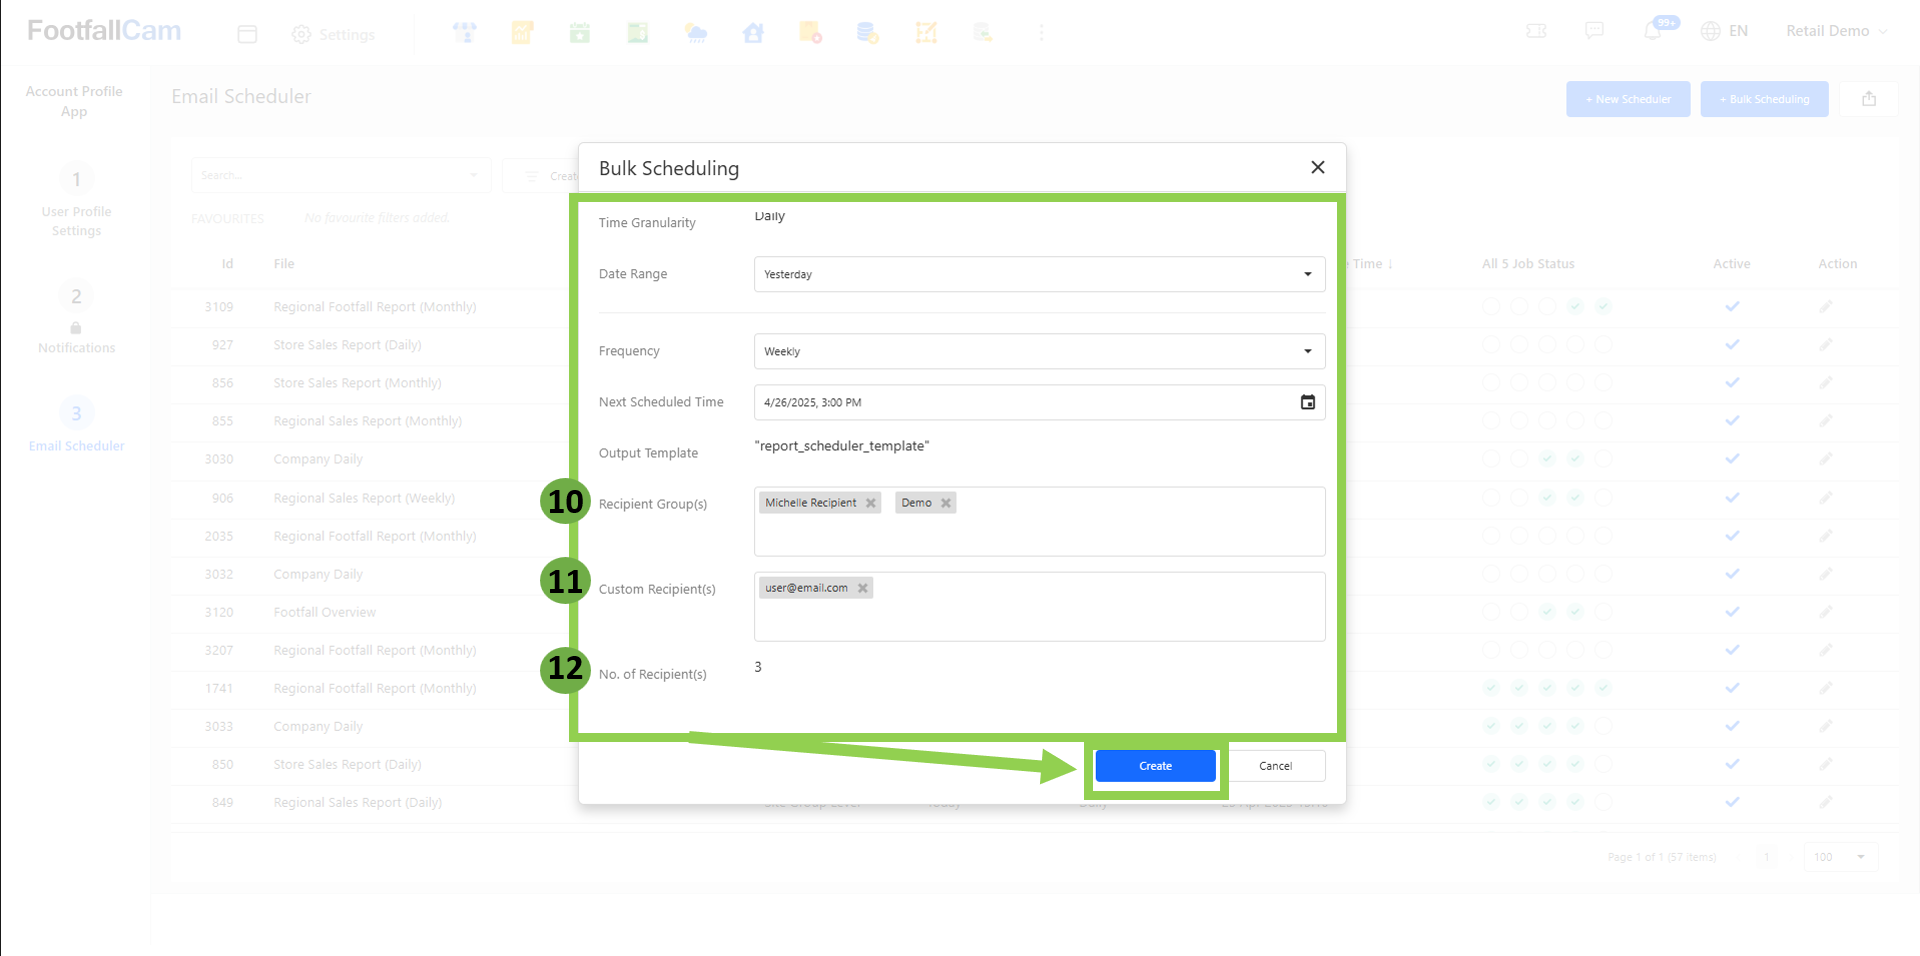
Step 2 - Fill up the necessary details then click on "Create" button to create schedulers. For each of the "Entity" that you've selected, a scheduler will be created.
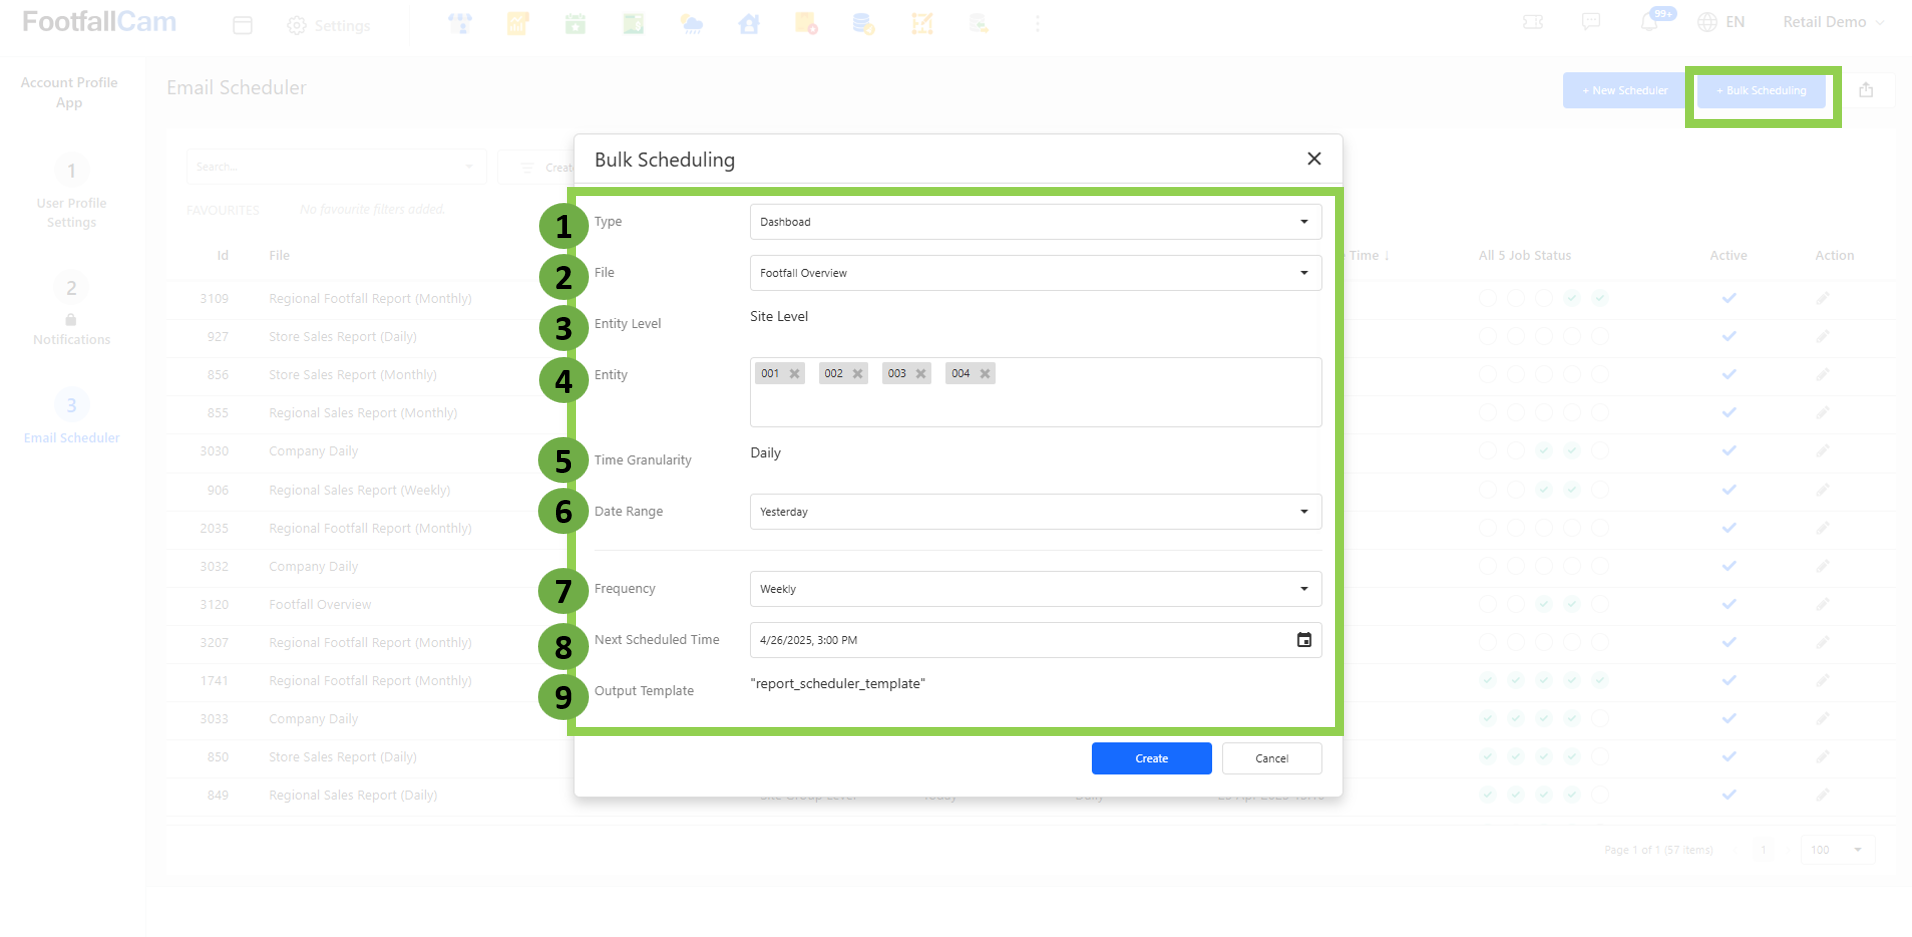
| Item | Description |
| 1. Type | Select type of report to generate. |
| 2. File | Select specific report of the selected type to generate. |
| 3. Entity Level | Auto generated based on selected report type. |
| 4. Entity | Select the entity to be included in the report. |
| 5. Time Granularity | Auto generated based on the selected report type. |
| 6. Date Range | Select the date range of the data. |
| 7. Frequency | How frequent the report should be generated. |
| 8. Next Scheduled Time | Select the next date time to start scheduling report. |
| 9. Output Template | Auto generated based on selected report type. |
| 10. Recipient Group(s) | Select the predefined recipient group to receive the report. |
| 11. Custom Recipient(s) | Select custom recipients to receive the report. |
| 12. No. of Recipient(s) | Number of recipients that will receive the report. |
3.5 What will I receive?
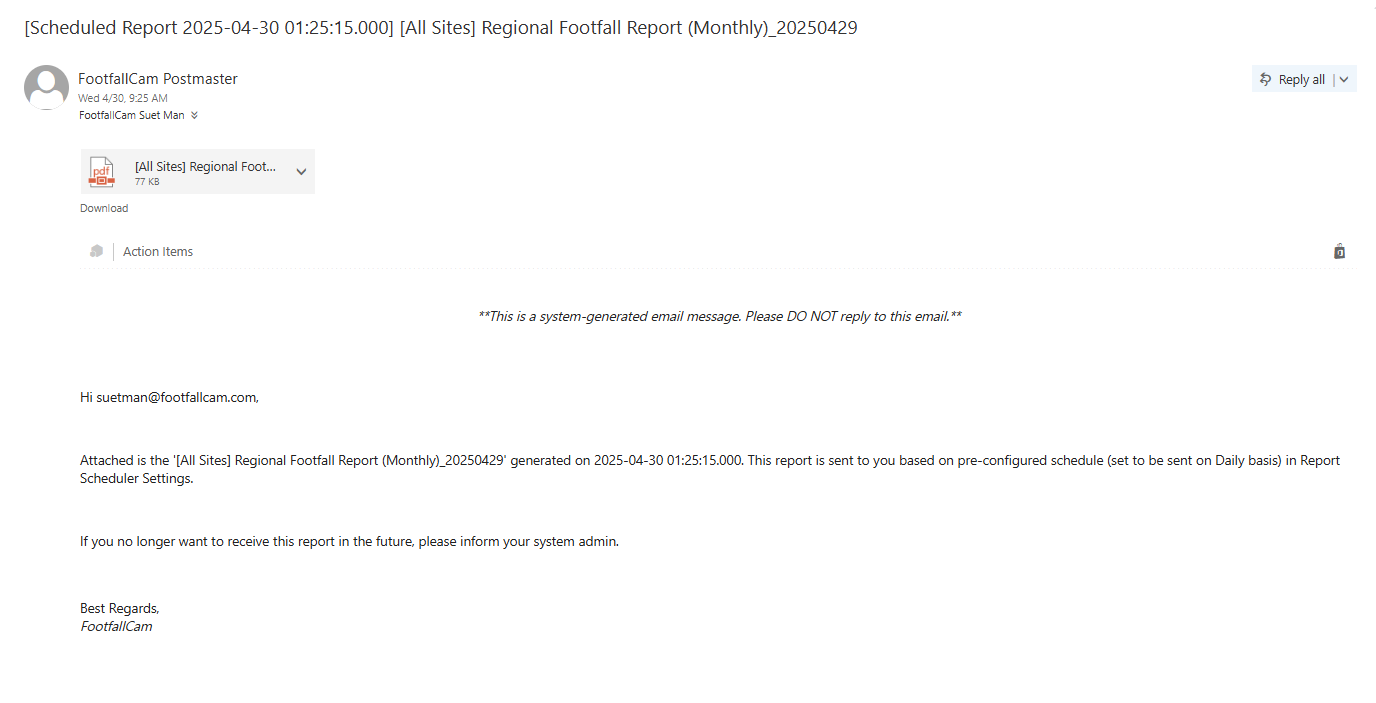
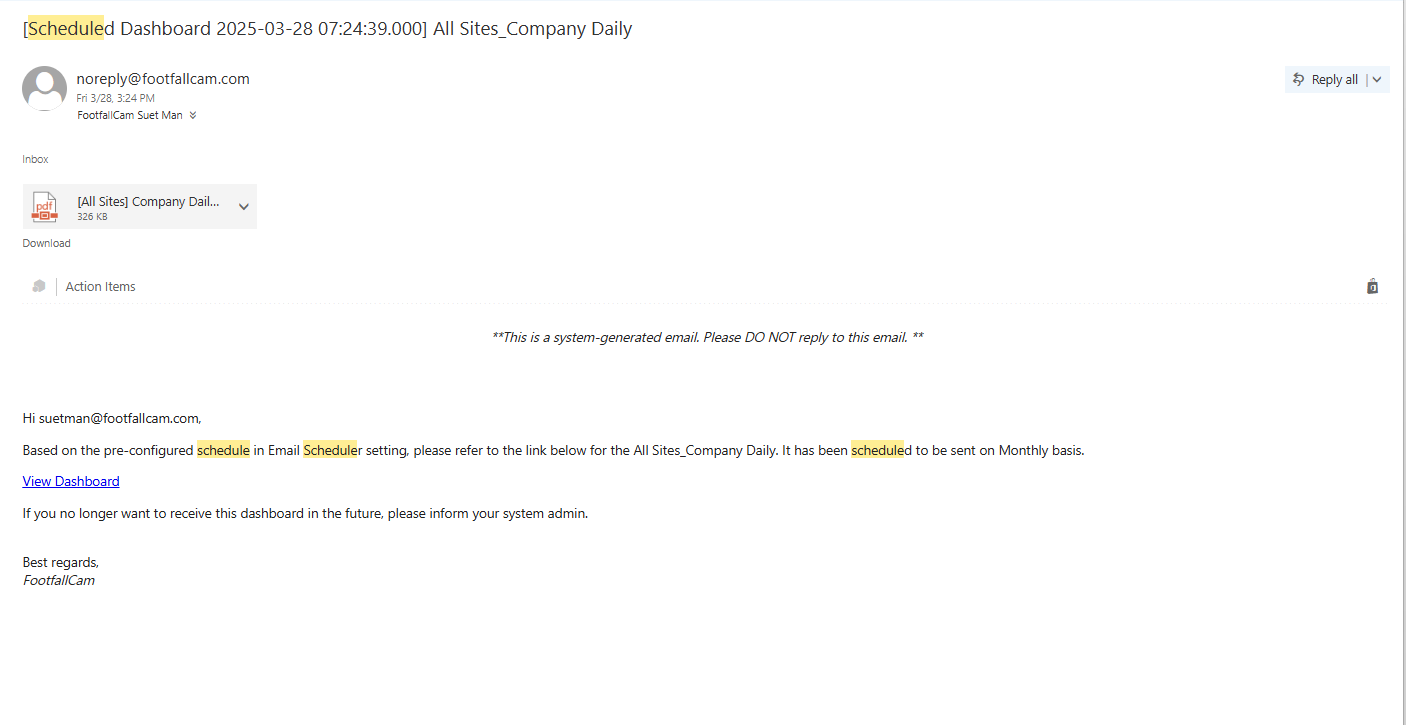
At the scheduled time, you will receive an email from the FootfallCam Postmaster based on the type of report.
DevExpress Report Type: You will receive an email with the report attached in PDF format.
Standard Analytic, Standard Dashboard and Custom Dashboard Type: You will receive an email with the public URL to access the dashboard.

Report Type: You will receive an email with the report or standard analytic attached in PDF format, along with the public URL to open the page.
3.6 Can I retry last scheduler job?
Yes! You can retry last scheduler job, regardless of whether it completed successfully or failed.
Step 1 - At Email Scheduler page, navigate to the email scheduler job that you wish to retry and click on the pen icon to go into email scheduler settings page.
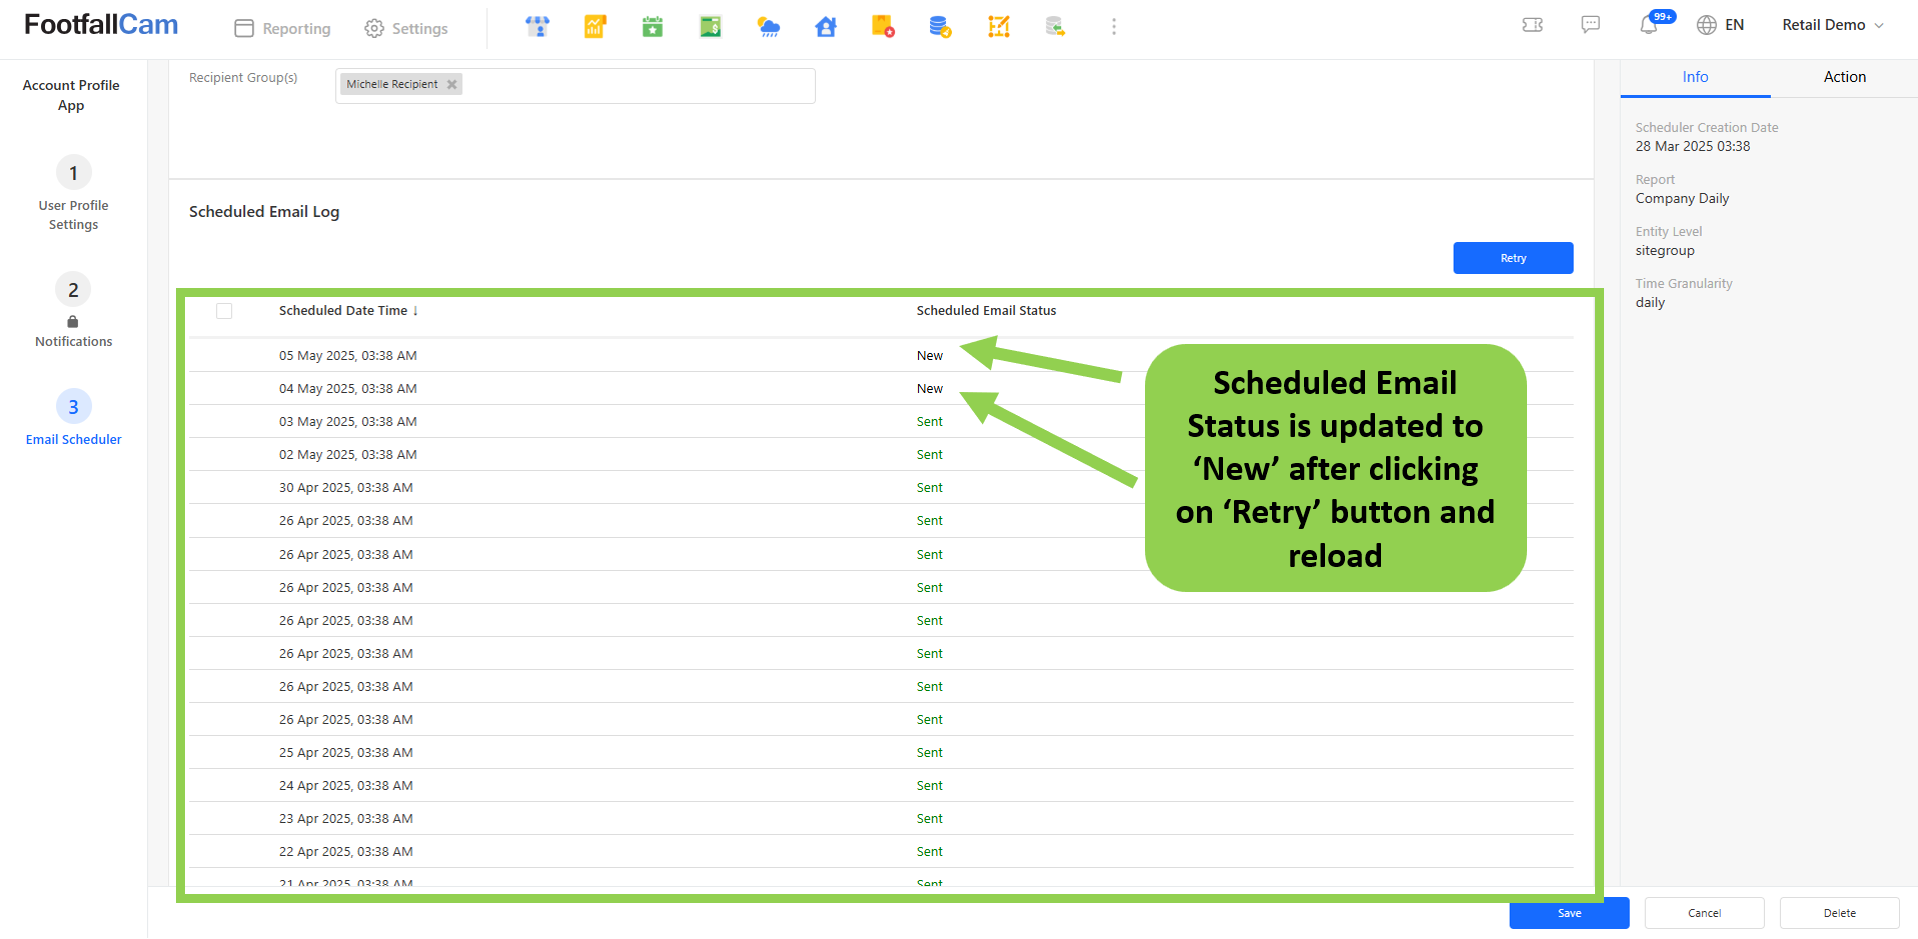
Step 2 - Navigate to the 'Scheduled Email Log' section in the email scheduler settings page. Here, user will see a table listing all previously scheduled report instances. Each row displays:
-
Scheduled Date Time: The exact date and time when the report was scheduled to run.
-
Status: Indicate one of the following five statuses of the report instance
| Status | Description |
| New | The report instance has been newly created and is awaiting processing. |
| Processing | The system is currently generating the report and preparing to send it to the designated recipients. |
| Sent | The report has been successfully generated and delivered to the intended recipients. |
| Failed | The report generation or sending has failed. The system will automatically attempt to retry. |
| Permanently Failed | After 3 retry attempts, the system failed to generate or send the report. No further action will be taken automatically. |
Step 3 - Select last scheduled job that you want to retry. Click 'Retry' button.
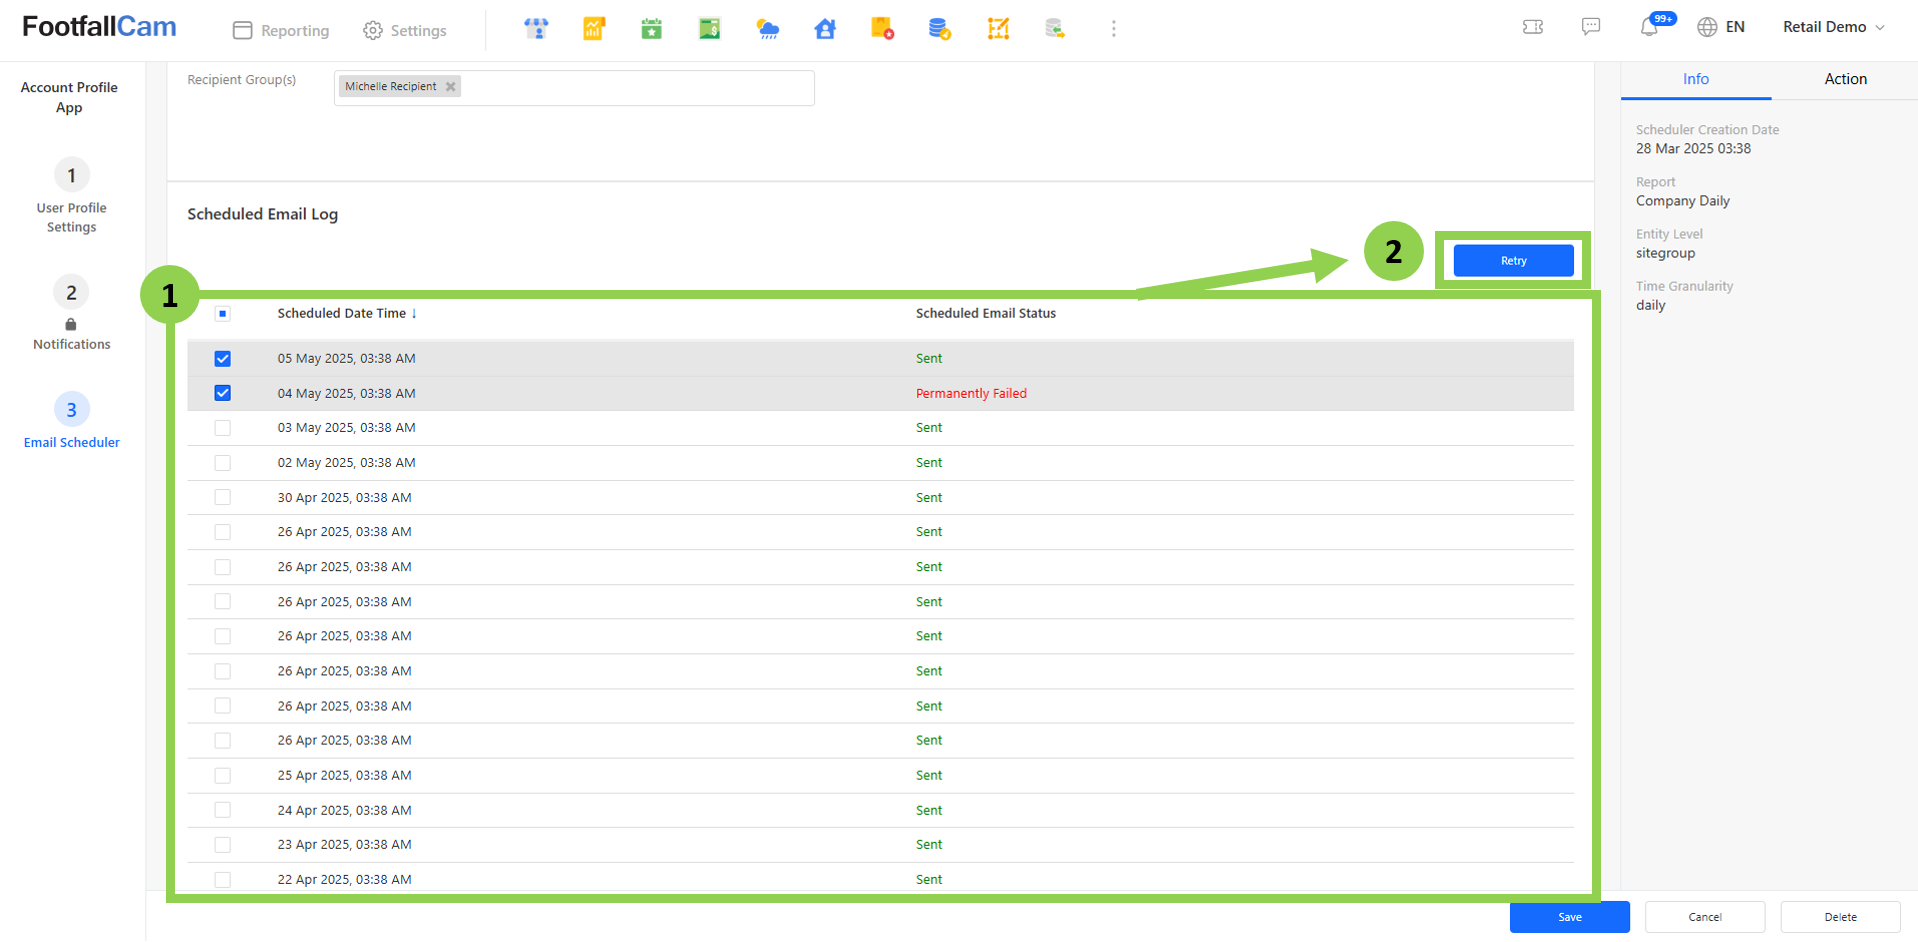
The selected job will retry and update the status to 'New'. However, the job may fail again after a retry. If the status shows "Permanently Failed", please contact [email protected] for assistance.