


Manage User Group
Update User Group
STEP 1 - Click on Setting > User Group to access the User Group page.
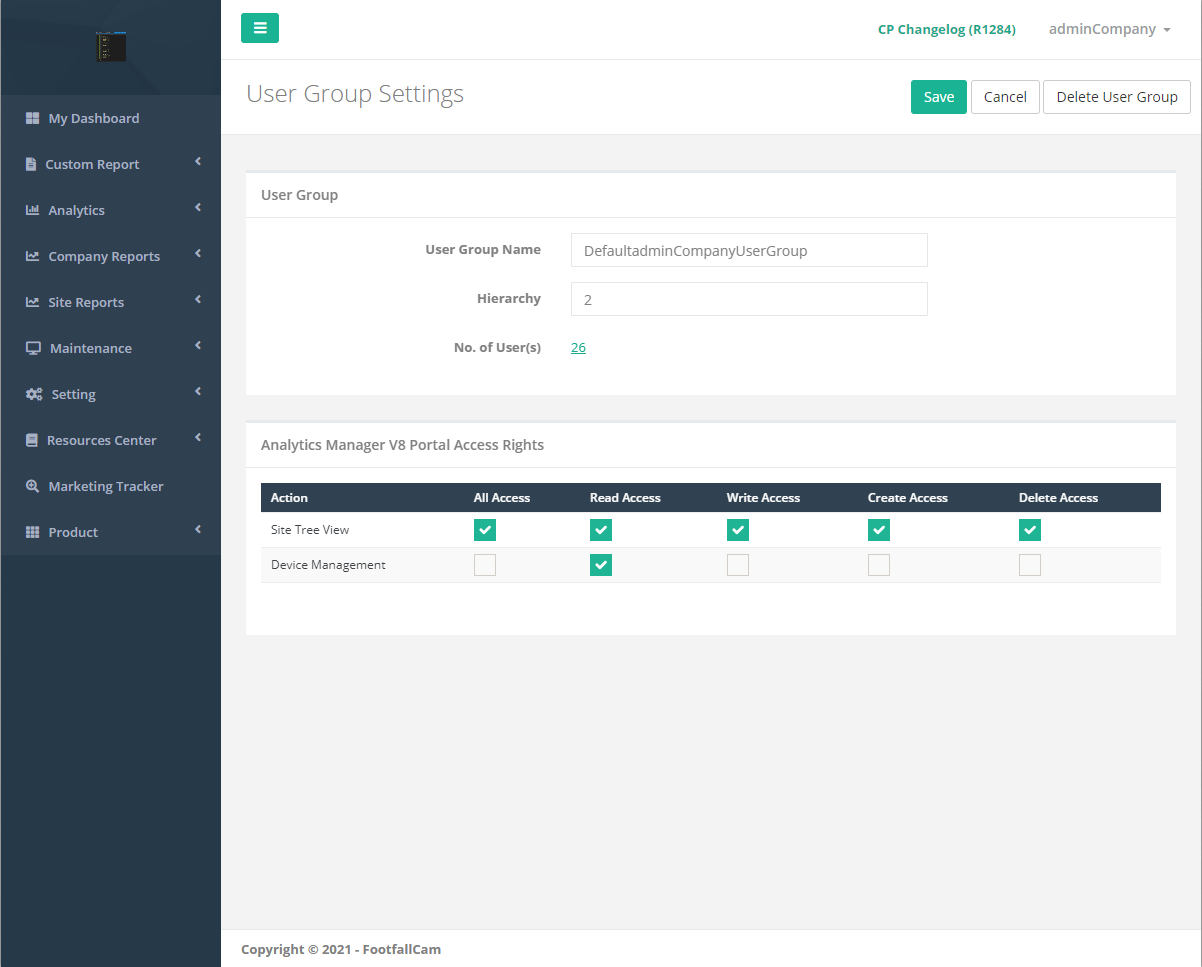
STEP 2 - Click on Edit to access the User Group Settings page.
STEP 3 - Complete the process by entering all the required fields and click on the Save button.
Delete User Group
STEP 1 - Click on Setting > User Group to access the User Group page.
STEP 2 - Click on Edit to access the User Group Settings page.
STEP 3 - Click on the Delete User Group button and Confirm button to delete the user group.
Manage User
Update User
STEP 1 - Click on Setting > Users to access the Users page.
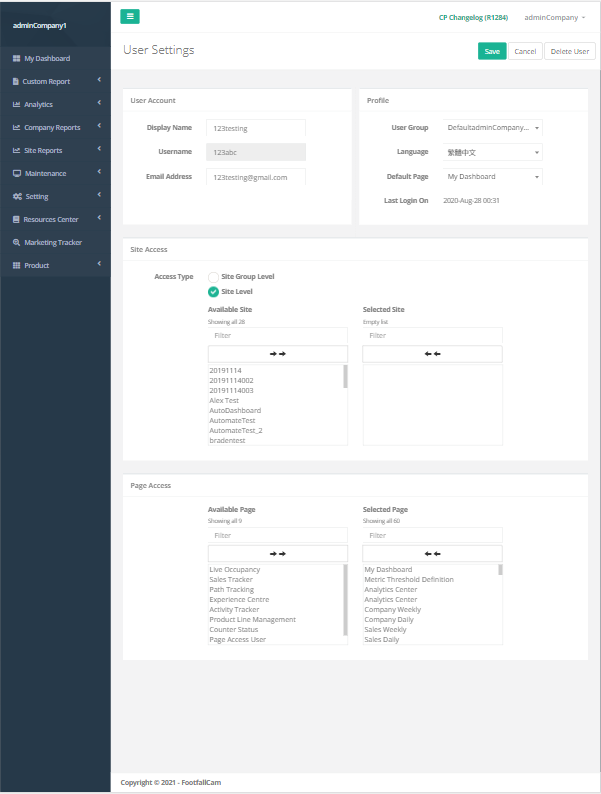
STEP 2 - Click on Edit to access the User Settings page.
STEP 3 - Complete the process by entering all the required fields and click on the Save button.
Delete User
STEP 1 - Click on Setting > User Group to access the User Group page.
STEP 2 - Click on Edit to access the User Settings page.
STEP 3 - Click on the Delete User button and Confirm button to delete the user.
Note: Only user account with hierarchy = 1 can manage all user accounts (create, edit or delete) which belongs to the company
Update User Profile
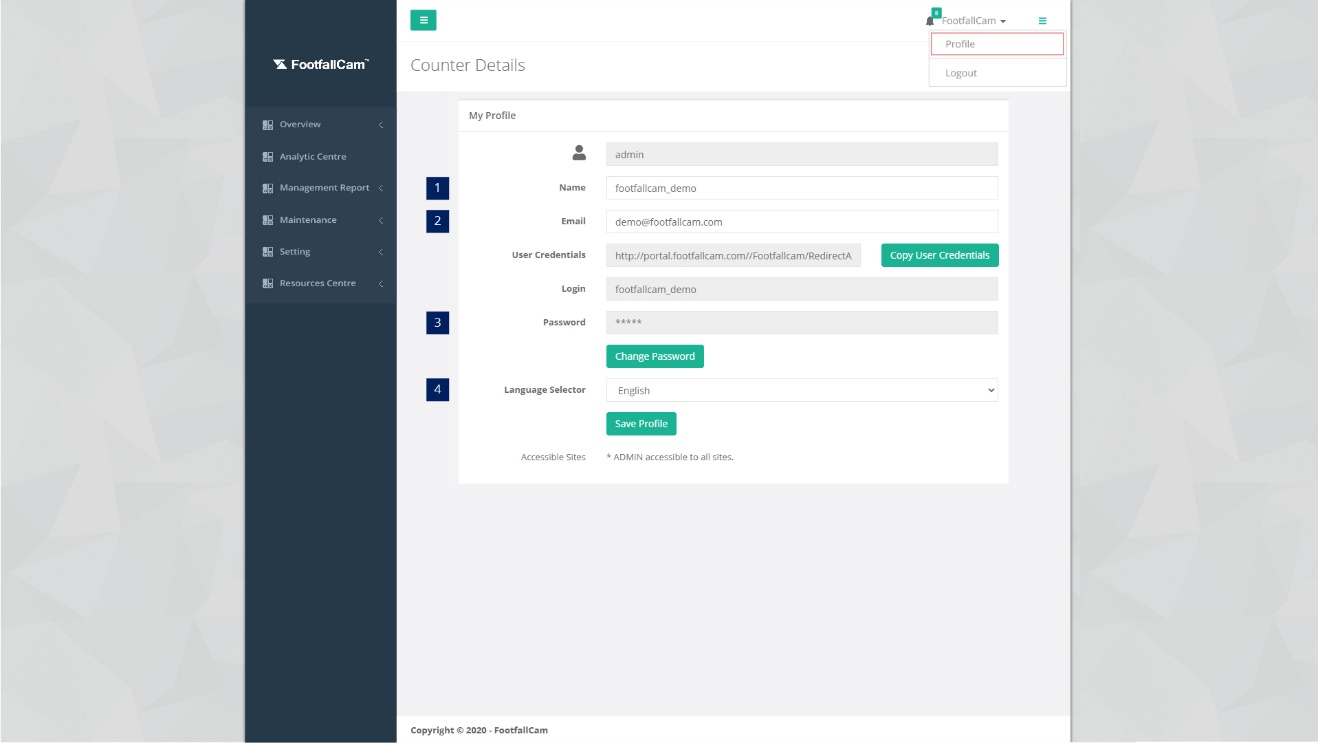
STEP 1 - Click on your username on top right and select Profile.
STEP 2 - Update the required fields and click on Save Profile.
| Item | Description |
| 1. Name | Enter a preferred name. |
| 2. Email | Enter a preferred email address.
(Info: Confirmation email will be sent to the email address.) |
| 3. Password | Click on Change Password to reset password. |
| 4. Language Selector | Select the preferred language. |
Sync User using Active Directory Server
*Note* Please make sure that Active Directory Server has been enabled and has been configured in Company Settings page. Additionally, a company that enabled AD server would not be able to create 'New User' but would only be able to sync users.
If Active Directory Server has not been configured Please refer the link below, to configure Active Directory Server https://www.footfallcam.com/people-counting/knowledge-base/chapter-2-setting-up-account/#2-5-active-directory-server
STEP 1 - Click on Setting > Users to access the Users page.

STEP 2 - Click on 'Sync User' button as shown above and the user account would be sync to the company.