


5.1 User Group Setting
5.1.1 Create User Group
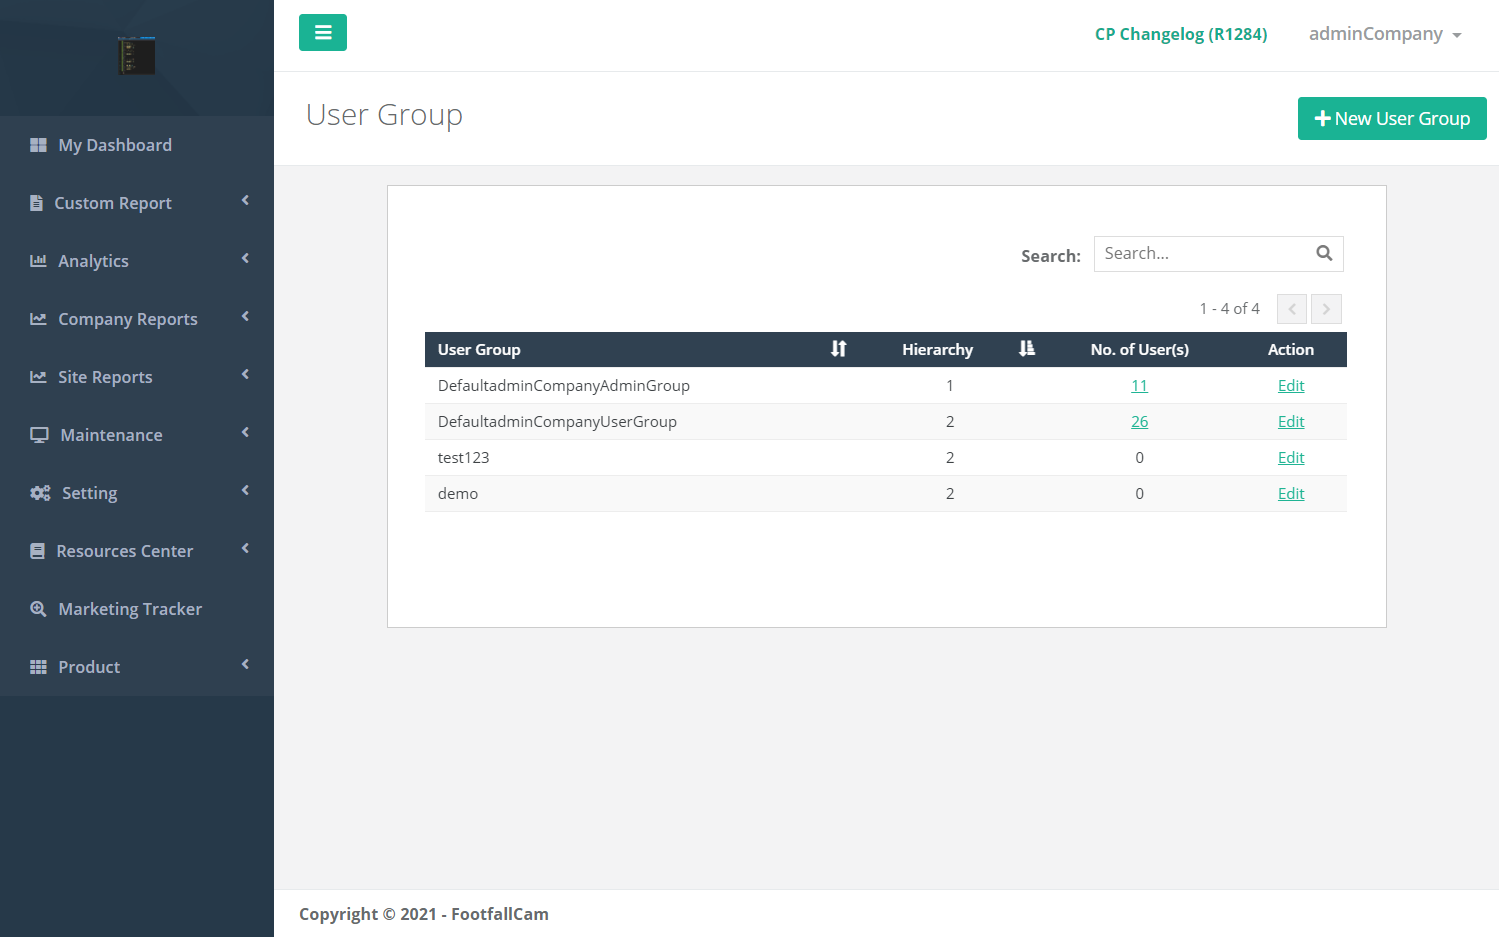
| Item | Description |
| 1. Search | Filter the table by User Group and Hierarchy. |
| 2. User Group | User group name. |
| 3. Hierarchy | Hierarchy of the user group. |
| 4. No. of User(s) | The number of users linked with the user group. Click to access the Users page with the user list linked to the user group. |
| 5. Action | Edit user group settings. |
STEP 1 - Click on Setting > User Group to access the User Group page.
STEP 2 - Click on + New User Group to access the User Group Settings page.
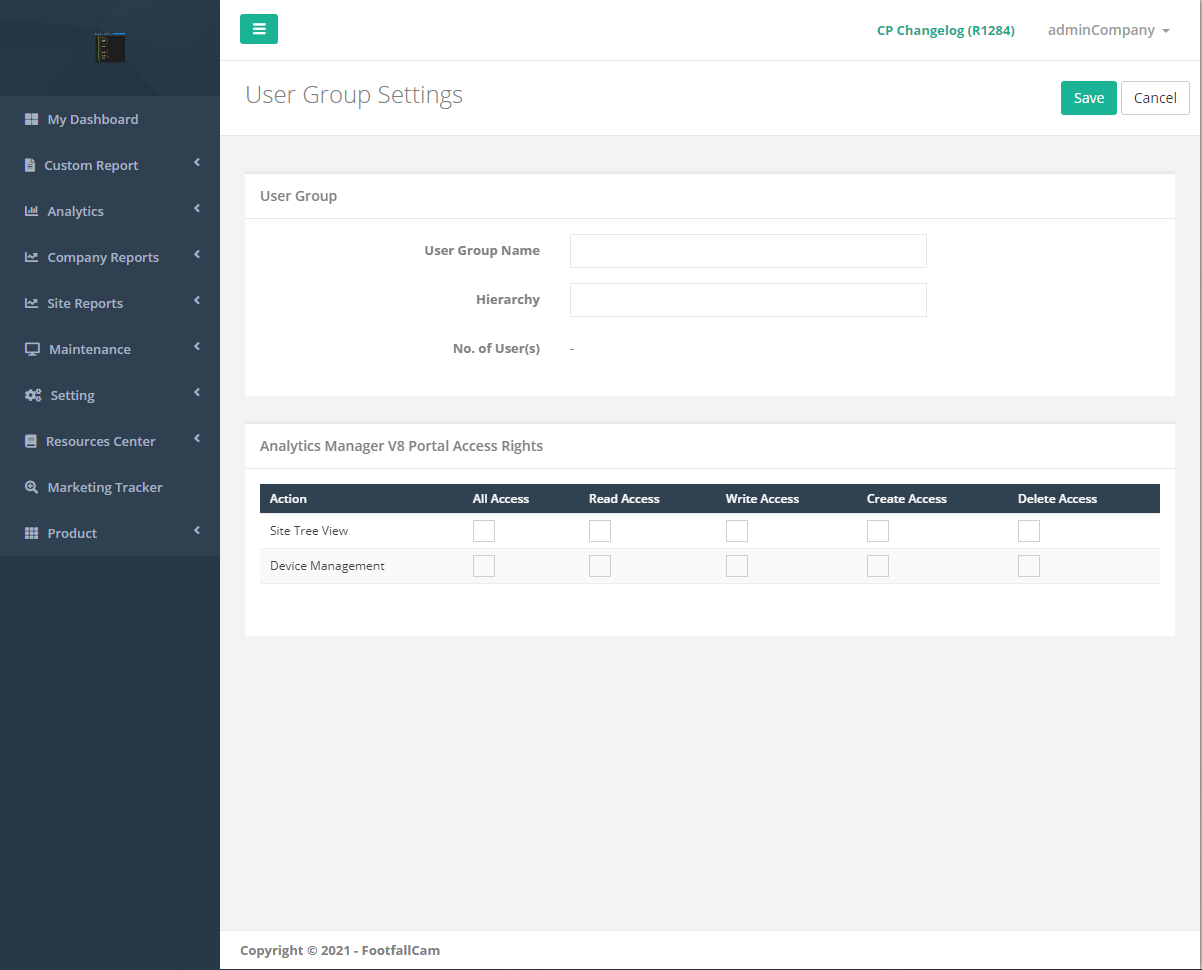
| Item | Description |
| 1. User Group Name | Enter a preferred name. |
| 2. Hierarchy | Enter a preferred hierarchy. (Info: Cannot lower than 1 since hierarchy =1 is the DefaultAdminGroup.) |
| 3. No. of User(s) | The number of users linked with the user group. Click to access the Users page with the user list linked to the user group. |
| 4. Analytics Manager V9 Portal Access Rights | Tick the preferred accesses allowed for this user group with the preferred action views. |
STEP 3 - Complete the process by entering all the required fields and click on the Save button.
5.1.2 Update User Group
STEP 1 - Click on Setting > User Group to access the User Group page.
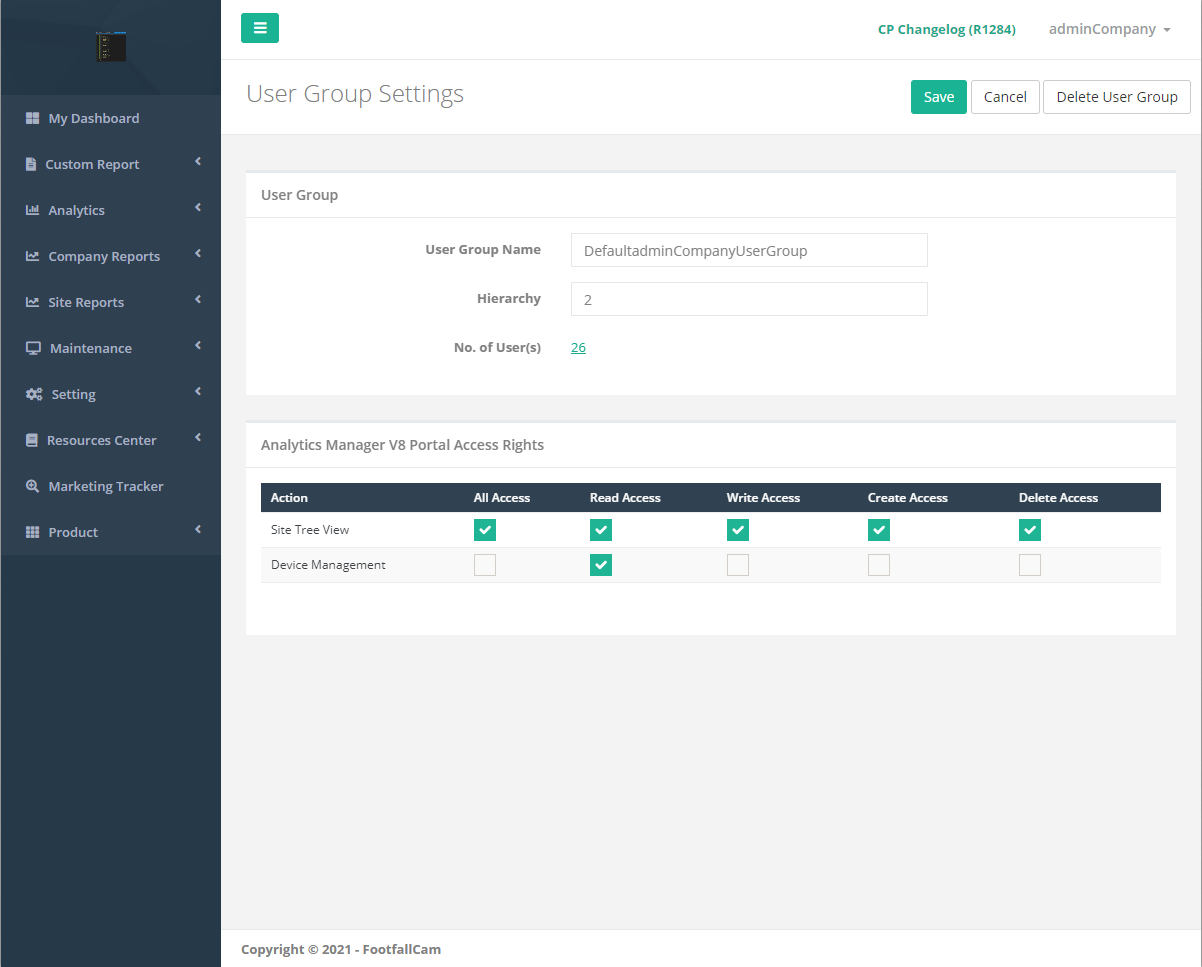
STEP 2 - Click on Edit to access the User Group Settings page.
STEP 3 - Complete the process by entering all the required fields and click on the Save button.
5.1.3 Delete User Group
STEP 1 - Click on Setting > User Group to access the User Group page.
STEP 2 - Click on Edit to access the User Group Settings page.
STEP 3 - Click on the Delete User Group button and Confirm button to delete the user group.
5.2 User Setting
This sections shows on how to Create User, Update User and Delete User.
5.2.1 Create User
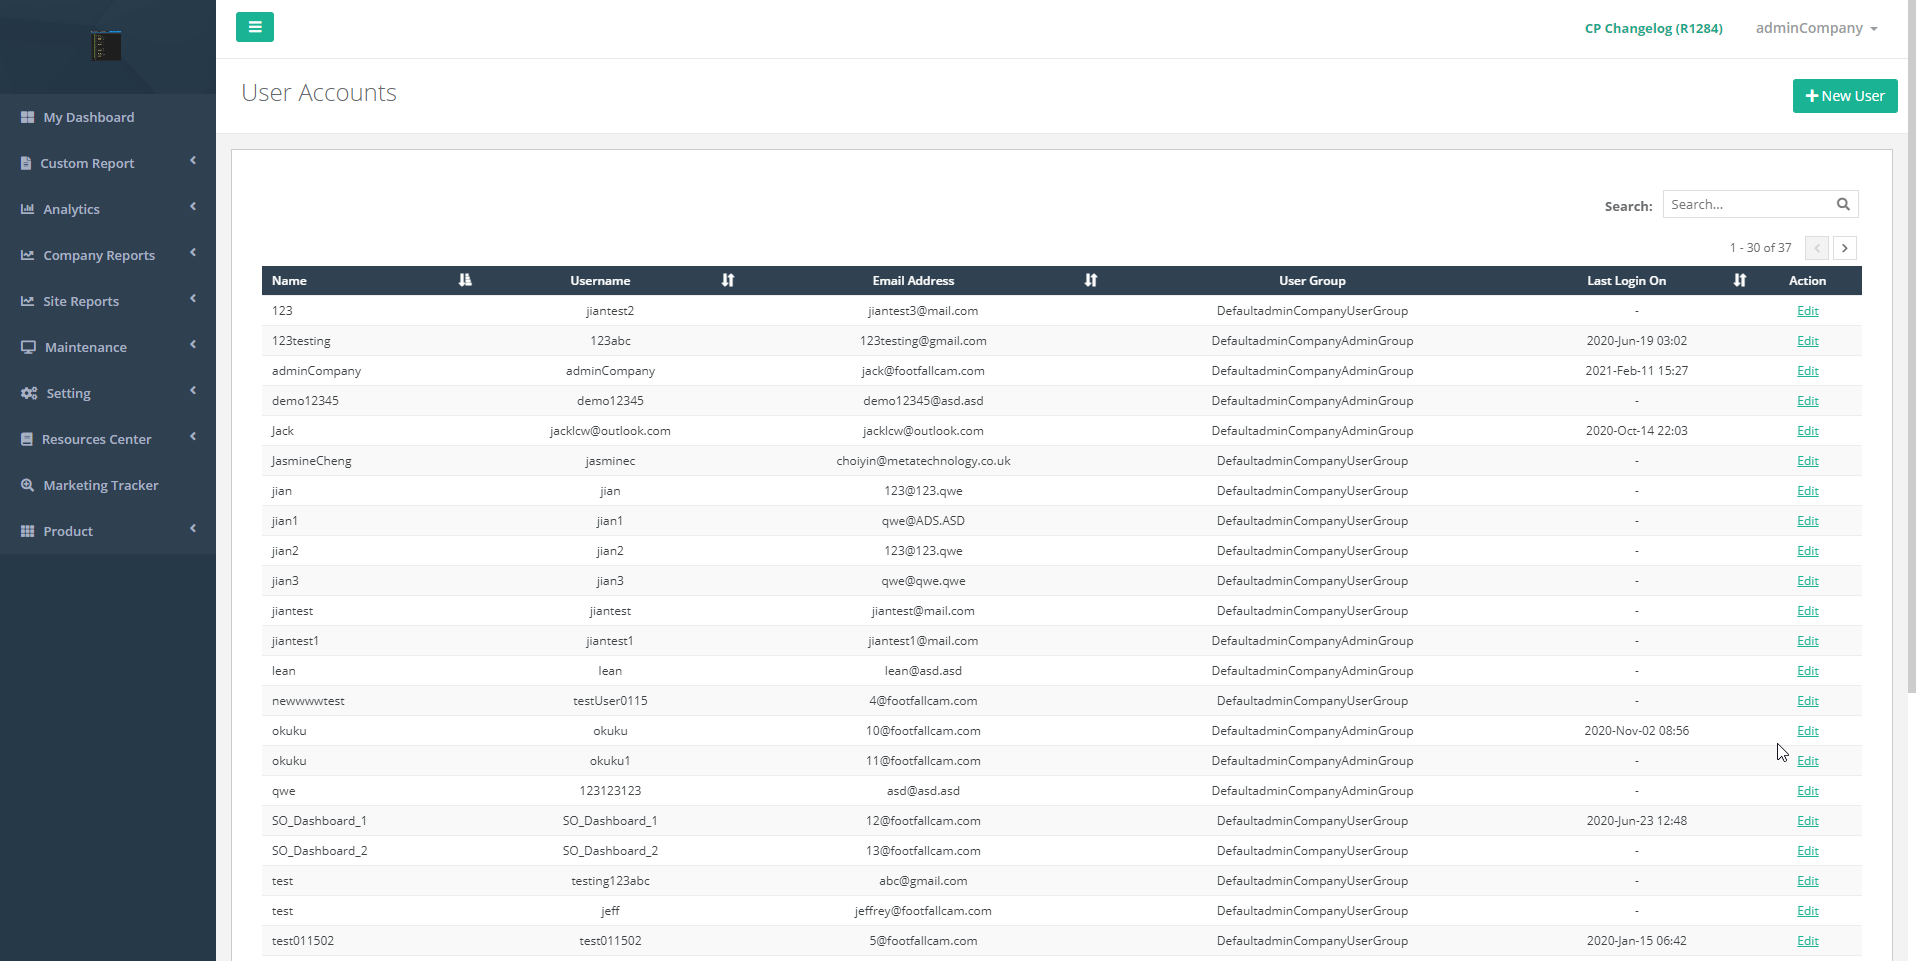
| Item | Description |
| 1. Search | Filter the table by Name, Username, Email Address and User Group. |
| 2. Name | User's display name. |
| 3. Username | User account's username. |
| 4. Email Address | User's email address. |
| 5. User Group | User linked user group name. |
| 6. Last Login On | User's last login date time. |
| 7. Action | Edit user settings. |
STEP 1 - Click on Setting > Users to access the Users page.
STEP 2 - Click on + New User button to access the User Settings page.
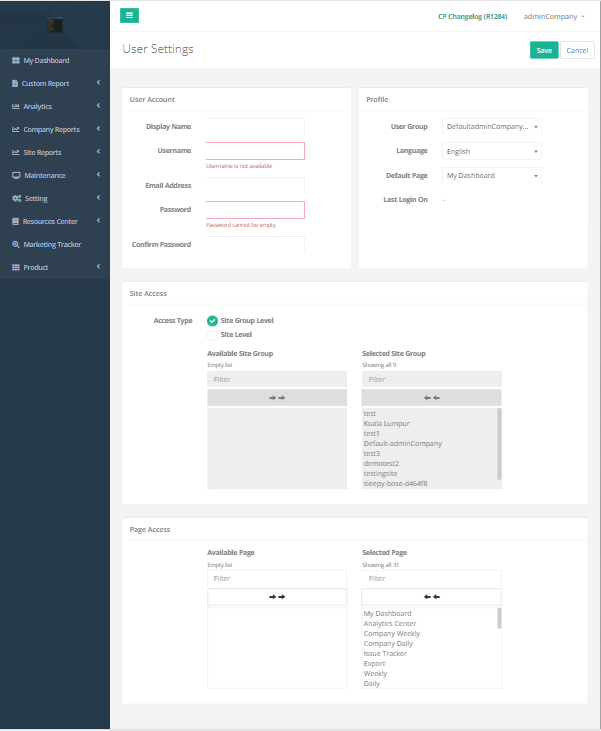
| Item | Description |
| 1. Display Name | Enter a preferred display name. |
| 2. Username | Enter a preferred username. (Info: Used to login account.) |
| 3. Email Address | Enter a preferred email address. (Info: Confirmation email will be sent to the email address.) |
| 4. Password | Enter a preferred password. |
| 5. Confirm Password | Enter to confirm the password field entered. |
| 6. User Group | Select the preferred user group. (Info: If DefaultAdminGroup is selected, the access type is auto-selected to Site Group Level and all Site Groups are selected to allow access) |
| 7. Language | Select a preferred language. |
| 8. Default Page | Select the default landing page upon the user login. |
| 9. Last Login On | Show the user's last login date time. |
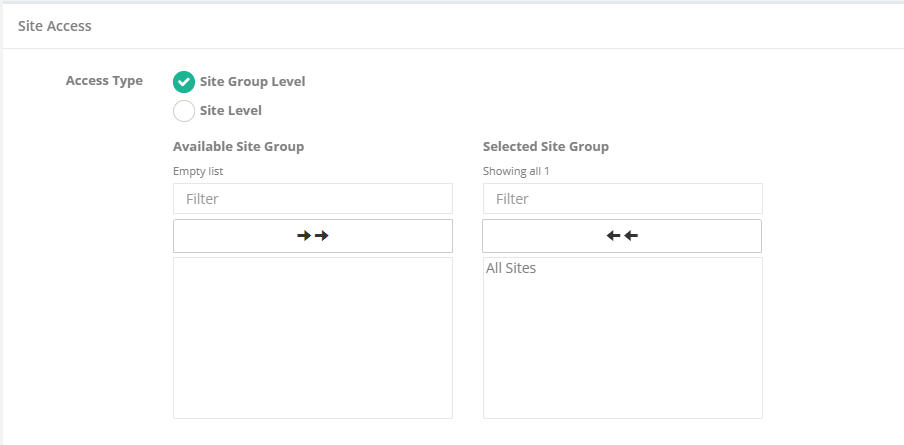
| 10. Site Access Type | Select the preferred site access type. (Info: If DefaultAdminGroup is selected, the access type is auto-selected to Site Group Level and all Site Groups are selected to allow access) |
| 11. Site Group Dual List (Site Group Level Access) |
Select the list of site groups that allow the user to access. |
| 12. Site Dual List (Site Level Access) |
Select the list of sites that allow the user to access. |
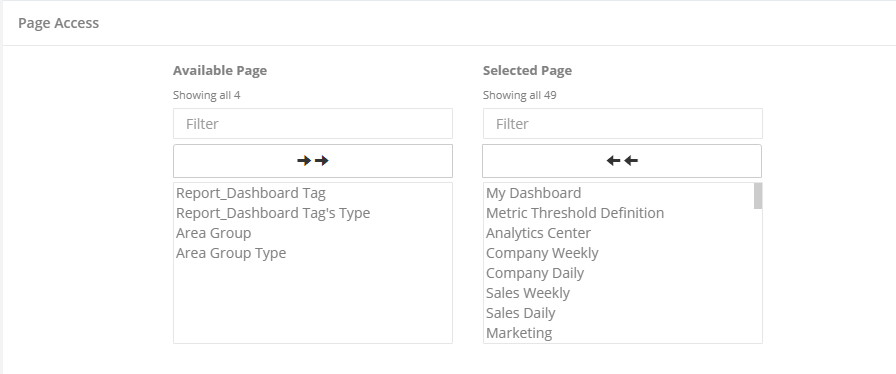
| 13. Page Access Dual List | Select the list of pages that allow the user to access. |
STEP 3 - Complete the process by entering all the required fields and click on the Save button.
5.2.2 Update User
STEP 1 - Click on Setting > Users to access the Users page.
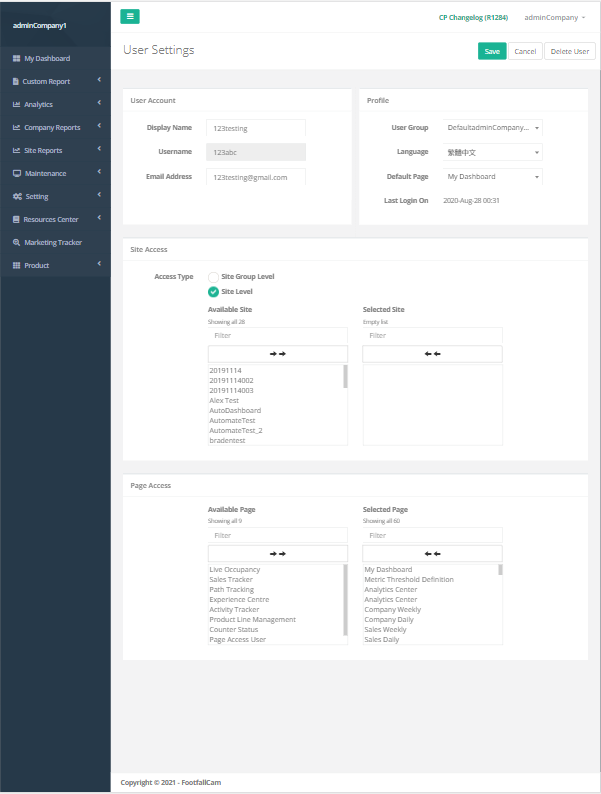
STEP 2 - Click on Edit to access the User Settings page.
STEP 3 - Complete the process by entering all the required fields and click on the Save button.
5.2.3 Delete User
STEP 1 - Click on Setting > User Group to access the User Group page.
STEP 2 - Click on Edit to access the User Settings page.
STEP 3 - Click on the Delete User button and Confirm button to delete the user.
Note: Only user account with hierarchy = 1 can manage all user accounts (create, edit or delete) which belongs to the company
5.2.4 Add User Site Access
STEP 1 - Click on Setting > Users to access the Users page.
STEP 2 - Click on Edit to access the User Settings page.
STEP 3 - Navigate to Site Access and select the preferred site access type.
STEP 4 - Select the list of site groups/sites that allow the user to access from left side to right side.
5.2.5 Add Page Access
STEP 1 - Click on Setting > Users to access the Users page.
STEP 2 - Click on Edit to access the User Settings page.
STEP 3 - Navigate to Page Access and select the list of pages that allow the user to access from left side to right side.
5.3 User Setting (User)
5.3.1 Update User Profile
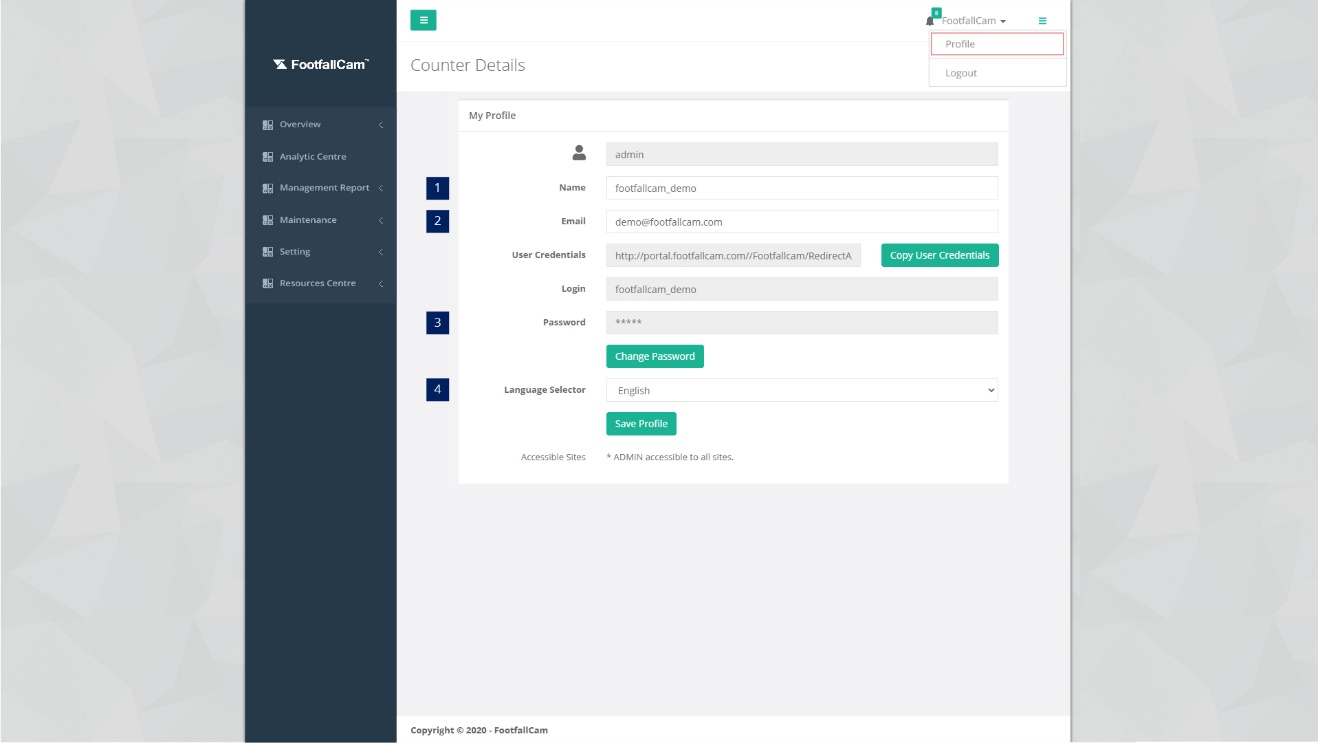
STEP 1 - Click on your username on top right and select Profile.
STEP 2 - Update the required fields and click on Save Profile.
| Item | Description |
| 1. Name | Enter a preferred name. |
| 2. Email | Enter a preferred email address.
(Info: Confirmation email will be sent to the email address.) |
| 3. Password | Click on Change Password to reset password. |
| 4. Language Selector | Select the preferred language. |
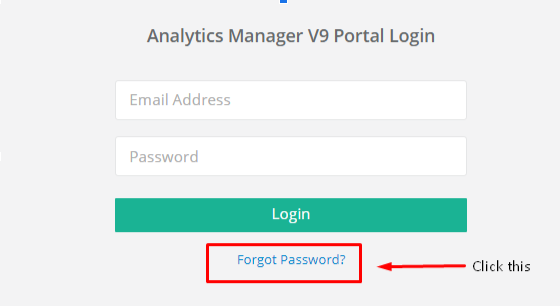
5.4 Forgot Login Password
STEP 1 - Go to FootfallCam Analytic Manager V9 . Login page link : https://v9.footfallcam.com . Click on the Forgot Password that is under the Login button.
STEP 2 - Enter your email address (e.g : [email protected]) and click on Submit..
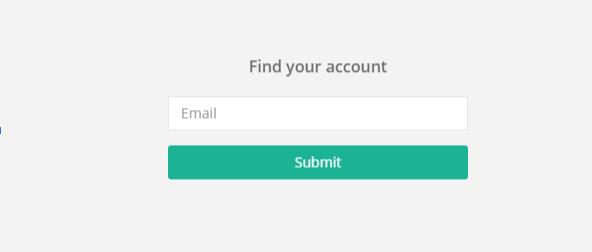
STEP 3 - Check your email inbox for the link to reset password.
Note : Check Junk/ Spam inbox if you do not find the password reset email in your inbox.
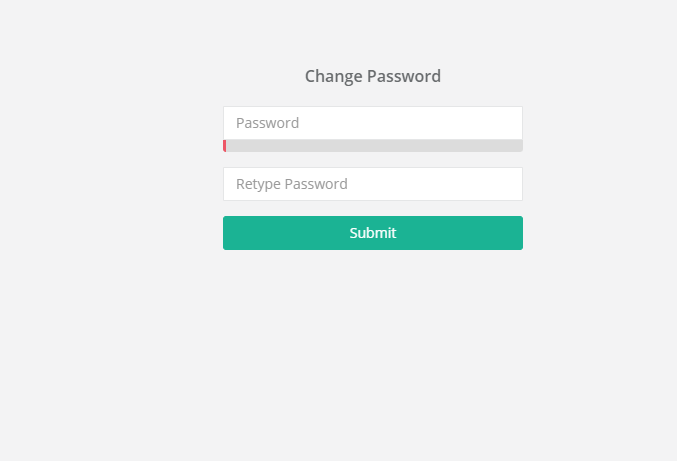
STEP 4 - After clicking on the link, you will be prompted to the above page and you can key in your new password. Then, click on Submit.
Password requirement : Password must be at least 8 characters, should contain at least one uppercase letter, at least one lowercase letter, at least one number, and at least one of the following symbols: @$!%*?&#
5.5 Sync User using Active Directory Server
5.5.1 Sync User
*Note* Please make sure that Active Directory Server has been enabled and has been configured in Company Settings page. Additionally, a company that enabled AD server would not be able to create 'New User' but would only be able to sync users.
If Active Directory Server has not been configured Please refer the link below, to configure Active Directory Server https://www.footfallcam.com/people-counting/knowledge-base/chapter-2-setting-up-account/#2-5-active-directory-server
STEP 1 - Click on Setting > Users to access the Users page.

STEP 2 - Click on 'Sync User' button as shown above and the user account would be sync to the company.