


FootfallCam NVR does not require additional network configuration as it is preset with a fixed IP address assigned by the network router inside Centroid. The default username and password for NVR are `centroid` and `centroid888` respectively.
Add CCTVs to Centroid DVR/NVR
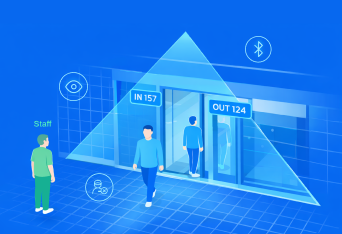
This section details the instructions for adding CCTVs to the DVR/NVR of FootfallCam Centroid for video footage recording and management.
*For this section to proceed smoothly, you should get ready with the credentials and RTSP link of CCTVs or NVR/DVR devices on the site. Consult the reseller or customer network admin for the required info.
**If you intend to bind FootfallCam Pro1, you must finish the IP setup for Pro1 first.
- The control panel of DVR or NVR can access via the the IP address of Centroid with the port 20080 (e.g.: http://<ip_address>:20080).
- Once logged in, go to the `Remote Setting` tab, on the side bar, select `Advanced` > `IP Channels` to go into the UI for adding CCTVs. See illustration below:
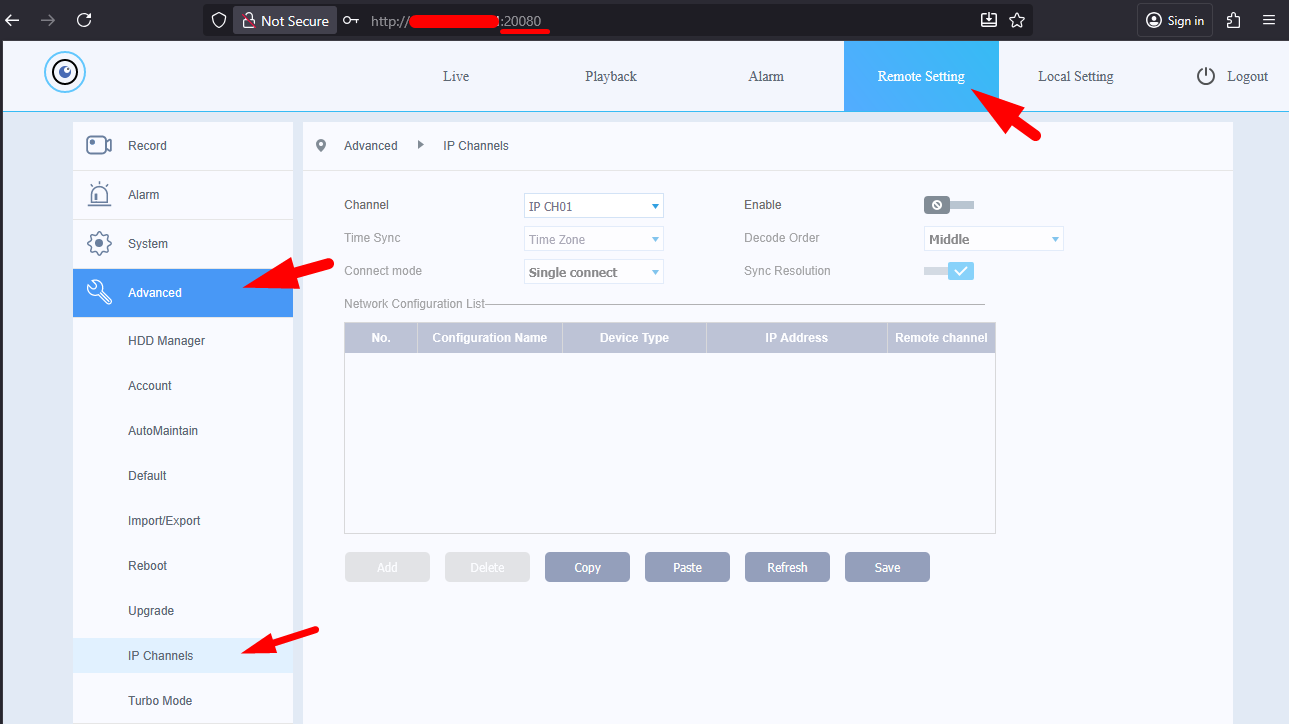
- If you do not see the `IP Channels` option, select `Turbo Mode` instead, and then tick the 3rd option with `Net 1080p` column = `16` . Click on `Save` to apply the setting. The DVR/NVR will auto reboot, relogin again after 10 to 20 seconds. After that, you should see the `IP Channels` option.
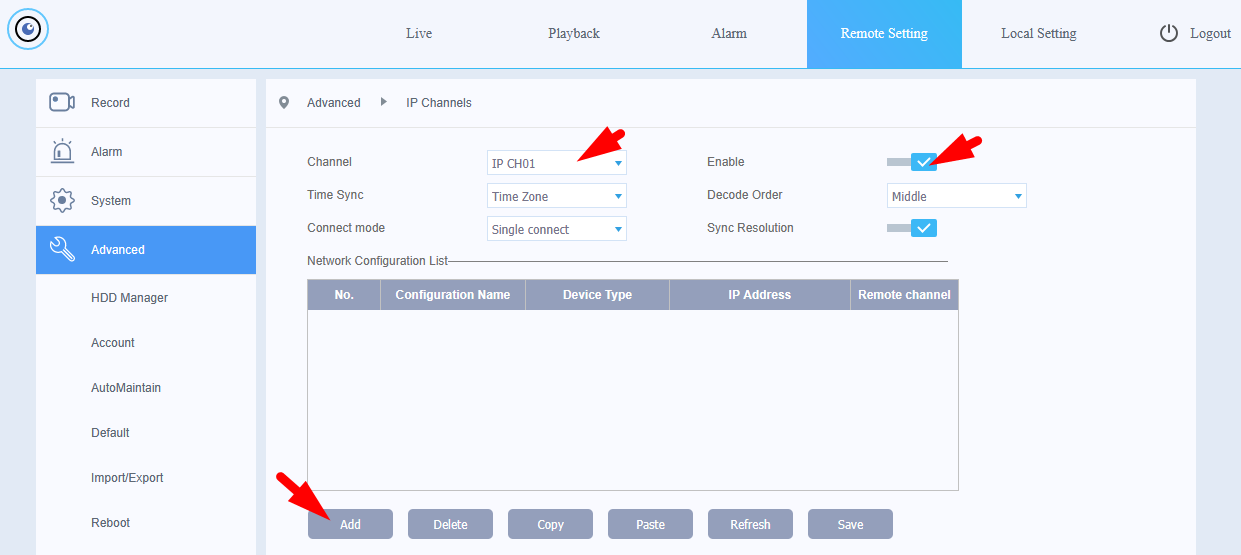
- To add a CCTV, select the desired Channel, enable it and click on `Add` button to open up a form that prompt you for the CCTV details, as shown below:
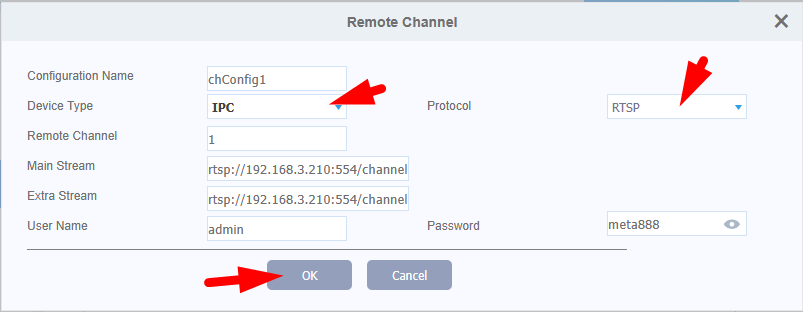
- Inside the form, please select `Device Type` (IPC for IP Cameras, i.e. CCTV; or DVR/HVR) accordingly. For protocol, choose `RTSP` by default. Then fill in the RTSP link under the `Main Stream` and `Extra Stream` textfield. If you are using FootfallCam CCTV, the main and extra stream would be in following format:
- Main stream: rtsp://<ip_address>:554/channel=1&stream=0.sdp?
- Extra stream: rtsp://<ip_address>:554/channel=1&stream=1.sdp?
-
Then, enter the username and password of the CCTV. For FootfallCam device, the default username is `admin` and password is `meta888` . Click `OK` to confirm adding the CCTV.
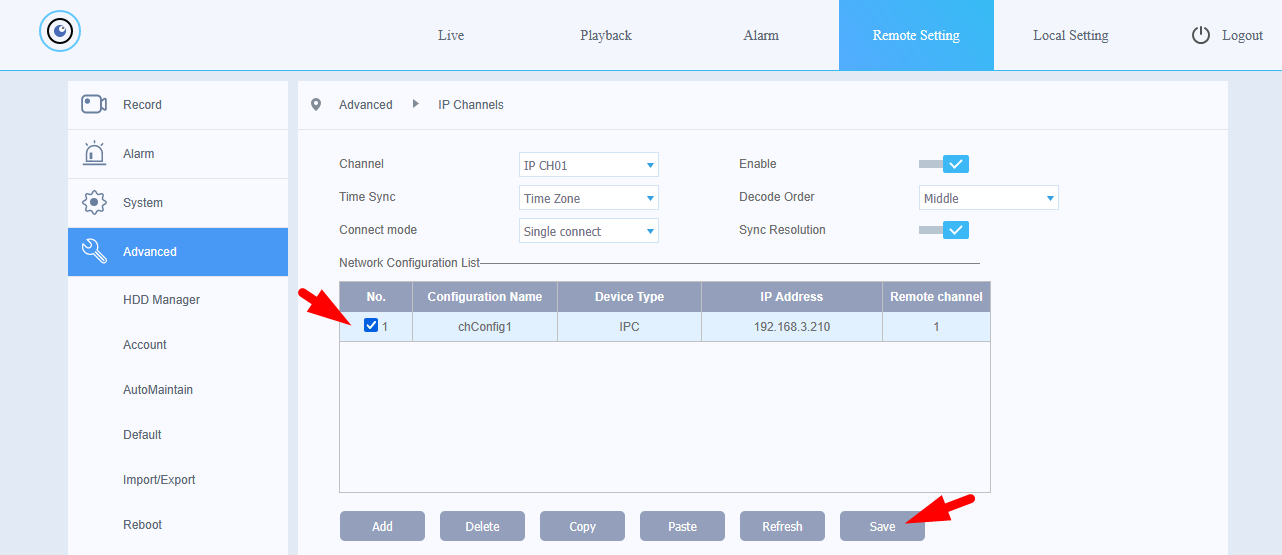
- Once the form is closed, you should see the added CCTV under the `Network Configuration List` , tick the checkbox and click on the `Save` button to confirm the addition. See image below. Then, repeat this step by selecting the next Channel and enable it to add the next CCTV.
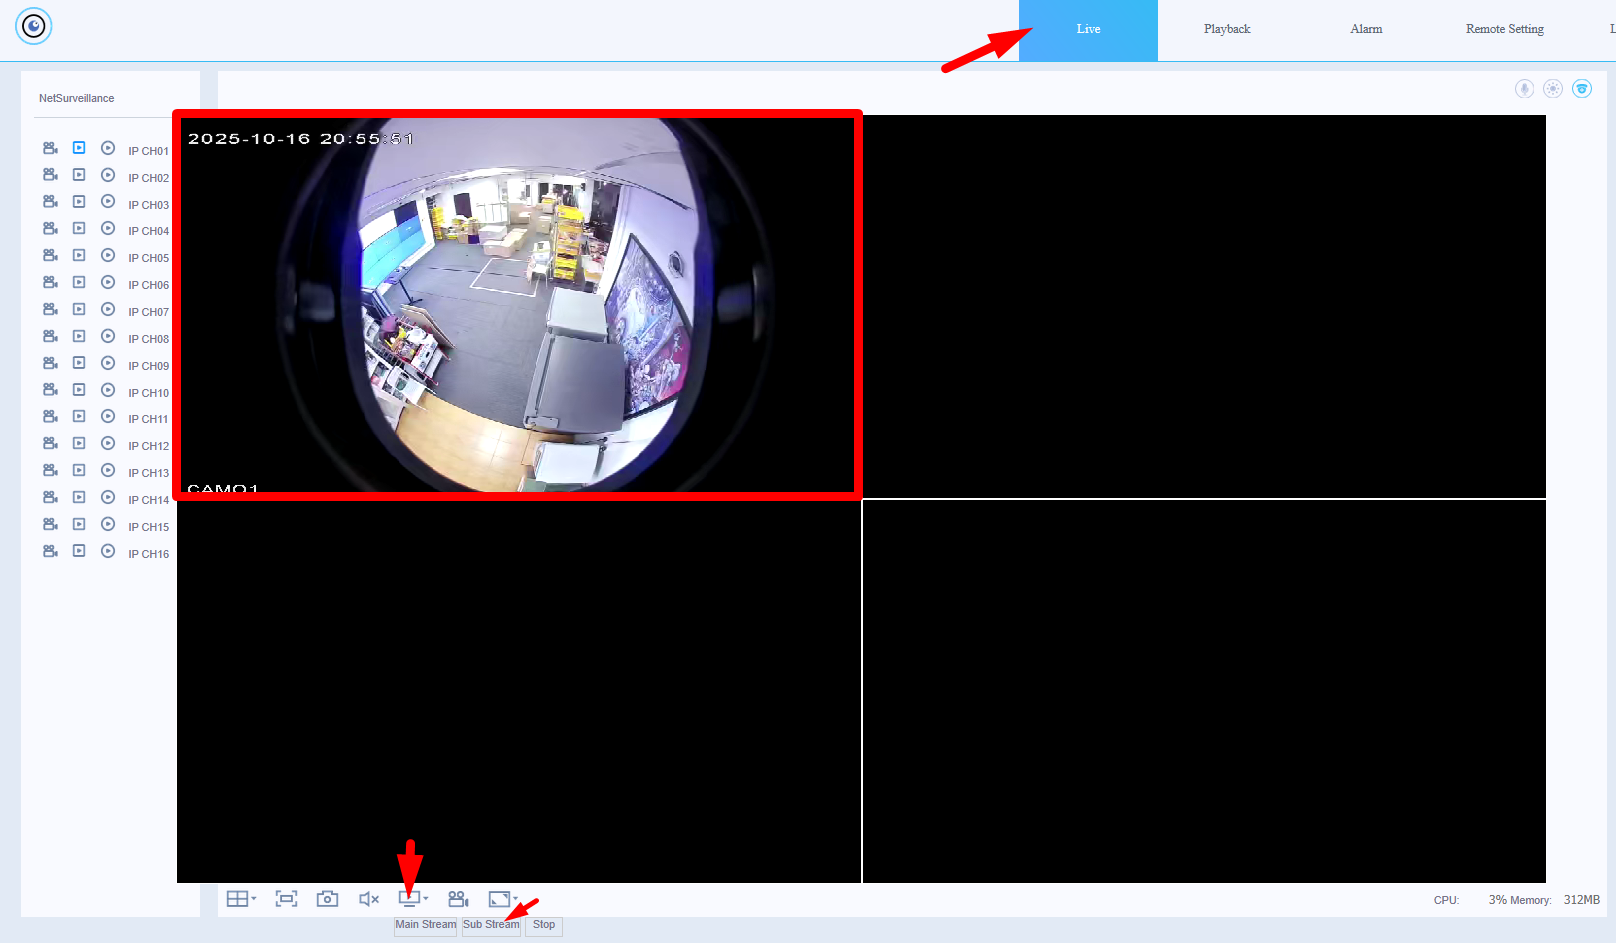
- After adding all the CCTVs, you may go back to the `Live` page, and view the live stream to confirm the CCTVs are indeed adding successfully.
Enabling Motion-Triggered Recording on NVR/DVR
This section details the steps to enable motion-triggered video recordings on NVR/DVR

- Under the `Alarm` tab, make sure the `Video Motion` alarm type is checked.

- Go to the `Remote Setting` tab, under `Record Conf.`, select `Timing` for Record Mode, adjust the recording length based on your requirements, check the `Detect` column and click `Save`.
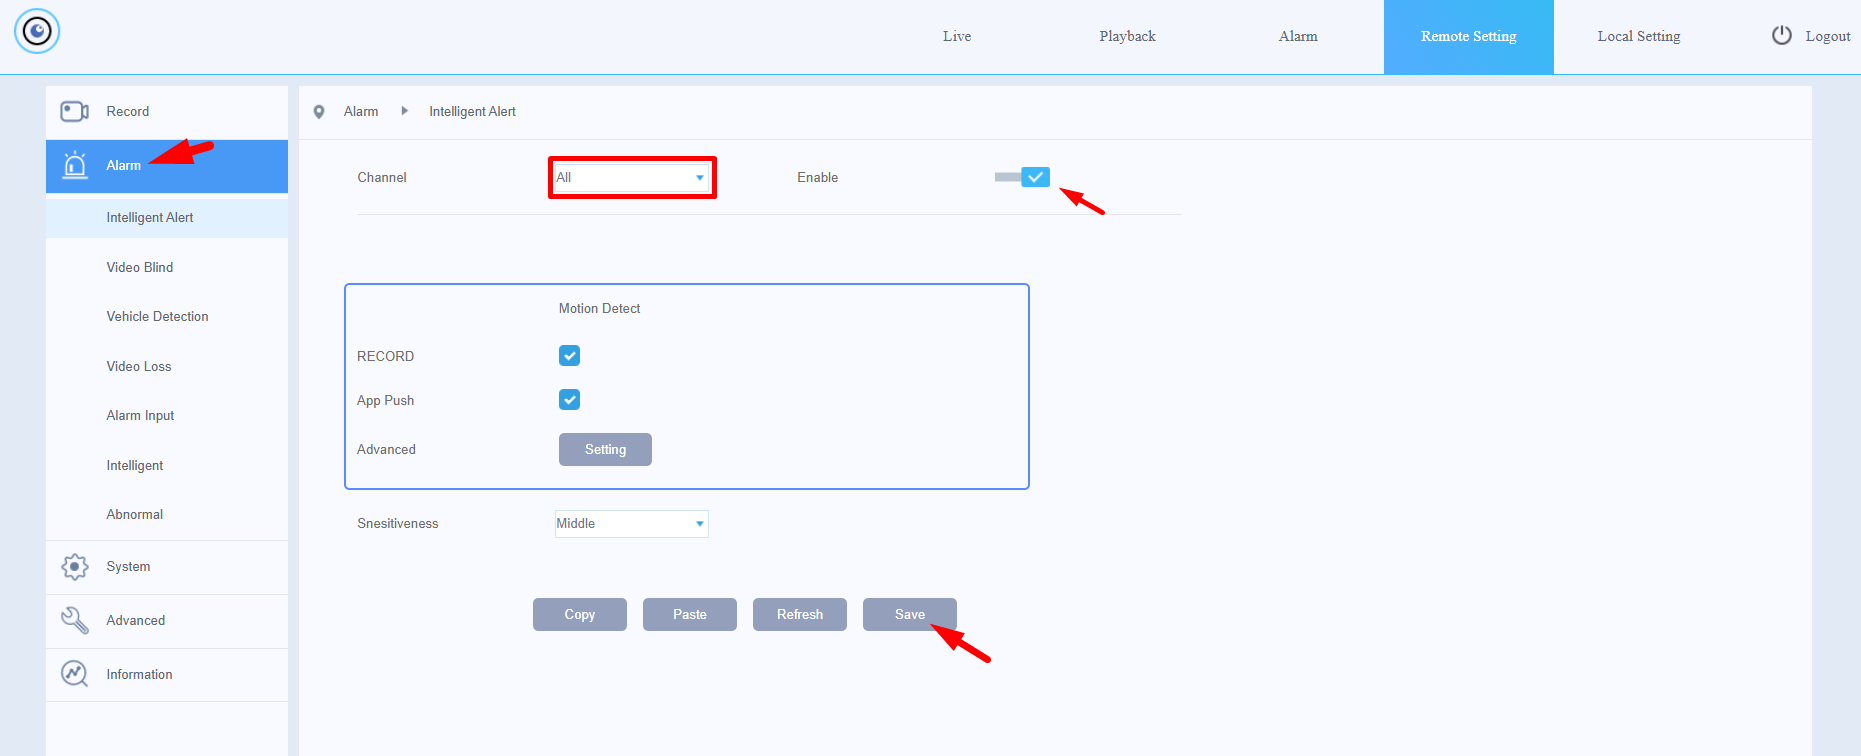
- Next, go to the `Alarm` section of the `Remote Setting` tab, select `All` for Channel and toggle the `Enable` button. Make sure the `RECORD` field of Motion Detect window is checked, then click `Save`.

- For motion-triggered recording to work, the IP cameras have to be added using `NETIP` protocol. Go to the `Advanced` section, under the `IP Channels` tab, look for the `Add` button to add a new IP camera to the desired channel.
- Inside the `Remote Channel` window, make sure `NETIP` is selected as the protocol, and use `34567` as the port number. Fill in the IP address, username and password accordingly. Then, click `OK` to save the changes.
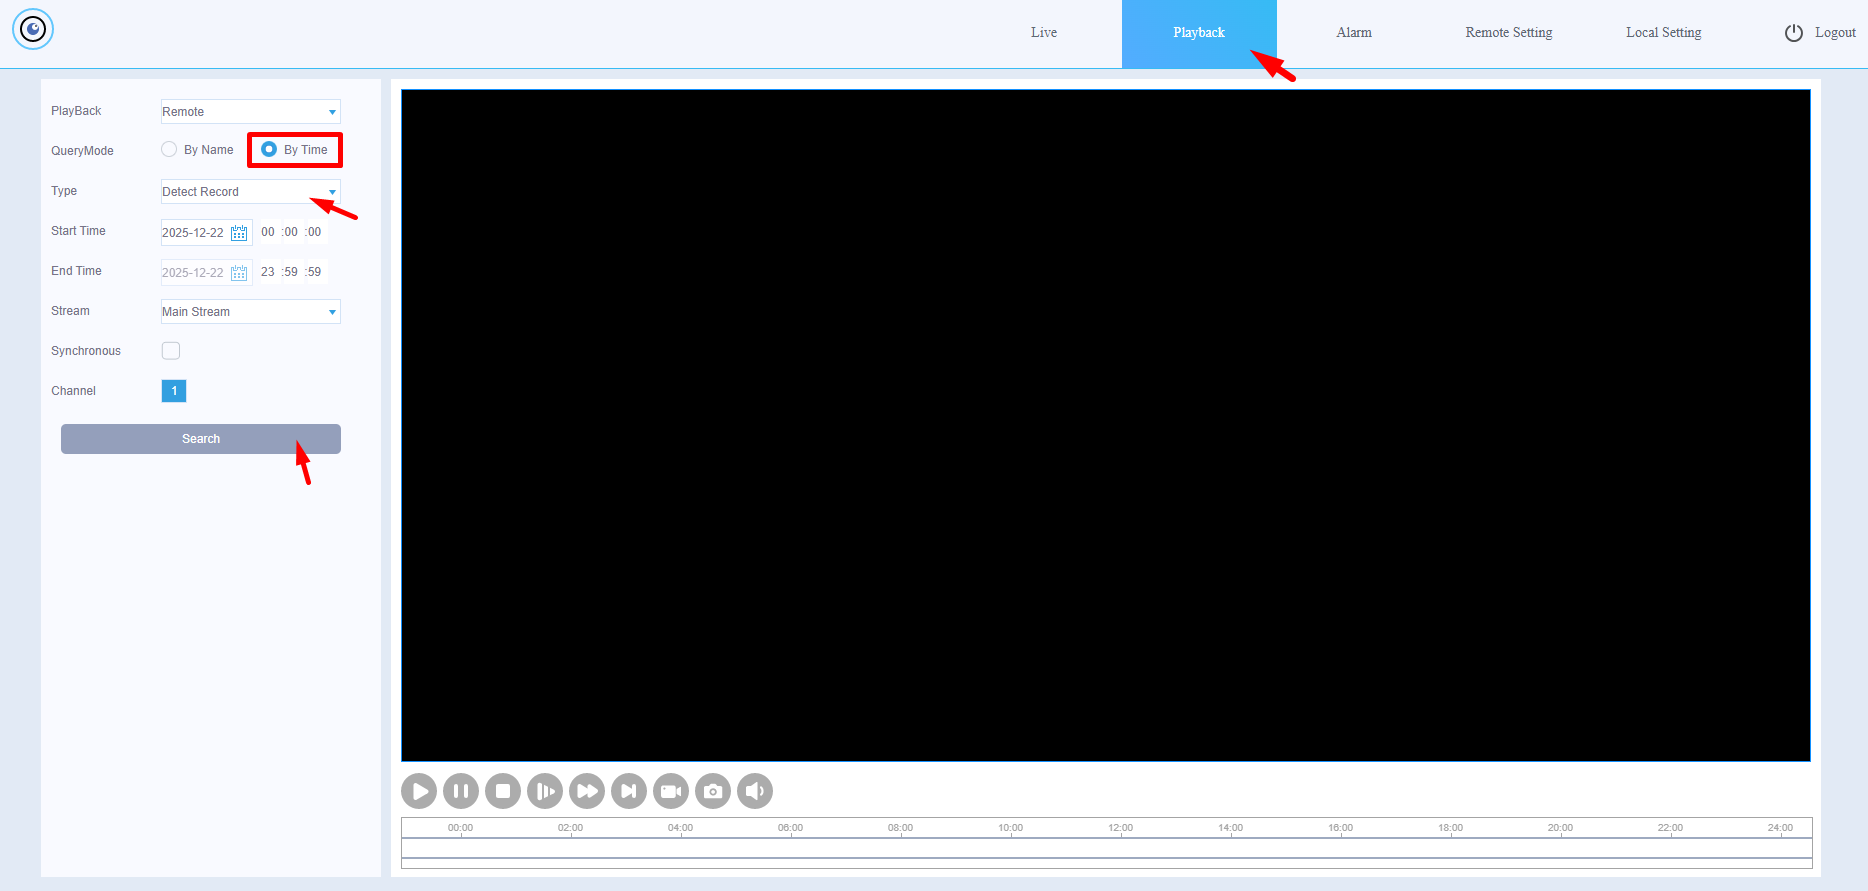
- To retrieve the recorded motion-triggered video recordings, go to the `Playback` tab, choose `By Time` for QueryMode, `Detect Record` for Type, input the start and end time accordingly, then select the desired Channel to retrieve the recorded videos for review.