4.0 Reboot
4.0.1 Soft Reboot
Note
Centroid will not record any data while it is rebooting.

STEP 1 - Connect Centroid SSID via Wi-Fi and login with password: Please get from FFC support personnel
STEP 2 - Access to web browser (Safari, Google Chrome) and enter URL: http://192.168.4.1.
STEP 3 - Login with password: Please get from FFC support personnel.
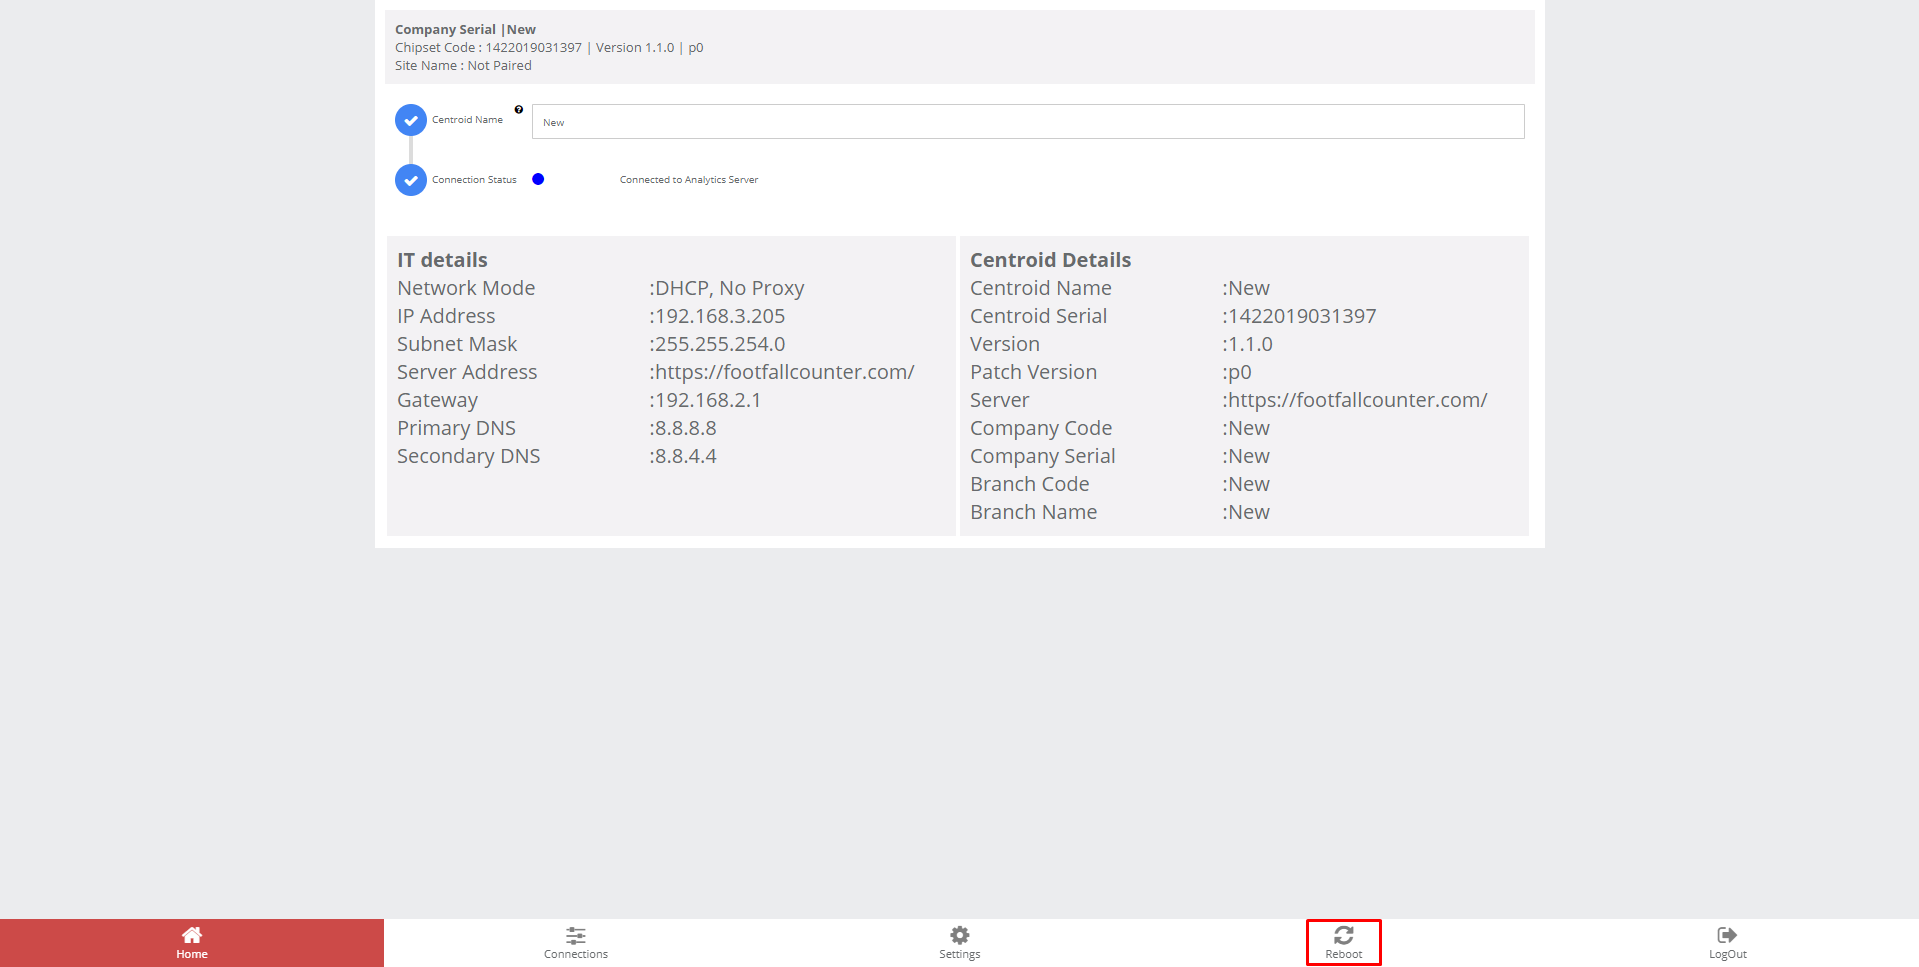
STEP 4 - Click on Reboot on the bottom.
STEP 5 - Click on Reboot in the pop-up message.
4.0.2 Hard Reboot
STEP 1 - Switch off and on the power source that is connecting to the Centroid.
4.1 Accessing Live View RTSP
4.1.1 Live View
Note
Live view RTSP is only available when CCTV bindings have been confirmed and recording mode is off.
Centroid streams its live view via this RTSP url
rtsp://local_ip:8554/ds-test
Replace local_ip with the local ip address of the centroid device.
To view it, open a network stream player (eg. VLC player) on another device in the same network, and play the RTSP url.
To store it, configure a DVR in the same network, and connect to the RTSP url.
4.2 Centroid Indication Light and Troubleshooting
Note
For centroid that require RMA / have any issues, we will need to raise a Support Ticket and have further diagnose only can proceed with raise RMA ticket. Please refer to Section to handling these cases.
Note
Centroid does not have a physical indication LED light, please refer to the light status on UI homepage.

| Issues |
Description |
Action Plan |
Examples |
|
 Pairing Issue -Flashing Blue Light Pairing Issue -Flashing Blue Light
Setup Status: Not Paired
|
- Rule: Connected to Analytics Server BUT Device Pairing shows EITHER 'No Pairing Code' OR 'Not Paired Yet'.
- Network connected, Server connected, Device not having a pairing code OR not paired yet.
|
|
https://prnt.sc/1xolxem
|
|
Constant Blue Light
Setup Status: Connected to Analytics Server
|
- Network connected, Server connected, Device Pairing successful.
- Blue LED light normally means no issue, all good.
|
|
https://prnt.sc/1xom1ae
|
|
 Network Issue - Network Issue -
Flashing Green Light
Setup Status: DHCP is Not Reachable
|
- DHCP server checking failed.
- Can't grab gateway / IP address.
|
- Step 1: Reboot the centroid
- Step 2: Check IT details
- Step 3: Ask the installer to change it to static IP, after inserting IP address or gateway, change back to DHCP.
- Step 4: Ask the installer to try plugging the device directly at the router, if it can grab gateway, then just need to re-crimp the cable.
- If the issue still persists, ask for help from second line to remotely diagnose the centroid.
- Meanwhile, ask the installer for teamviewer or anydesk access to any PC / laptop in the store connecting to the centroid wifi.
|
Will be added in future
|
|
Network Issue -
Flashing Green Light
Setup Status: 'IP is Out of Range' OR 'IP is Outside The Subnet Mask'
|
- Intended to use subnet mask and gateway to obtain the range of IP addresses. Error will occur if out of range.
|
- Step 1: Inform installer to double check the IP details and make sure all inputs are correct.
- Step 2: Mostly likely is caused by wrong Server Address. Take note of the company as well, see if they are using own server or ours.
|
Will be added in future
|
|
Network Issue -
Flashing Green Light
Setup Status: DNS Lookup Failed
|
- Rule: Intended to resolve the server address using DNS that is filled in by the user. Error will occur if the DNS failed to resolve the server address.
|
- Step 1: Inform installer to double check the IP details and make sure all details are correct.
- Step 2: If all IP details are correct, inform installer to double check and make sure the cable is properly crimped.
|
Will be added in future
|
|
Network Issue -
Flashing Green Light
Setup Status: Proxy is Not Reachable
|
- Rule: Proxy is set but not able to access to our Server Network Issue.
- Analytics Server not reachable will also cause this issue.
|
- Step 1: Start by checking if Analytics Server is reachable whenever this status appears.
- Step 2: Reboot the setup wizard and centroid.
- Currently, there is no way for us to differentiate between Proxy issue and Server issue. To do that, it requires a server that has 100% uptime and is accessible even in client server.
|
Will be added in future-
|
|
Network Issue -
Constant Green Light
Setup Status: Server is Not Reachable
|
- Rule: Not able to ping (client) server.
- Network connected, Server not connected.
|
- Step 1: Check IT details.
- Step 2: Reboot the centroid.
- Step 3: Ask the installer to get on any PC on site, connect to the same network as centroid, and type ipconfig in cmd. Check for the gateway and subnet mask (https://prnt.sc/1w6q0oi), if it is different from the IT details, follow the one in cmd.
|
Will be added in future
|
|
 Network Diagnosis Issue - Network Diagnosis Issue -
Flashing Yellow Light
Setup Status: Unable to Run Network Diagnosis
|
- Rule: Failed to read from Network Diagnosis's text file.
- Software issue. Need to raise ticket.
|
- Step 1: Raise the issue to FootfallCam support chat.
|
Will be added in future |
|
Cable Issue -
Constant Yellow Light
Setup Status: Eth0 is Not Enabled
|
- Rule: Failed to obtain information on ethernet cable connected to centroid.
- Constant yellow light is most likely related to cable issues. Normally due to faulty cable/cable not crimped correctly/connection between ports not plugged firmly.
- Must be resolved before the installers leave the site. We can't do anything remotely if it is a cable issue.
|
- Step 1: Double check the cable, ask the installer to re-crimp the cable.
- Step 2: swap with another cable if the issue still persist.
- Step 3: If the installers have a cable tester (RJ45 tester https://prnt.sc/1v8d1s0) with them, ask them to use it to check if the cable is faulty.
- Step 4: Ask the installer to connect the same cable to a working centroid.
- Step 5: If it is yellow light, change centroid.
- Step 6: If it is not yellow light, change cable. Installer can use any cables other than the one provided by us.
|
Will be added in future
|
4.3 Centroid Patch Upgrade
Note
Please follow the steps below to upgrage the patch to latest version.
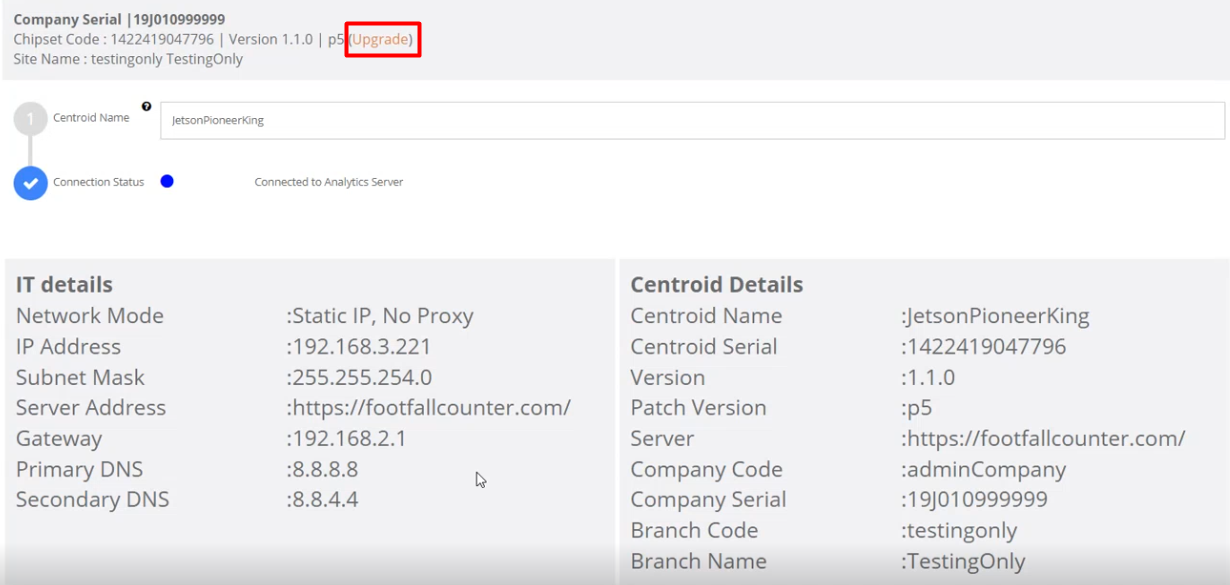
STEP 1 - Click the Upgrade button in the Home Page.
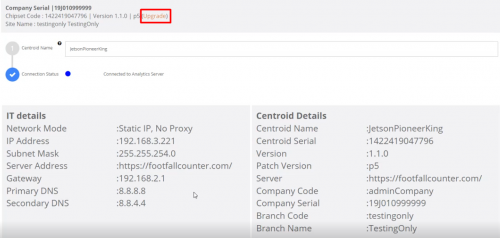
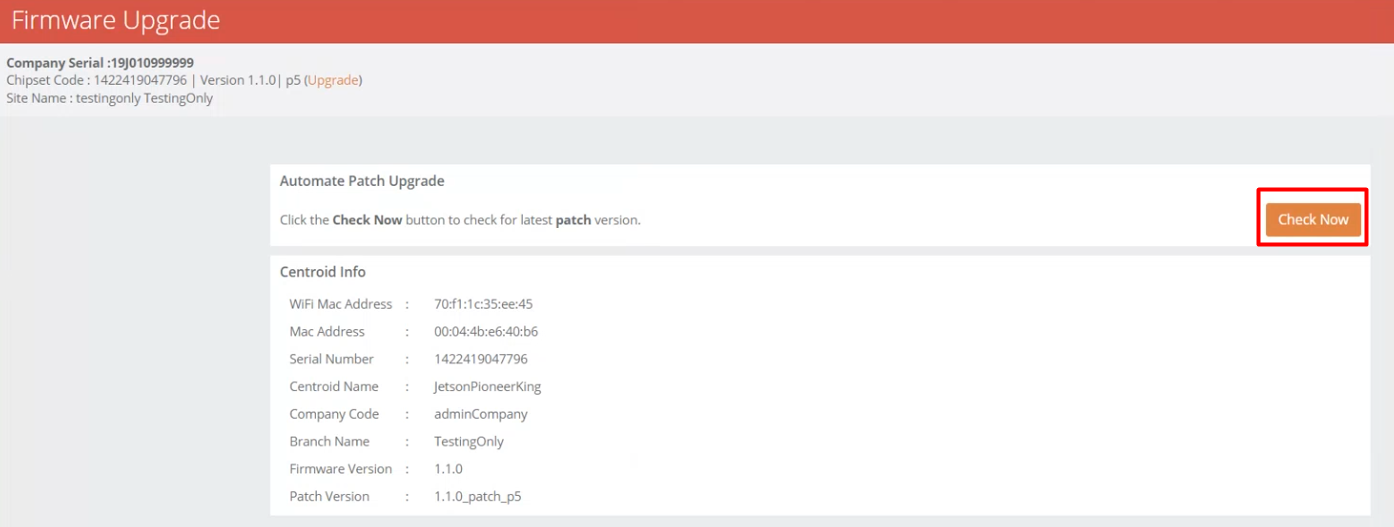
STEP 2 - Click the Check Now to check the patch version.

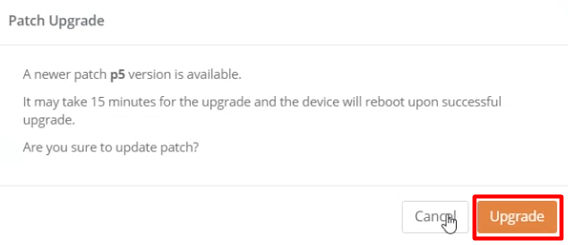
STEP 3.1 - If the current patch is not in latest version, it will show this. Click the Upgrade button to upgrade the patch.
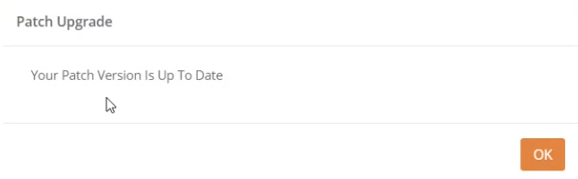
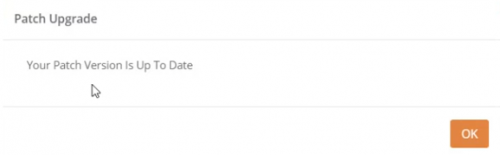
 STEP 3.2 - If the current patch is in latest version, it will show this. Click the OK button.


 STEP 3.2 - If the current patch is in latest version, it will show this. Click the OK button.