

5.1 Zone Counting for Malls
5.1.1 Zone configuration
For zone configuration to be done, it require floorplan of the mall to be uploaded. If there is no floorplan for the zone that is about to be configured, please follow 11.3.1 https://www.footfallcam.com/people-counting/knowledge-base/chapter-16-heat-map-configuration/
5.1.1.1 Identifying the zone
After the floor plan has been uploaded into the FootfallCam Analytic Manager, the user will be able to identify the zones within the shopping mall according to the FootfallCam counters that were installed.
STEP 1 - Access to FootfallCam Analytic Manager V9™: http://v9.footfallcam.com via Google Chrome.
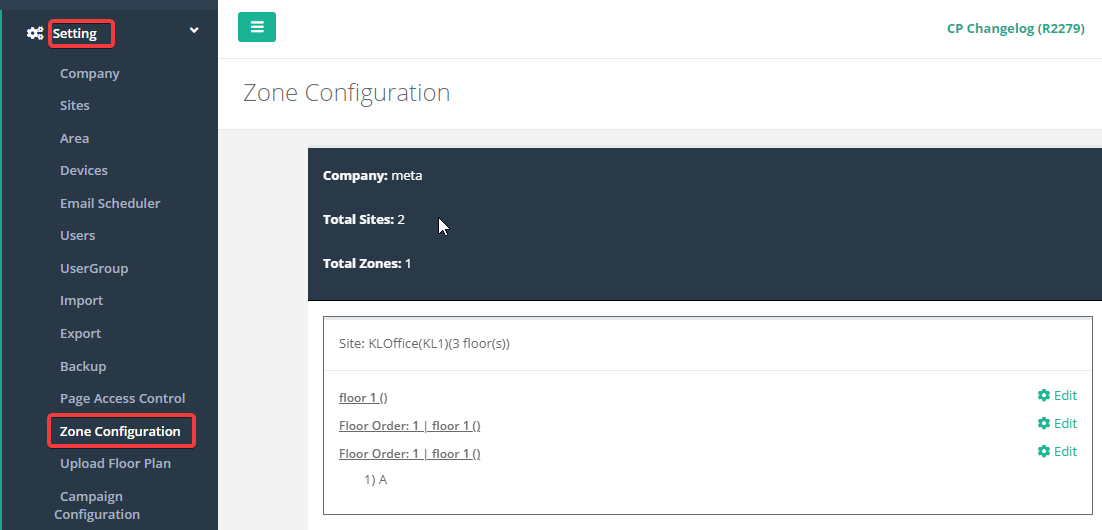
STEP 2 - Click on Setting > Zone Configuration to access the Zone Configuration Page.
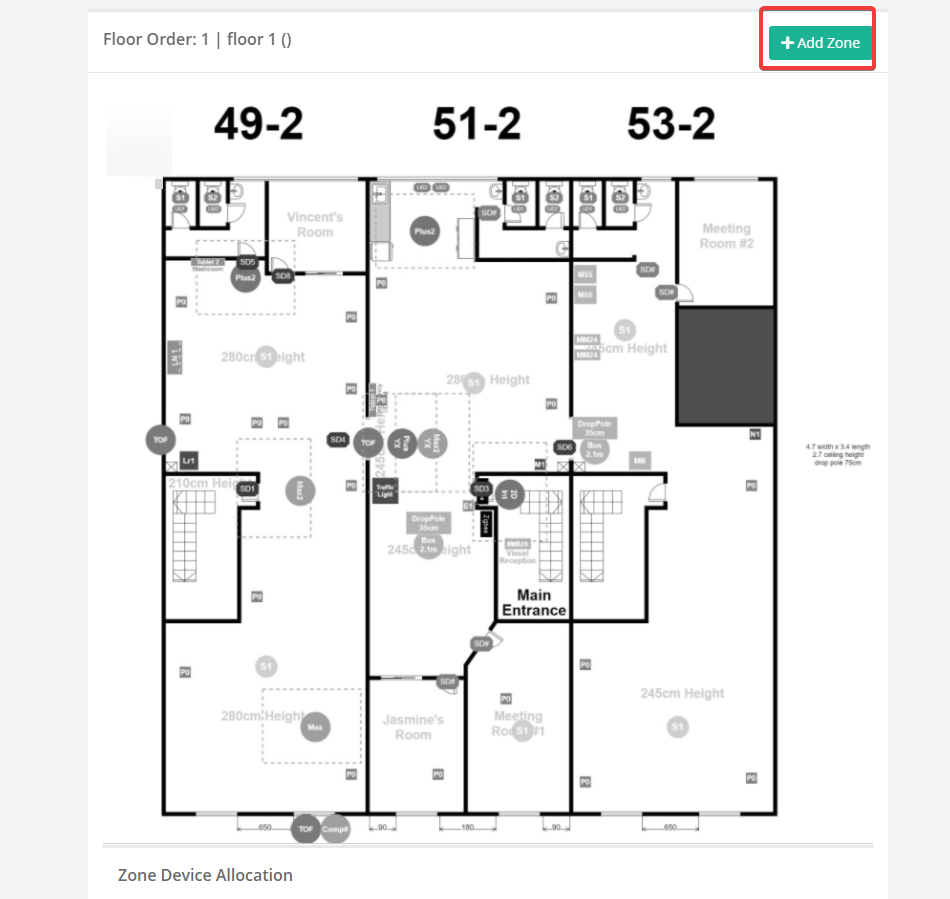
STEP 3 - Click on Edit for the floorplan that wants to add the zone configuration into
STEP 4 - Click on + Add Zone to add zone into the floorplan
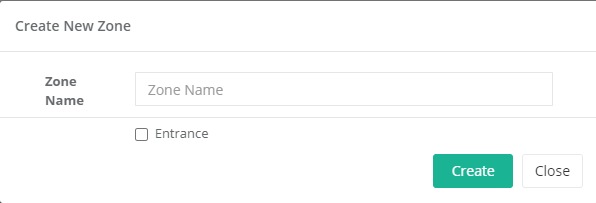
STEP 5 - Enter zone name and if the zone is an entrance to the site, tick the entrance checkbox. Then click on Create
STEP 6 - Drag and drop the newly created zone to where the zone should be on the floorplan.
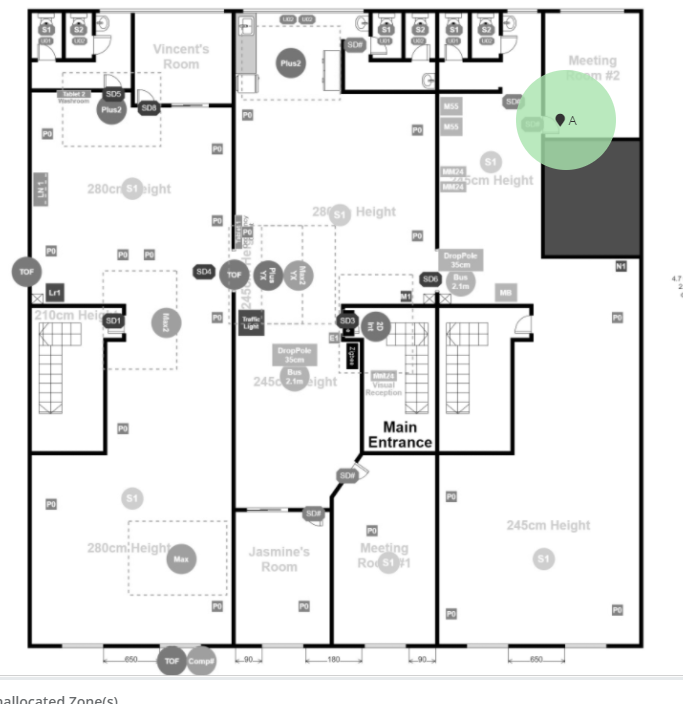
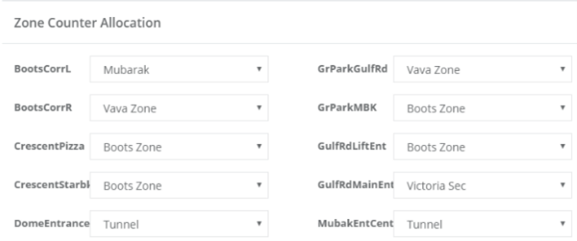
STEP 7 - Select the zone from the drop-down list for each of the counters at the bottom of the page. Once completed click on Save
Note: Only one counter can be allocated to one zone